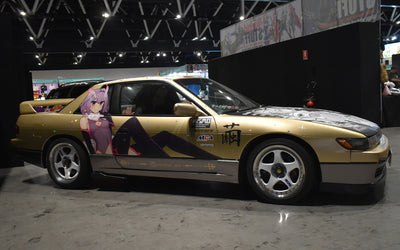
144 products
144 products


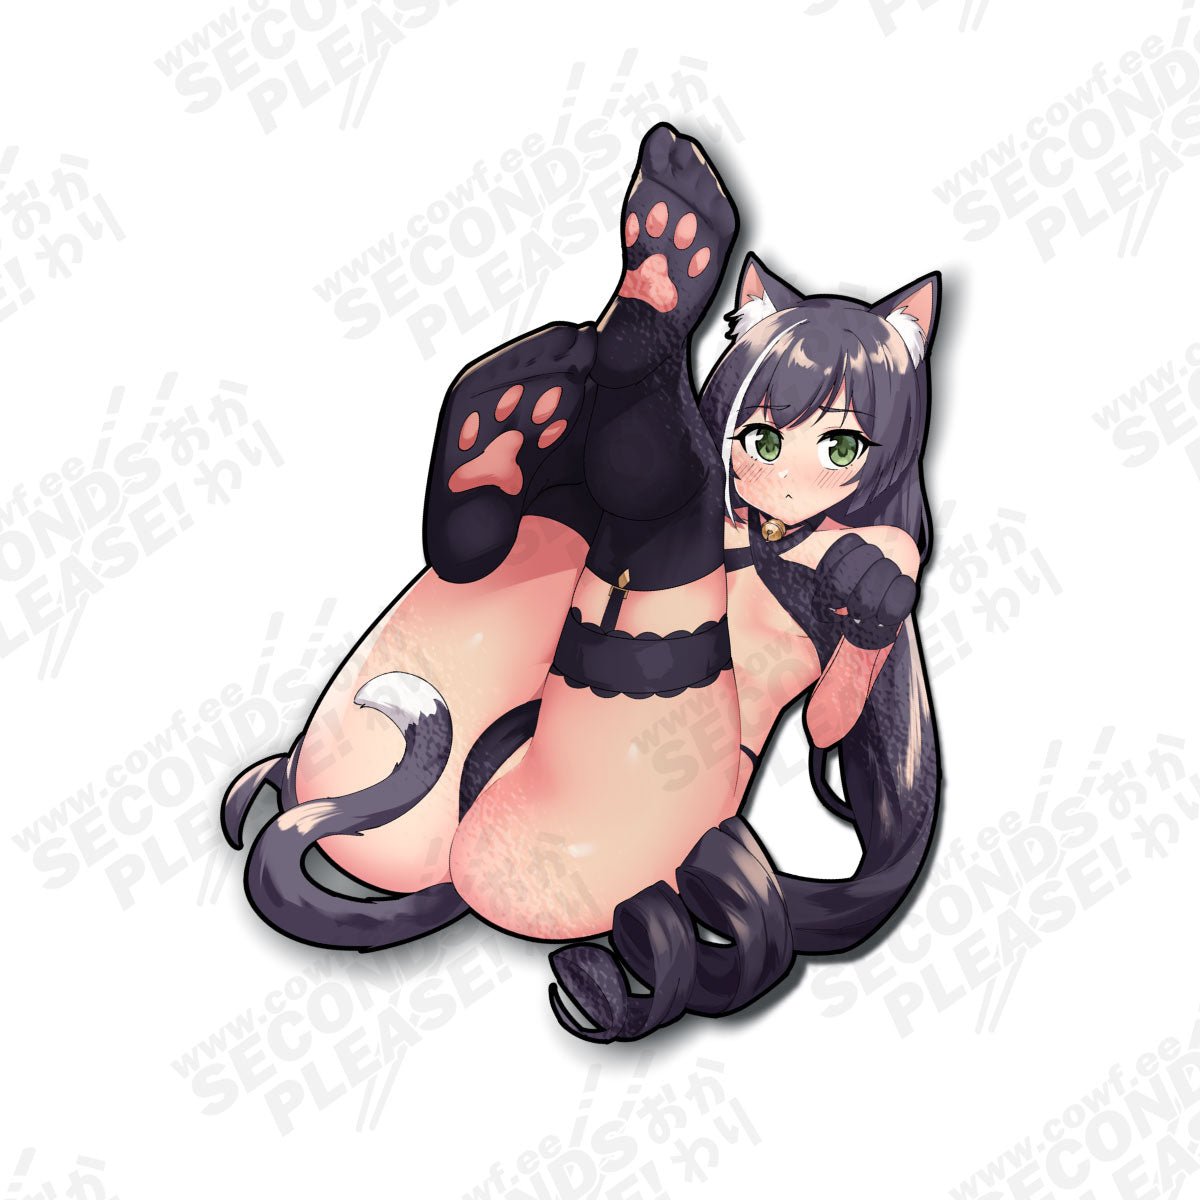
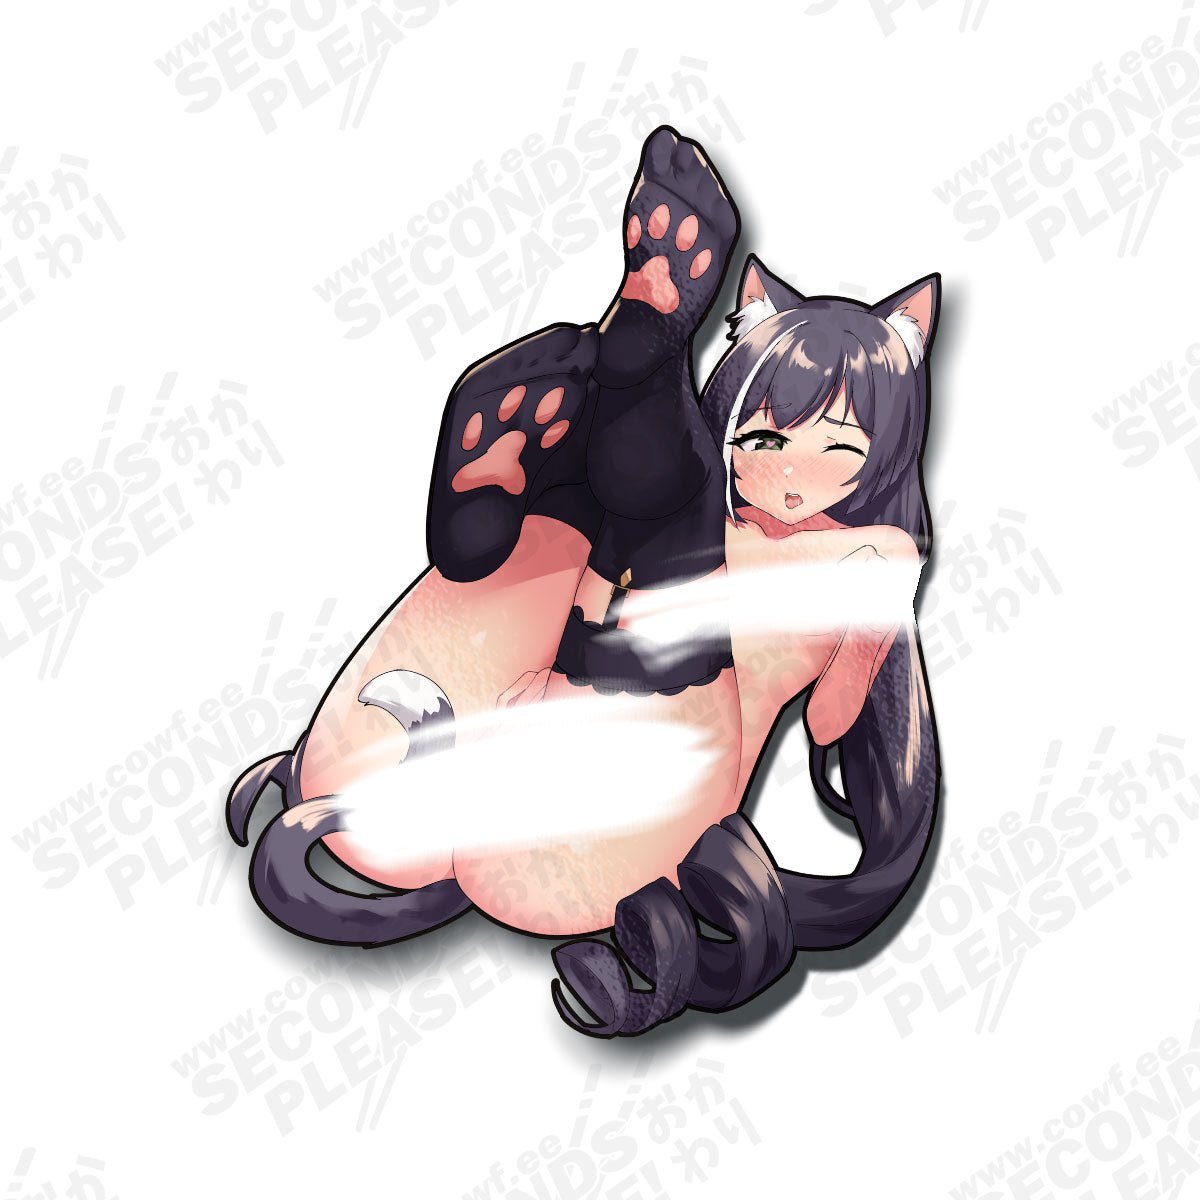
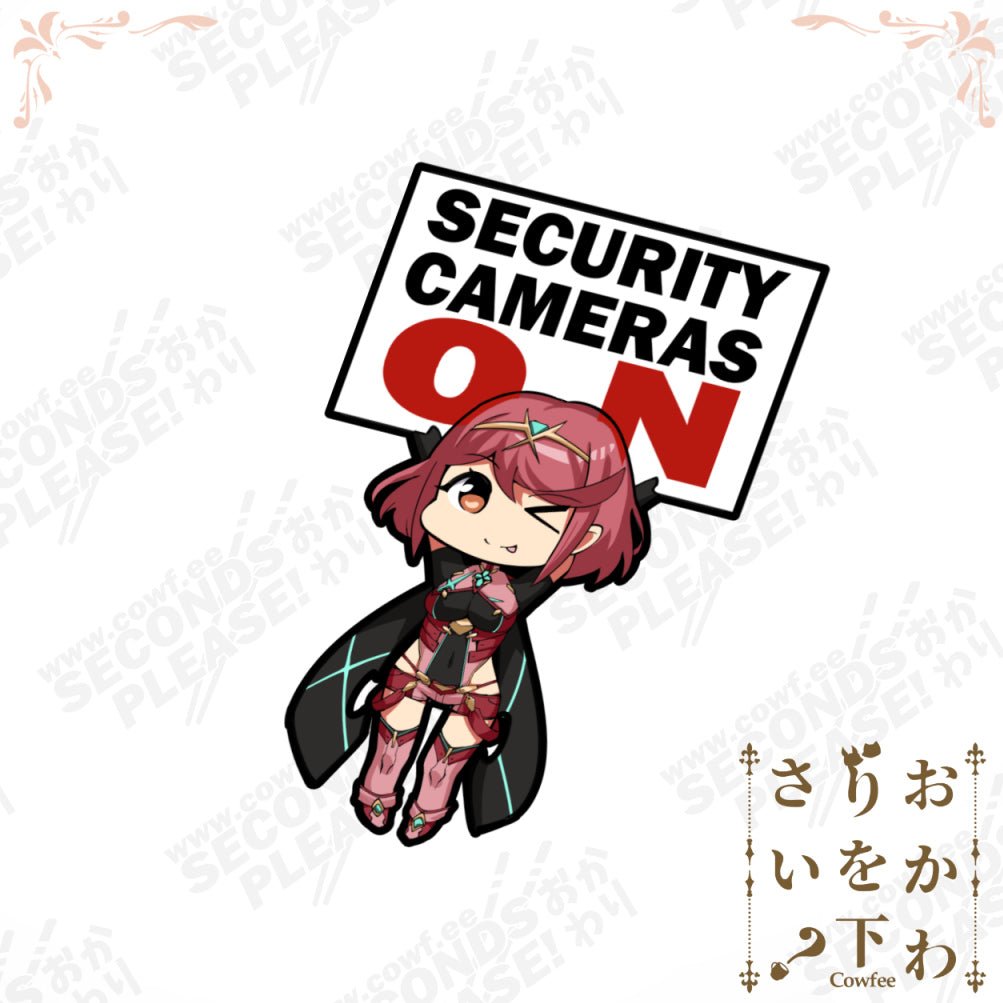
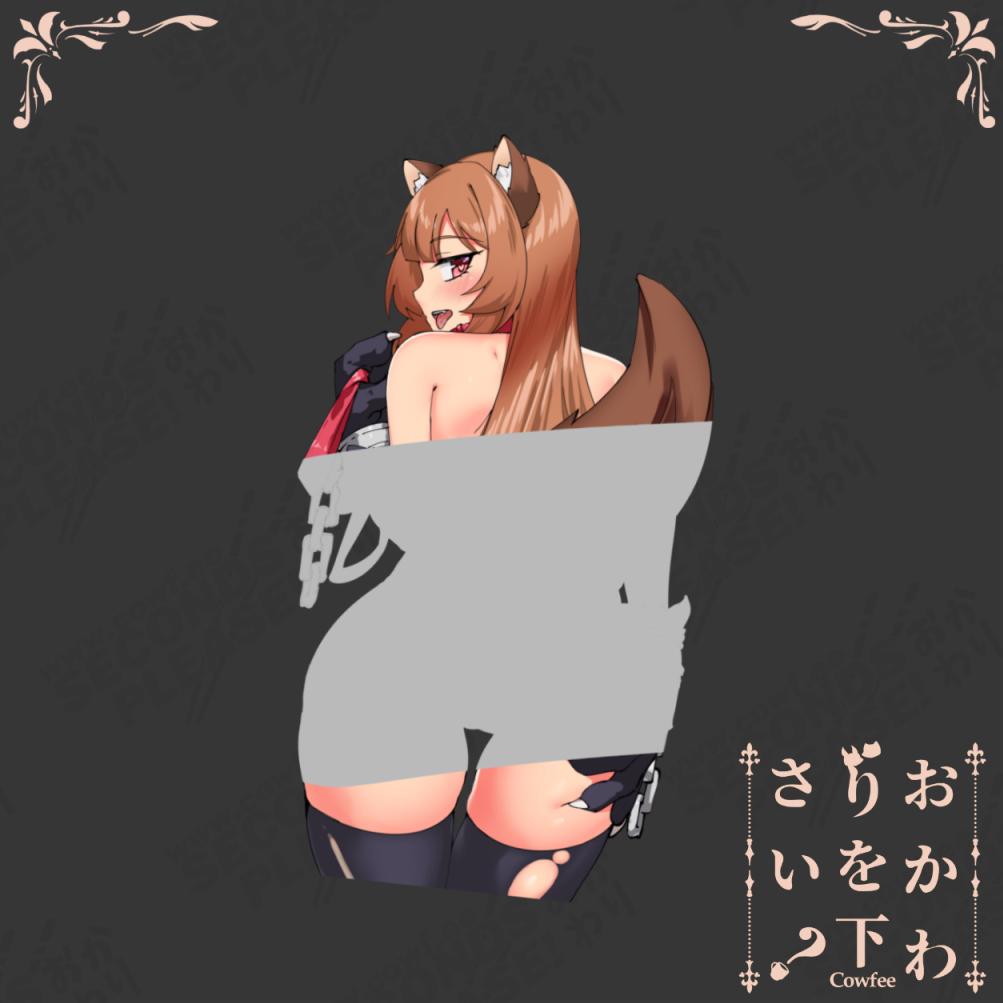
Bocchi Kita Kiss-Cut
Regular price $20.90 USD
Tax included.
Shipping calculated at checkout.
Artwork By cowfee
Sticker measures approximately 6" regular
Printed on high-quality outdoor use UV-resistant and weatherproof vinyl, satin laminate.
All characters aged 18+
To view the secret version and install instructions, head to our FAQ page
General Sticker application rules apply but here’s how you apply them properly!
Large Decal Application Instructions
Wet Application
(Messy but the safest method of application)
- Ensure surface is appropriately cleaned beforehand and weather is calm. Little wind if applying outdoors.
Use isopropyl alcohol, alcohol wipes, or a detergent to remove any dirt and oils. - Spray down surface with as much water as possible.
- Remove decal backing paper and apply as gently as possible from center outwards.
Make sure to position it how you want at this stage. - “Tack” centre of decal down firmly and hold with one hand, press down firmly using a card or Squeegee at an angle and work from center out in an arc. Work slowly and remove as much water as possible taking care not to trap any bubbles.
Work in halves and in arcs outwards - Recommended to leave on application tape as the decal adheres for a few hours before removal. Remove from largest decal area to thinnest, avoid removing directly towards thin areas.


Dry Application
(Clean but hardest method of application)
- Same as Wet Application
- Remove and trim half of backing paper
- Take your time and line it up, tack from trimmed half of backing paper.
- Same as Wet Application
- Application tape can be removed instantly
Banner Instructions
- Measure out how you want it to fit, we recommend keeping the logo under the top of the windshield at minimum and above the arrows marked on the windscreen (whatever is legal for your country for sunstrips)
Use masking tape to keep the banner centred (Align the banner vertically and horizontally, use a ruler for precise measurements) - Lift up half the banner on the long side and peel off the backing paper and trim halfway.
- Spray down the windscreen and vinyl with water thoroughly (More cant hurt)
- Place the banner down gently. Make sure all your adjustments are made at this stage before progressing.
- Tack down the centre by pressing down with your finger before firmly pushing out the water with the Seconds Please! Squeegee in the same area.
- You can continue to push out the water firmly to apply the rest of the area with the backing paper removed
- Repeat for the other side.
- Trim the banner on the top and sides leaving 5mm where the windscreen seals are.
- Press down firmly with the squeegee to get it up to the seal. Do the side sections separate from the top and trim using a razor blade sitting in the corner the seal makes with the windshield. Drag the knife towards you gently holding the same angle around 30 degrees.
Other things to consider
Use common sense! Whilst they are rated for outdoor use, don’t place them anywhere there will be extreme temperatures, take care of your girls.
Don’t put them anywhere normal stickers won't go, that is on surfaces which aren’t flat and smooth.
Take care when cleaning the surface afterwards, sharp points and corners could get lifted accidentally.

UPDATED 25th Jan, 2021
We ship out of Australia.
Due to Covid-19, logistics companies are facing stressed out infrastructure globally, so expect some shipping delays that are out of our control. Over 2020, shipping companies have increased their pricing by roughly 20%, as devastated as we are with this, we must adjust to keep the business alive. We try to maintain our shipping costs as best as possible to give you the best shipping rates to get our art and products to you. Thank you for your patience and support.
Upon packaging up and shipping out your order there may be delays in the following countries.
USA & EU regions - expect up to 1 month delay (Most orders are currently arriving within 6-8 weeks)
Asia regions - expect up to 1 month delay (Most orders are currently arriving within 6-8 weeks)
AU & NZ regions - expect up to 2 weeks delay (Most orders are currently arriving within 2-4 weeks)
We are doing our best to make sure you get your orders as fast as possible and exploring multiple shipping options to get our products into your house.
You are always welcome to message us on instagram or email us to check up on your order details by simply quoting your order number.
We apologise for the delays and we hope you stay safe during these times.
Thank you for your love and trust in us,
Team Cowfee

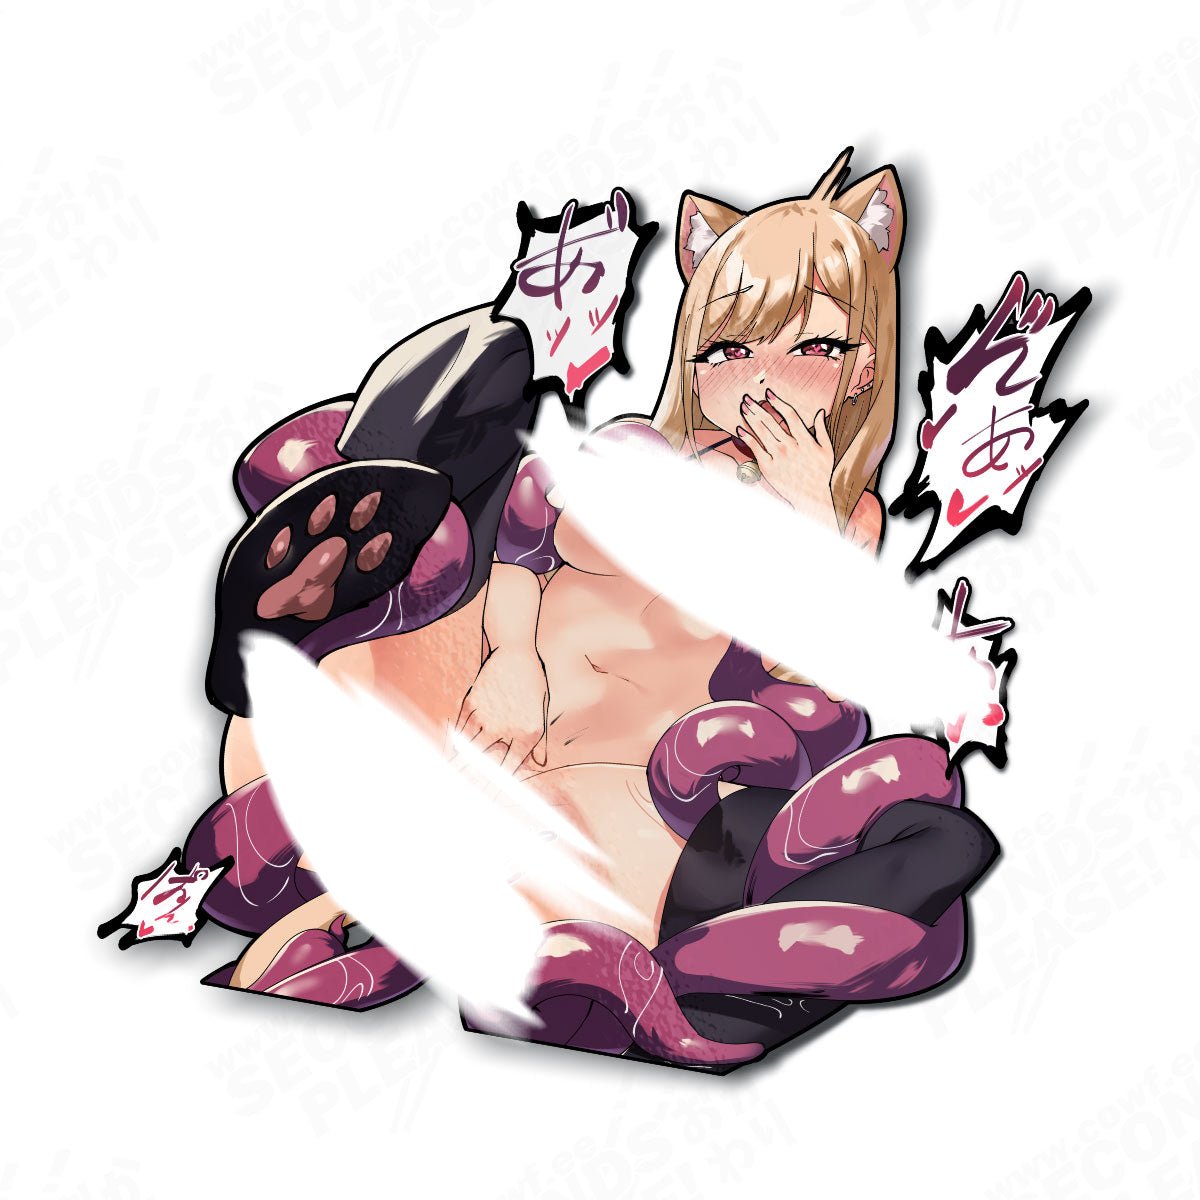
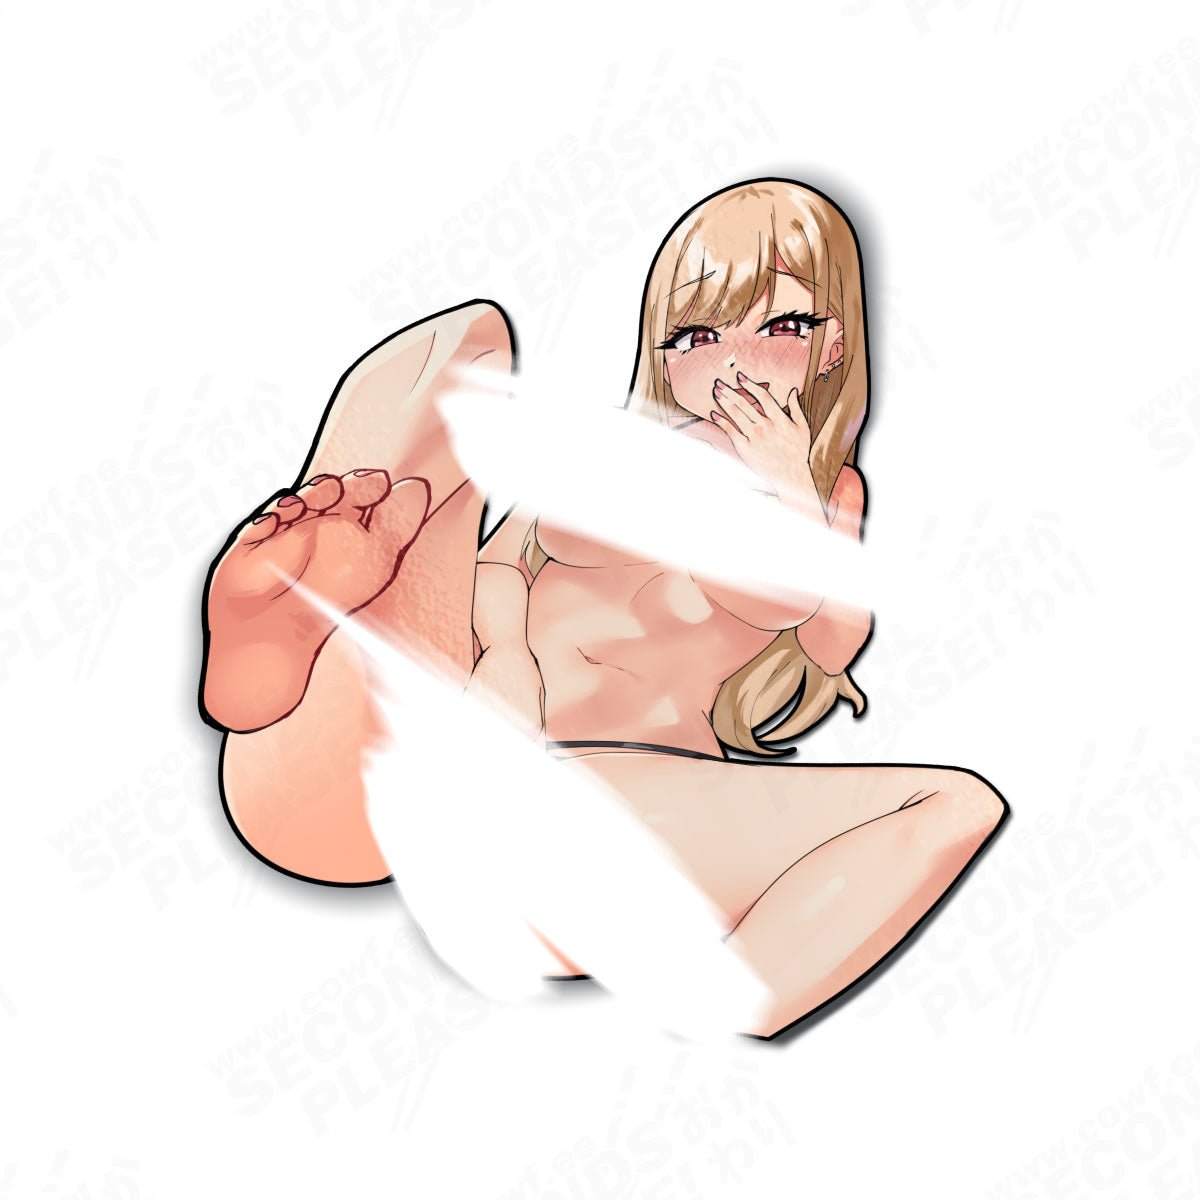
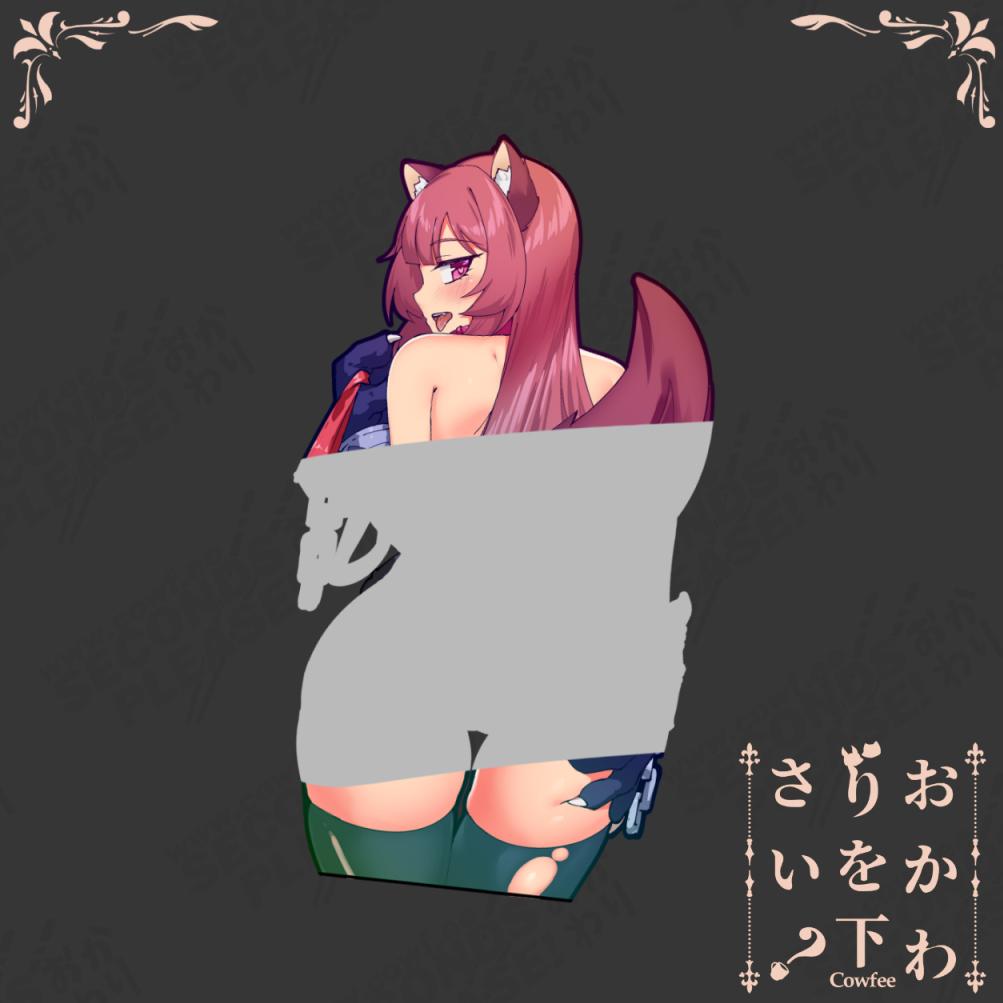
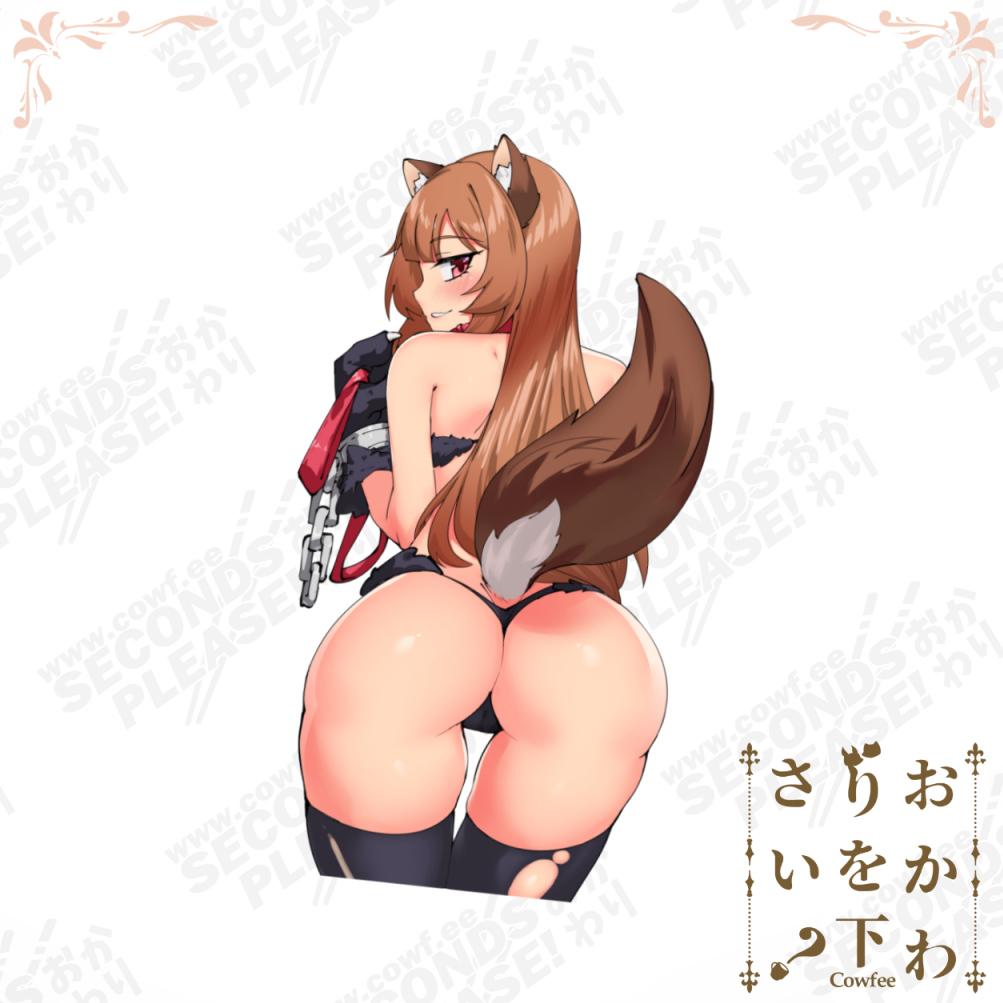
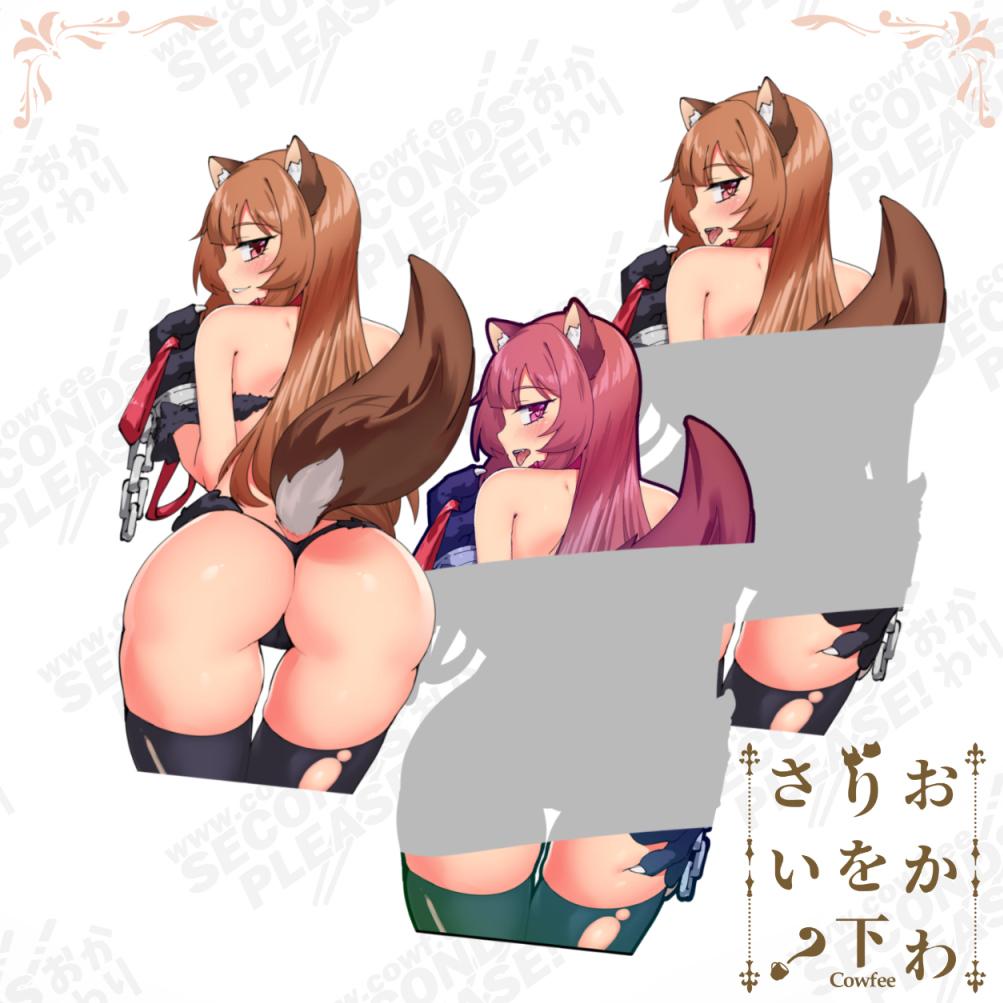
Fuwamoco Tentacle Kiss-Cut
Regular price $10.90 USD
Tax included.
Shipping calculated at checkout.
Artwork By cowfee
Sticker measures approximately 6.2" regular
Printed on high-quality outdoor use UV-resistant and weatherproof vinyl, satin laminate.
All characters aged 18+
To view the secret version and install instructions, head to our FAQ page
General Sticker application rules apply but here’s how you apply them properly!
Large Decal Application Instructions
Wet Application
(Messy but the safest method of application)
- Ensure surface is appropriately cleaned beforehand and weather is calm. Little wind if applying outdoors.
Use isopropyl alcohol, alcohol wipes, or a detergent to remove any dirt and oils. - Spray down surface with as much water as possible.
- Remove decal backing paper and apply as gently as possible from center outwards.
Make sure to position it how you want at this stage. - “Tack” centre of decal down firmly and hold with one hand, press down firmly using a card or Squeegee at an angle and work from center out in an arc. Work slowly and remove as much water as possible taking care not to trap any bubbles.
Work in halves and in arcs outwards - Recommended to leave on application tape as the decal adheres for a few hours before removal. Remove from largest decal area to thinnest, avoid removing directly towards thin areas.
Dry Application
(Clean but hardest method of application)
- Same as Wet Application
- Remove and trim half of backing paper
- Take your time and line it up, tack from trimmed half of backing paper.
- Same as Wet Application
- Application tape can be removed instantly
Banner Instructions
- Measure out how you want it to fit, we recommend keeping the logo under the top of the windshield at minimum and above the arrows marked on the windscreen (whatever is legal for your country for sunstrips)
Use masking tape to keep the banner centred (Align the banner vertically and horizontally, use a ruler for precise measurements) - Lift up half the banner on the long side and peel off the backing paper and trim halfway.
- Spray down the windscreen and vinyl with water thoroughly (More cant hurt)
- Place the banner down gently. Make sure all your adjustments are made at this stage before progressing.
- Tack down the centre by pressing down with your finger before firmly pushing out the water with the Seconds Please! Squeegee in the same area.
- You can continue to push out the water firmly to apply the rest of the area with the backing paper removed
- Repeat for the other side.
- Trim the banner on the top and sides leaving 5mm where the windscreen seals are.
- Press down firmly with the squeegee to get it up to the seal. Do the side sections separate from the top and trim using a razor blade sitting in the corner the seal makes with the windshield. Drag the knife towards you gently holding the same angle around 30 degrees.
Other things to consider
Use common sense! Whilst they are rated for outdoor use, don’t place them anywhere there will be extreme temperatures, take care of your girls.
Don’t put them anywhere normal stickers won't go, that is on surfaces which aren’t flat and smooth.
Take care when cleaning the surface afterwards, sharp points and corners could get lifted accidentally.
UPDATED 25th Jan, 2021
We ship out of Australia.
Due to Covid-19, logistics companies are facing stressed out infrastructure globally, so expect some shipping delays that are out of our control. Over 2020, shipping companies have increased their pricing by roughly 20%, as devastated as we are with this, we must adjust to keep the business alive. We try to maintain our shipping costs as best as possible to give you the best shipping rates to get our art and products to you. Thank you for your patience and support.
Upon packaging up and shipping out your order there may be delays in the following countries.
USA & EU regions - expect up to 1 month delay (Most orders are currently arriving within 6-8 weeks)
Asia regions - expect up to 1 month delay (Most orders are currently arriving within 6-8 weeks)
AU & NZ regions - expect up to 2 weeks delay (Most orders are currently arriving within 2-4 weeks)
We are doing our best to make sure you get your orders as fast as possible and exploring multiple shipping options to get our products into your house.
You are always welcome to message us on instagram or email us to check up on your order details by simply quoting your order number.
We apologise for the delays and we hope you stay safe during these times.
Thank you for your love and trust in us,
Team Cowfee

Foxy Kuro Sleep Kiss-Cut (LIMITED EDITION COLLAB)
Regular price $8.80 USD
Tax included.
Shipping calculated at checkout.
Artwork By Foxy Kuro
Sticker measures approximately 4.5" Peeker
Printed on high-quality outdoor use UV-resistant and weatherproof vinyl, satin laminate.
All characters aged 18+
To view the secret version and install instructions, head to our FAQ page
General Sticker application rules apply but here’s how you apply them properly!
Large Decal Application Instructions
Wet Application
(Messy but the safest method of application)
- Ensure surface is appropriately cleaned beforehand and weather is calm. Little wind if applying outdoors.
Use isopropyl alcohol, alcohol wipes, or a detergent to remove any dirt and oils. - Spray down surface with as much water as possible.
- Remove decal backing paper and apply as gently as possible from center outwards.
Make sure to position it how you want at this stage. - “Tack” centre of decal down firmly and hold with one hand, press down firmly using a card or Squeegee at an angle and work from center out in an arc. Work slowly and remove as much water as possible taking care not to trap any bubbles.
Work in halves and in arcs outwards - Recommended to leave on application tape as the decal adheres for a few hours before removal. Remove from largest decal area to thinnest, avoid removing directly towards thin areas.
Dry Application
(Clean but hardest method of application)
- Same as Wet Application
- Remove and trim half of backing paper
- Take your time and line it up, tack from trimmed half of backing paper.
- Same as Wet Application
- Application tape can be removed instantly
Banner Instructions
- Measure out how you want it to fit, we recommend keeping the logo under the top of the windshield at minimum and above the arrows marked on the windscreen (whatever is legal for your country for sunstrips)
Use masking tape to keep the banner centred (Align the banner vertically and horizontally, use a ruler for precise measurements) - Lift up half the banner on the long side and peel off the backing paper and trim halfway.
- Spray down the windscreen and vinyl with water thoroughly (More cant hurt)
- Place the banner down gently. Make sure all your adjustments are made at this stage before progressing.
- Tack down the centre by pressing down with your finger before firmly pushing out the water with the Seconds Please! Squeegee in the same area.
- You can continue to push out the water firmly to apply the rest of the area with the backing paper removed
- Repeat for the other side.
- Trim the banner on the top and sides leaving 5mm where the windscreen seals are.
- Press down firmly with the squeegee to get it up to the seal. Do the side sections separate from the top and trim using a razor blade sitting in the corner the seal makes with the windshield. Drag the knife towards you gently holding the same angle around 30 degrees.
Other things to consider
Use common sense! Whilst they are rated for outdoor use, don’t place them anywhere there will be extreme temperatures, take care of your girls.
Don’t put them anywhere normal stickers won't go, that is on surfaces which aren’t flat and smooth.
Take care when cleaning the surface afterwards, sharp points and corners could get lifted accidentally.
UPDATED 25th Jan, 2021
We ship out of Australia.
Due to Covid-19, logistics companies are facing stressed out infrastructure globally, so expect some shipping delays that are out of our control. Over 2020, shipping companies have increased their pricing by roughly 20%, as devastated as we are with this, we must adjust to keep the business alive. We try to maintain our shipping costs as best as possible to give you the best shipping rates to get our art and products to you. Thank you for your patience and support.
Upon packaging up and shipping out your order there may be delays in the following countries.
USA & EU regions - expect up to 1 month delay (Most orders are currently arriving within 6-8 weeks)
Asia regions - expect up to 1 month delay (Most orders are currently arriving within 6-8 weeks)
AU & NZ regions - expect up to 2 weeks delay (Most orders are currently arriving within 2-4 weeks)
We are doing our best to make sure you get your orders as fast as possible and exploring multiple shipping options to get our products into your house.
You are always welcome to message us on instagram or email us to check up on your order details by simply quoting your order number.
We apologise for the delays and we hope you stay safe during these times.
Thank you for your love and trust in us,
Team Cowfee


Foxy Kuro Kiss-Cut (LIMITED EDITION COLLAB)
Regular price $32.90 USD
Tax included.
Shipping calculated at checkout.
Artwork By Foxy Kuro
Sticker measures approximately 6" regular, 4" Peeker
Printed on high-quality outdoor use UV-resistant and weatherproof vinyl, satin laminate.
All characters aged 18+
To view the secret version and install instructions, head to our FAQ page
General Sticker application rules apply but here’s how you apply them properly!
Large Decal Application Instructions
Wet Application
(Messy but the safest method of application)
- Ensure surface is appropriately cleaned beforehand and weather is calm. Little wind if applying outdoors.
Use isopropyl alcohol, alcohol wipes, or a detergent to remove any dirt and oils. - Spray down surface with as much water as possible.
- Remove decal backing paper and apply as gently as possible from center outwards.
Make sure to position it how you want at this stage. - “Tack” centre of decal down firmly and hold with one hand, press down firmly using a card or Squeegee at an angle and work from center out in an arc. Work slowly and remove as much water as possible taking care not to trap any bubbles.
Work in halves and in arcs outwards - Recommended to leave on application tape as the decal adheres for a few hours before removal. Remove from largest decal area to thinnest, avoid removing directly towards thin areas.
Dry Application
(Clean but hardest method of application)
- Same as Wet Application
- Remove and trim half of backing paper
- Take your time and line it up, tack from trimmed half of backing paper.
- Same as Wet Application
- Application tape can be removed instantly
Banner Instructions
- Measure out how you want it to fit, we recommend keeping the logo under the top of the windshield at minimum and above the arrows marked on the windscreen (whatever is legal for your country for sunstrips)
Use masking tape to keep the banner centred (Align the banner vertically and horizontally, use a ruler for precise measurements) - Lift up half the banner on the long side and peel off the backing paper and trim halfway.
- Spray down the windscreen and vinyl with water thoroughly (More cant hurt)
- Place the banner down gently. Make sure all your adjustments are made at this stage before progressing.
- Tack down the centre by pressing down with your finger before firmly pushing out the water with the Seconds Please! Squeegee in the same area.
- You can continue to push out the water firmly to apply the rest of the area with the backing paper removed
- Repeat for the other side.
- Trim the banner on the top and sides leaving 5mm where the windscreen seals are.
- Press down firmly with the squeegee to get it up to the seal. Do the side sections separate from the top and trim using a razor blade sitting in the corner the seal makes with the windshield. Drag the knife towards you gently holding the same angle around 30 degrees.
Other things to consider
Use common sense! Whilst they are rated for outdoor use, don’t place them anywhere there will be extreme temperatures, take care of your girls.
Don’t put them anywhere normal stickers won't go, that is on surfaces which aren’t flat and smooth.
Take care when cleaning the surface afterwards, sharp points and corners could get lifted accidentally.
UPDATED 25th Jan, 2021
We ship out of Australia.
Due to Covid-19, logistics companies are facing stressed out infrastructure globally, so expect some shipping delays that are out of our control. Over 2020, shipping companies have increased their pricing by roughly 20%, as devastated as we are with this, we must adjust to keep the business alive. We try to maintain our shipping costs as best as possible to give you the best shipping rates to get our art and products to you. Thank you for your patience and support.
Upon packaging up and shipping out your order there may be delays in the following countries.
USA & EU regions - expect up to 1 month delay (Most orders are currently arriving within 6-8 weeks)
Asia regions - expect up to 1 month delay (Most orders are currently arriving within 6-8 weeks)
AU & NZ regions - expect up to 2 weeks delay (Most orders are currently arriving within 2-4 weeks)
We are doing our best to make sure you get your orders as fast as possible and exploring multiple shipping options to get our products into your house.
You are always welcome to message us on instagram or email us to check up on your order details by simply quoting your order number.
We apologise for the delays and we hope you stay safe during these times.
Thank you for your love and trust in us,
Team Cowfee


Fuwawa Kiss-Cut
Sale price $8.80 USD
Tax included.
Shipping calculated at checkout.
Artwork By cowfee
Sticker measures approximately 4.6" regular, 4.5" Peeker
Printed on high-quality outdoor use UV-resistant and weatherproof vinyl, satin laminate.
All characters aged 18+
To view the secret version and install instructions, head to our FAQ page
General Sticker application rules apply but here’s how you apply them properly!
Large Decal Application Instructions
Wet Application
(Messy but the safest method of application)
- Ensure surface is appropriately cleaned beforehand and weather is calm. Little wind if applying outdoors.
Use isopropyl alcohol, alcohol wipes, or a detergent to remove any dirt and oils. - Spray down surface with as much water as possible.
- Remove decal backing paper and apply as gently as possible from center outwards.
Make sure to position it how you want at this stage. - “Tack” centre of decal down firmly and hold with one hand, press down firmly using a card or Squeegee at an angle and work from center out in an arc. Work slowly and remove as much water as possible taking care not to trap any bubbles.
Work in halves and in arcs outwards - Recommended to leave on application tape as the decal adheres for a few hours before removal. Remove from largest decal area to thinnest, avoid removing directly towards thin areas.
Dry Application
(Clean but hardest method of application)
- Same as Wet Application
- Remove and trim half of backing paper
- Take your time and line it up, tack from trimmed half of backing paper.
- Same as Wet Application
- Application tape can be removed instantly
Banner Instructions
- Measure out how you want it to fit, we recommend keeping the logo under the top of the windshield at minimum and above the arrows marked on the windscreen (whatever is legal for your country for sunstrips)
Use masking tape to keep the banner centred (Align the banner vertically and horizontally, use a ruler for precise measurements) - Lift up half the banner on the long side and peel off the backing paper and trim halfway.
- Spray down the windscreen and vinyl with water thoroughly (More cant hurt)
- Place the banner down gently. Make sure all your adjustments are made at this stage before progressing.
- Tack down the centre by pressing down with your finger before firmly pushing out the water with the Seconds Please! Squeegee in the same area.
- You can continue to push out the water firmly to apply the rest of the area with the backing paper removed
- Repeat for the other side.
- Trim the banner on the top and sides leaving 5mm where the windscreen seals are.
- Press down firmly with the squeegee to get it up to the seal. Do the side sections separate from the top and trim using a razor blade sitting in the corner the seal makes with the windshield. Drag the knife towards you gently holding the same angle around 30 degrees.
Other things to consider
Use common sense! Whilst they are rated for outdoor use, don’t place them anywhere there will be extreme temperatures, take care of your girls.
Don’t put them anywhere normal stickers won't go, that is on surfaces which aren’t flat and smooth.
Take care when cleaning the surface afterwards, sharp points and corners could get lifted accidentally.
UPDATED 25th Jan, 2021
We ship out of Australia.
Due to Covid-19, logistics companies are facing stressed out infrastructure globally, so expect some shipping delays that are out of our control. Over 2020, shipping companies have increased their pricing by roughly 20%, as devastated as we are with this, we must adjust to keep the business alive. We try to maintain our shipping costs as best as possible to give you the best shipping rates to get our art and products to you. Thank you for your patience and support.
Upon packaging up and shipping out your order there may be delays in the following countries.
USA & EU regions - expect up to 1 month delay (Most orders are currently arriving within 6-8 weeks)
Asia regions - expect up to 1 month delay (Most orders are currently arriving within 6-8 weeks)
AU & NZ regions - expect up to 2 weeks delay (Most orders are currently arriving within 2-4 weeks)
We are doing our best to make sure you get your orders as fast as possible and exploring multiple shipping options to get our products into your house.
You are always welcome to message us on instagram or email us to check up on your order details by simply quoting your order number.
We apologise for the delays and we hope you stay safe during these times.
Thank you for your love and trust in us,
Team Cowfee


Frieren Mimic Kiss-Cut
Regular price $8.80 USD
Tax included.
Shipping calculated at checkout.
Artwork By cowfee
Sticker measures approximately 5" regular
Printed on high-quality outdoor use UV-resistant and weatherproof vinyl, satin laminate.
All characters aged 18+
To view the secret version and install instructions, head to our FAQ page
General Sticker application rules apply but here’s how you apply them properly!
Large Decal Application Instructions
Wet Application
(Messy but the safest method of application)
- Ensure surface is appropriately cleaned beforehand and weather is calm. Little wind if applying outdoors.
Use isopropyl alcohol, alcohol wipes, or a detergent to remove any dirt and oils. - Spray down surface with as much water as possible.
- Remove decal backing paper and apply as gently as possible from center outwards.
Make sure to position it how you want at this stage. - “Tack” centre of decal down firmly and hold with one hand, press down firmly using a card or Squeegee at an angle and work from center out in an arc. Work slowly and remove as much water as possible taking care not to trap any bubbles.
Work in halves and in arcs outwards - Recommended to leave on application tape as the decal adheres for a few hours before removal. Remove from largest decal area to thinnest, avoid removing directly towards thin areas.
Dry Application
(Clean but hardest method of application)
- Same as Wet Application
- Remove and trim half of backing paper
- Take your time and line it up, tack from trimmed half of backing paper.
- Same as Wet Application
- Application tape can be removed instantly
Banner Instructions
- Measure out how you want it to fit, we recommend keeping the logo under the top of the windshield at minimum and above the arrows marked on the windscreen (whatever is legal for your country for sunstrips)
Use masking tape to keep the banner centred (Align the banner vertically and horizontally, use a ruler for precise measurements) - Lift up half the banner on the long side and peel off the backing paper and trim halfway.
- Spray down the windscreen and vinyl with water thoroughly (More cant hurt)
- Place the banner down gently. Make sure all your adjustments are made at this stage before progressing.
- Tack down the centre by pressing down with your finger before firmly pushing out the water with the Seconds Please! Squeegee in the same area.
- You can continue to push out the water firmly to apply the rest of the area with the backing paper removed
- Repeat for the other side.
- Trim the banner on the top and sides leaving 5mm where the windscreen seals are.
- Press down firmly with the squeegee to get it up to the seal. Do the side sections separate from the top and trim using a razor blade sitting in the corner the seal makes with the windshield. Drag the knife towards you gently holding the same angle around 30 degrees.
Other things to consider
Use common sense! Whilst they are rated for outdoor use, don’t place them anywhere there will be extreme temperatures, take care of your girls.
Don’t put them anywhere normal stickers won't go, that is on surfaces which aren’t flat and smooth.
Take care when cleaning the surface afterwards, sharp points and corners could get lifted accidentally.
UPDATED 25th Jan, 2021
We ship out of Australia.
Due to Covid-19, logistics companies are facing stressed out infrastructure globally, so expect some shipping delays that are out of our control. Over 2020, shipping companies have increased their pricing by roughly 20%, as devastated as we are with this, we must adjust to keep the business alive. We try to maintain our shipping costs as best as possible to give you the best shipping rates to get our art and products to you. Thank you for your patience and support.
Upon packaging up and shipping out your order there may be delays in the following countries.
USA & EU regions - expect up to 1 month delay (Most orders are currently arriving within 6-8 weeks)
Asia regions - expect up to 1 month delay (Most orders are currently arriving within 6-8 weeks)
AU & NZ regions - expect up to 2 weeks delay (Most orders are currently arriving within 2-4 weeks)
We are doing our best to make sure you get your orders as fast as possible and exploring multiple shipping options to get our products into your house.
You are always welcome to message us on instagram or email us to check up on your order details by simply quoting your order number.
We apologise for the delays and we hope you stay safe during these times.
Thank you for your love and trust in us,
Team Cowfee

Shuten Tentacle Kiss-Cut
Regular price $8.80 USD
Tax included.
Shipping calculated at checkout.
Artwork By Cowfee//カウフィー
5.5" Regulars
Printed on high-quality outdoor use UV-resistant and weatherproof vinyl, satin laminate.
All characters aged 18+
To view the secret version and install instructions, head to our FAQ page
General Sticker application rules apply but here’s how you apply them properly!
Large Decal Application Instructions
Wet Application
(Messy but the safest method of application)
- Ensure surface is appropriately cleaned beforehand and weather is calm. Little wind if applying outdoors.
Use isopropyl alcohol, alcohol wipes, or a detergent to remove any dirt and oils. - Spray down surface with as much water as possible.
- Remove decal backing paper and apply as gently as possible from center outwards.
Make sure to position it how you want at this stage. - “Tack” centre of decal down firmly and hold with one hand, press down firmly using a card or Squeegee at an angle and work from center out in an arc. Work slowly and remove as much water as possible taking care not to trap any bubbles.
Work in halves and in arcs outwards - Recommended to leave on application tape as the decal adheres for a few hours before removal. Remove from largest decal area to thinnest, avoid removing directly towards thin areas.
Dry Application
(Clean but hardest method of application)
- Same as Wet Application
- Remove and trim half of backing paper
- Take your time and line it up, tack from trimmed half of backing paper.
- Same as Wet Application
- Application tape can be removed instantly
Banner Instructions
- Measure out how you want it to fit, we recommend keeping the logo under the top of the windshield at minimum and above the arrows marked on the windscreen (whatever is legal for your country for sunstrips)
Use masking tape to keep the banner centred (Align the banner vertically and horizontally, use a ruler for precise measurements) - Lift up half the banner on the long side and peel off the backing paper and trim halfway.
- Spray down the windscreen and vinyl with water thoroughly (More cant hurt)
- Place the banner down gently. Make sure all your adjustments are made at this stage before progressing.
- Tack down the centre by pressing down with your finger before firmly pushing out the water with the Seconds Please! Squeegee in the same area.
- You can continue to push out the water firmly to apply the rest of the area with the backing paper removed
- Repeat for the other side.
- Trim the banner on the top and sides leaving 5mm where the windscreen seals are.
- Press down firmly with the squeegee to get it up to the seal. Do the side sections separate from the top and trim using a razor blade sitting in the corner the seal makes with the windshield. Drag the knife towards you gently holding the same angle around 30 degrees.
Other things to consider
Use common sense! Whilst they are rated for outdoor use, don’t place them anywhere there will be extreme temperatures, take care of your girls.
Don’t put them anywhere normal stickers won't go, that is on surfaces which aren’t flat and smooth.
Take care when cleaning the surface afterwards, sharp points and corners could get lifted accidentally.
UPDATED 25th Jan, 2021
We ship out of Australia.
Due to Covid-19, logistics companies are facing stressed out infrastructure globally, so expect some shipping delays that are out of our control. Over 2020, shipping companies have increased their pricing by roughly 20%, as devastated as we are with this, we must adjust to keep the business alive. We try to maintain our shipping costs as best as possible to give you the best shipping rates to get our art and products to you. Thank you for your patience and support.
Upon packaging up and shipping out your order there may be delays in the following countries.
USA & EU regions - expect up to 1 month delay (Most orders are currently arriving within 6-8 weeks)
Asia regions - expect up to 1 month delay (Most orders are currently arriving within 6-8 weeks)
AU & NZ regions - expect up to 2 weeks delay (Most orders are currently arriving within 2-4 weeks)
We are doing our best to make sure you get your orders as fast as possible and exploring multiple shipping options to get our products into your house.
You are always welcome to message us on instagram or email us to check up on your order details by simply quoting your order number.
We apologise for the delays and we hope you stay safe during these times.
Thank you for your love and trust in us,
Team Cowfee

Tamamo Kiss-Cut
Regular price $8.80 USD
Tax included.
Shipping calculated at checkout.
Artwork By Cowfee//カウフィー
5" Regulars
Printed on high-quality outdoor use UV-resistant and weatherproof vinyl, satin laminate.
All characters aged 18+
To view the secret version and install instructions, head to our FAQ page
General Sticker application rules apply but here’s how you apply them properly!
Large Decal Application Instructions
Wet Application
(Messy but the safest method of application)
- Ensure surface is appropriately cleaned beforehand and weather is calm. Little wind if applying outdoors.
Use isopropyl alcohol, alcohol wipes, or a detergent to remove any dirt and oils. - Spray down surface with as much water as possible.
- Remove decal backing paper and apply as gently as possible from center outwards.
Make sure to position it how you want at this stage. - “Tack” centre of decal down firmly and hold with one hand, press down firmly using a card or Squeegee at an angle and work from center out in an arc. Work slowly and remove as much water as possible taking care not to trap any bubbles.
Work in halves and in arcs outwards - Recommended to leave on application tape as the decal adheres for a few hours before removal. Remove from largest decal area to thinnest, avoid removing directly towards thin areas.
Dry Application
(Clean but hardest method of application)
- Same as Wet Application
- Remove and trim half of backing paper
- Take your time and line it up, tack from trimmed half of backing paper.
- Same as Wet Application
- Application tape can be removed instantly
Banner Instructions
- Measure out how you want it to fit, we recommend keeping the logo under the top of the windshield at minimum and above the arrows marked on the windscreen (whatever is legal for your country for sunstrips)
Use masking tape to keep the banner centred (Align the banner vertically and horizontally, use a ruler for precise measurements) - Lift up half the banner on the long side and peel off the backing paper and trim halfway.
- Spray down the windscreen and vinyl with water thoroughly (More cant hurt)
- Place the banner down gently. Make sure all your adjustments are made at this stage before progressing.
- Tack down the centre by pressing down with your finger before firmly pushing out the water with the Seconds Please! Squeegee in the same area.
- You can continue to push out the water firmly to apply the rest of the area with the backing paper removed
- Repeat for the other side.
- Trim the banner on the top and sides leaving 5mm where the windscreen seals are.
- Press down firmly with the squeegee to get it up to the seal. Do the side sections separate from the top and trim using a razor blade sitting in the corner the seal makes with the windshield. Drag the knife towards you gently holding the same angle around 30 degrees.
Other things to consider
Use common sense! Whilst they are rated for outdoor use, don’t place them anywhere there will be extreme temperatures, take care of your girls.
Don’t put them anywhere normal stickers won't go, that is on surfaces which aren’t flat and smooth.
Take care when cleaning the surface afterwards, sharp points and corners could get lifted accidentally.
UPDATED 25th Jan, 2021
We ship out of Australia.
Due to Covid-19, logistics companies are facing stressed out infrastructure globally, so expect some shipping delays that are out of our control. Over 2020, shipping companies have increased their pricing by roughly 20%, as devastated as we are with this, we must adjust to keep the business alive. We try to maintain our shipping costs as best as possible to give you the best shipping rates to get our art and products to you. Thank you for your patience and support.
Upon packaging up and shipping out your order there may be delays in the following countries.
USA & EU regions - expect up to 1 month delay (Most orders are currently arriving within 6-8 weeks)
Asia regions - expect up to 1 month delay (Most orders are currently arriving within 6-8 weeks)
AU & NZ regions - expect up to 2 weeks delay (Most orders are currently arriving within 2-4 weeks)
We are doing our best to make sure you get your orders as fast as possible and exploring multiple shipping options to get our products into your house.
You are always welcome to message us on instagram or email us to check up on your order details by simply quoting your order number.
We apologise for the delays and we hope you stay safe during these times.
Thank you for your love and trust in us,
Team Cowfee

Hinata Tentacle Kiss-Cut
Regular price $11.00 USD Sale price $8.80 USD Save $2.20 USD
Tax included.
Shipping calculated at checkout.
Artwork By Cowfee//カウフィー
5" Regulars
Printed on high-quality outdoor use UV-resistant and weatherproof vinyl, satin laminate.
All characters aged 18+
To view the secret version and install instructions, head to our FAQ page
General Sticker application rules apply but here’s how you apply them properly!
Large Decal Application Instructions
Wet Application
(Messy but the safest method of application)
- Ensure surface is appropriately cleaned beforehand and weather is calm. Little wind if applying outdoors.
Use isopropyl alcohol, alcohol wipes, or a detergent to remove any dirt and oils. - Spray down surface with as much water as possible.
- Remove decal backing paper and apply as gently as possible from center outwards.
Make sure to position it how you want at this stage. - “Tack” centre of decal down firmly and hold with one hand, press down firmly using a card or Squeegee at an angle and work from center out in an arc. Work slowly and remove as much water as possible taking care not to trap any bubbles.
Work in halves and in arcs outwards - Recommended to leave on application tape as the decal adheres for a few hours before removal. Remove from largest decal area to thinnest, avoid removing directly towards thin areas.
Dry Application
(Clean but hardest method of application)
- Same as Wet Application
- Remove and trim half of backing paper
- Take your time and line it up, tack from trimmed half of backing paper.
- Same as Wet Application
- Application tape can be removed instantly
Banner Instructions
- Measure out how you want it to fit, we recommend keeping the logo under the top of the windshield at minimum and above the arrows marked on the windscreen (whatever is legal for your country for sunstrips)
Use masking tape to keep the banner centred (Align the banner vertically and horizontally, use a ruler for precise measurements) - Lift up half the banner on the long side and peel off the backing paper and trim halfway.
- Spray down the windscreen and vinyl with water thoroughly (More cant hurt)
- Place the banner down gently. Make sure all your adjustments are made at this stage before progressing.
- Tack down the centre by pressing down with your finger before firmly pushing out the water with the Seconds Please! Squeegee in the same area.
- You can continue to push out the water firmly to apply the rest of the area with the backing paper removed
- Repeat for the other side.
- Trim the banner on the top and sides leaving 5mm where the windscreen seals are.
- Press down firmly with the squeegee to get it up to the seal. Do the side sections separate from the top and trim using a razor blade sitting in the corner the seal makes with the windshield. Drag the knife towards you gently holding the same angle around 30 degrees.
Other things to consider
Use common sense! Whilst they are rated for outdoor use, don’t place them anywhere there will be extreme temperatures, take care of your girls.
Don’t put them anywhere normal stickers won't go, that is on surfaces which aren’t flat and smooth.
Take care when cleaning the surface afterwards, sharp points and corners could get lifted accidentally.
UPDATED 25th Jan, 2021
We ship out of Australia.
Due to Covid-19, logistics companies are facing stressed out infrastructure globally, so expect some shipping delays that are out of our control. Over 2020, shipping companies have increased their pricing by roughly 20%, as devastated as we are with this, we must adjust to keep the business alive. We try to maintain our shipping costs as best as possible to give you the best shipping rates to get our art and products to you. Thank you for your patience and support.
Upon packaging up and shipping out your order there may be delays in the following countries.
USA & EU regions - expect up to 1 month delay (Most orders are currently arriving within 6-8 weeks)
Asia regions - expect up to 1 month delay (Most orders are currently arriving within 6-8 weeks)
AU & NZ regions - expect up to 2 weeks delay (Most orders are currently arriving within 2-4 weeks)
We are doing our best to make sure you get your orders as fast as possible and exploring multiple shipping options to get our products into your house.
You are always welcome to message us on instagram or email us to check up on your order details by simply quoting your order number.
We apologise for the delays and we hope you stay safe during these times.
Thank you for your love and trust in us,
Team Cowfee

Koneko Tentacle Kiss-Cut
Regular price $8.80 USD
Tax included.
Shipping calculated at checkout.
Artwork By Cowfee//カウフィー
6" Regulars
Printed on high-quality outdoor use UV-resistant and weatherproof vinyl, satin laminate.
All characters aged 18+
To view the secret version and install instructions, head to our FAQ page
General Sticker application rules apply but here’s how you apply them properly!
Large Decal Application Instructions
Wet Application
(Messy but the safest method of application)
- Ensure surface is appropriately cleaned beforehand and weather is calm. Little wind if applying outdoors.
Use isopropyl alcohol, alcohol wipes, or a detergent to remove any dirt and oils. - Spray down surface with as much water as possible.
- Remove decal backing paper and apply as gently as possible from center outwards.
Make sure to position it how you want at this stage. - “Tack” centre of decal down firmly and hold with one hand, press down firmly using a card or Squeegee at an angle and work from center out in an arc. Work slowly and remove as much water as possible taking care not to trap any bubbles.
Work in halves and in arcs outwards - Recommended to leave on application tape as the decal adheres for a few hours before removal. Remove from largest decal area to thinnest, avoid removing directly towards thin areas.
Dry Application
(Clean but hardest method of application)
- Same as Wet Application
- Remove and trim half of backing paper
- Take your time and line it up, tack from trimmed half of backing paper.
- Same as Wet Application
- Application tape can be removed instantly
Banner Instructions
- Measure out how you want it to fit, we recommend keeping the logo under the top of the windshield at minimum and above the arrows marked on the windscreen (whatever is legal for your country for sunstrips)
Use masking tape to keep the banner centred (Align the banner vertically and horizontally, use a ruler for precise measurements) - Lift up half the banner on the long side and peel off the backing paper and trim halfway.
- Spray down the windscreen and vinyl with water thoroughly (More cant hurt)
- Place the banner down gently. Make sure all your adjustments are made at this stage before progressing.
- Tack down the centre by pressing down with your finger before firmly pushing out the water with the Seconds Please! Squeegee in the same area.
- You can continue to push out the water firmly to apply the rest of the area with the backing paper removed
- Repeat for the other side.
- Trim the banner on the top and sides leaving 5mm where the windscreen seals are.
- Press down firmly with the squeegee to get it up to the seal. Do the side sections separate from the top and trim using a razor blade sitting in the corner the seal makes with the windshield. Drag the knife towards you gently holding the same angle around 30 degrees.
Other things to consider
Use common sense! Whilst they are rated for outdoor use, don’t place them anywhere there will be extreme temperatures, take care of your girls.
Don’t put them anywhere normal stickers won't go, that is on surfaces which aren’t flat and smooth.
Take care when cleaning the surface afterwards, sharp points and corners could get lifted accidentally.
UPDATED 25th Jan, 2021
We ship out of Australia.
Due to Covid-19, logistics companies are facing stressed out infrastructure globally, so expect some shipping delays that are out of our control. Over 2020, shipping companies have increased their pricing by roughly 20%, as devastated as we are with this, we must adjust to keep the business alive. We try to maintain our shipping costs as best as possible to give you the best shipping rates to get our art and products to you. Thank you for your patience and support.
Upon packaging up and shipping out your order there may be delays in the following countries.
USA & EU regions - expect up to 1 month delay (Most orders are currently arriving within 6-8 weeks)
Asia regions - expect up to 1 month delay (Most orders are currently arriving within 6-8 weeks)
AU & NZ regions - expect up to 2 weeks delay (Most orders are currently arriving within 2-4 weeks)
We are doing our best to make sure you get your orders as fast as possible and exploring multiple shipping options to get our products into your house.
You are always welcome to message us on instagram or email us to check up on your order details by simply quoting your order number.
We apologise for the delays and we hope you stay safe during these times.
Thank you for your love and trust in us,
Team Cowfee

Raph Tentacle Kiss-Cut
Regular price $8.80 USD
Tax included.
Shipping calculated at checkout.
Artwork By Cowfee//カウフィー
5" Regulars
Printed on high-quality outdoor use UV-resistant and weatherproof vinyl, satin laminate.
All characters aged 18+
To view the secret version and install instructions, head to our FAQ page
General Sticker application rules apply but here’s how you apply them properly!
Large Decal Application Instructions
Wet Application
(Messy but the safest method of application)
- Ensure surface is appropriately cleaned beforehand and weather is calm. Little wind if applying outdoors.
Use isopropyl alcohol, alcohol wipes, or a detergent to remove any dirt and oils. - Spray down surface with as much water as possible.
- Remove decal backing paper and apply as gently as possible from center outwards.
Make sure to position it how you want at this stage. - “Tack” centre of decal down firmly and hold with one hand, press down firmly using a card or Squeegee at an angle and work from center out in an arc. Work slowly and remove as much water as possible taking care not to trap any bubbles.
Work in halves and in arcs outwards - Recommended to leave on application tape as the decal adheres for a few hours before removal. Remove from largest decal area to thinnest, avoid removing directly towards thin areas.
Dry Application
(Clean but hardest method of application)
- Same as Wet Application
- Remove and trim half of backing paper
- Take your time and line it up, tack from trimmed half of backing paper.
- Same as Wet Application
- Application tape can be removed instantly
Banner Instructions
- Measure out how you want it to fit, we recommend keeping the logo under the top of the windshield at minimum and above the arrows marked on the windscreen (whatever is legal for your country for sunstrips)
Use masking tape to keep the banner centred (Align the banner vertically and horizontally, use a ruler for precise measurements) - Lift up half the banner on the long side and peel off the backing paper and trim halfway.
- Spray down the windscreen and vinyl with water thoroughly (More cant hurt)
- Place the banner down gently. Make sure all your adjustments are made at this stage before progressing.
- Tack down the centre by pressing down with your finger before firmly pushing out the water with the Seconds Please! Squeegee in the same area.
- You can continue to push out the water firmly to apply the rest of the area with the backing paper removed
- Repeat for the other side.
- Trim the banner on the top and sides leaving 5mm where the windscreen seals are.
- Press down firmly with the squeegee to get it up to the seal. Do the side sections separate from the top and trim using a razor blade sitting in the corner the seal makes with the windshield. Drag the knife towards you gently holding the same angle around 30 degrees.
Other things to consider
Use common sense! Whilst they are rated for outdoor use, don’t place them anywhere there will be extreme temperatures, take care of your girls.
Don’t put them anywhere normal stickers won't go, that is on surfaces which aren’t flat and smooth.
Take care when cleaning the surface afterwards, sharp points and corners could get lifted accidentally.
UPDATED 25th Jan, 2021
We ship out of Australia.
Due to Covid-19, logistics companies are facing stressed out infrastructure globally, so expect some shipping delays that are out of our control. Over 2020, shipping companies have increased their pricing by roughly 20%, as devastated as we are with this, we must adjust to keep the business alive. We try to maintain our shipping costs as best as possible to give you the best shipping rates to get our art and products to you. Thank you for your patience and support.
Upon packaging up and shipping out your order there may be delays in the following countries.
USA & EU regions - expect up to 1 month delay (Most orders are currently arriving within 6-8 weeks)
Asia regions - expect up to 1 month delay (Most orders are currently arriving within 6-8 weeks)
AU & NZ regions - expect up to 2 weeks delay (Most orders are currently arriving within 2-4 weeks)
We are doing our best to make sure you get your orders as fast as possible and exploring multiple shipping options to get our products into your house.
You are always welcome to message us on instagram or email us to check up on your order details by simply quoting your order number.
We apologise for the delays and we hope you stay safe during these times.
Thank you for your love and trust in us,
Team Cowfee


Marin Tentacle Kiss-Cut
Regular price $8.80 USD
Tax included.
Shipping calculated at checkout.
Artwork By Cowfee//カウフィー
5.5"/5" Regulars
Printed on high-quality outdoor use UV-resistant and weatherproof vinyl, satin laminate.
All characters aged 18+
To view the secret version and install instructions, head to our FAQ page
General Sticker application rules apply but here’s how you apply them properly!
Large Decal Application Instructions
Wet Application
(Messy but the safest method of application)
- Ensure surface is appropriately cleaned beforehand and weather is calm. Little wind if applying outdoors.
Use isopropyl alcohol, alcohol wipes, or a detergent to remove any dirt and oils. - Spray down surface with as much water as possible.
- Remove decal backing paper and apply as gently as possible from center outwards.
Make sure to position it how you want at this stage. - “Tack” centre of decal down firmly and hold with one hand, press down firmly using a card or Squeegee at an angle and work from center out in an arc. Work slowly and remove as much water as possible taking care not to trap any bubbles.
Work in halves and in arcs outwards - Recommended to leave on application tape as the decal adheres for a few hours before removal. Remove from largest decal area to thinnest, avoid removing directly towards thin areas.
Dry Application
(Clean but hardest method of application)
- Same as Wet Application
- Remove and trim half of backing paper
- Take your time and line it up, tack from trimmed half of backing paper.
- Same as Wet Application
- Application tape can be removed instantly
Banner Instructions
- Measure out how you want it to fit, we recommend keeping the logo under the top of the windshield at minimum and above the arrows marked on the windscreen (whatever is legal for your country for sunstrips)
Use masking tape to keep the banner centred (Align the banner vertically and horizontally, use a ruler for precise measurements) - Lift up half the banner on the long side and peel off the backing paper and trim halfway.
- Spray down the windscreen and vinyl with water thoroughly (More cant hurt)
- Place the banner down gently. Make sure all your adjustments are made at this stage before progressing.
- Tack down the centre by pressing down with your finger before firmly pushing out the water with the Seconds Please! Squeegee in the same area.
- You can continue to push out the water firmly to apply the rest of the area with the backing paper removed
- Repeat for the other side.
- Trim the banner on the top and sides leaving 5mm where the windscreen seals are.
- Press down firmly with the squeegee to get it up to the seal. Do the side sections separate from the top and trim using a razor blade sitting in the corner the seal makes with the windshield. Drag the knife towards you gently holding the same angle around 30 degrees.
Other things to consider
Use common sense! Whilst they are rated for outdoor use, don’t place them anywhere there will be extreme temperatures, take care of your girls.
Don’t put them anywhere normal stickers won't go, that is on surfaces which aren’t flat and smooth.
Take care when cleaning the surface afterwards, sharp points and corners could get lifted accidentally.
UPDATED 25th Jan, 2021
We ship out of Australia.
Due to Covid-19, logistics companies are facing stressed out infrastructure globally, so expect some shipping delays that are out of our control. Over 2020, shipping companies have increased their pricing by roughly 20%, as devastated as we are with this, we must adjust to keep the business alive. We try to maintain our shipping costs as best as possible to give you the best shipping rates to get our art and products to you. Thank you for your patience and support.
Upon packaging up and shipping out your order there may be delays in the following countries.
USA & EU regions - expect up to 1 month delay (Most orders are currently arriving within 6-8 weeks)
Asia regions - expect up to 1 month delay (Most orders are currently arriving within 6-8 weeks)
AU & NZ regions - expect up to 2 weeks delay (Most orders are currently arriving within 2-4 weeks)
We are doing our best to make sure you get your orders as fast as possible and exploring multiple shipping options to get our products into your house.
You are always welcome to message us on instagram or email us to check up on your order details by simply quoting your order number.
We apologise for the delays and we hope you stay safe during these times.
Thank you for your love and trust in us,
Team Cowfee


Kyaru Kiss-Cut
Regular price $8.80 USD
Tax included.
Shipping calculated at checkout.
Artwork By Cowfee//カウフィー
6" Regulars
Printed on high-quality outdoor use UV-resistant and weatherproof vinyl, satin laminate.
All characters aged 18+
To view the secret version and install instructions, head to our FAQ page
General Sticker application rules apply but here’s how you apply them properly!
Large Decal Application Instructions
Wet Application
(Messy but the safest method of application)
- Ensure surface is appropriately cleaned beforehand and weather is calm. Little wind if applying outdoors.
Use isopropyl alcohol, alcohol wipes, or a detergent to remove any dirt and oils. - Spray down surface with as much water as possible.
- Remove decal backing paper and apply as gently as possible from center outwards.
Make sure to position it how you want at this stage. - “Tack” centre of decal down firmly and hold with one hand, press down firmly using a card or Squeegee at an angle and work from center out in an arc. Work slowly and remove as much water as possible taking care not to trap any bubbles.
Work in halves and in arcs outwards - Recommended to leave on application tape as the decal adheres for a few hours before removal. Remove from largest decal area to thinnest, avoid removing directly towards thin areas.
Dry Application
(Clean but hardest method of application)
- Same as Wet Application
- Remove and trim half of backing paper
- Take your time and line it up, tack from trimmed half of backing paper.
- Same as Wet Application
- Application tape can be removed instantly
Banner Instructions
- Measure out how you want it to fit, we recommend keeping the logo under the top of the windshield at minimum and above the arrows marked on the windscreen (whatever is legal for your country for sunstrips)
Use masking tape to keep the banner centred (Align the banner vertically and horizontally, use a ruler for precise measurements) - Lift up half the banner on the long side and peel off the backing paper and trim halfway.
- Spray down the windscreen and vinyl with water thoroughly (More cant hurt)
- Place the banner down gently. Make sure all your adjustments are made at this stage before progressing.
- Tack down the centre by pressing down with your finger before firmly pushing out the water with the Seconds Please! Squeegee in the same area.
- You can continue to push out the water firmly to apply the rest of the area with the backing paper removed
- Repeat for the other side.
- Trim the banner on the top and sides leaving 5mm where the windscreen seals are.
- Press down firmly with the squeegee to get it up to the seal. Do the side sections separate from the top and trim using a razor blade sitting in the corner the seal makes with the windshield. Drag the knife towards you gently holding the same angle around 30 degrees.
Other things to consider
Use common sense! Whilst they are rated for outdoor use, don’t place them anywhere there will be extreme temperatures, take care of your girls.
Don’t put them anywhere normal stickers won't go, that is on surfaces which aren’t flat and smooth.
Take care when cleaning the surface afterwards, sharp points and corners could get lifted accidentally.
UPDATED 25th Jan, 2021
We ship out of Australia.
Due to Covid-19, logistics companies are facing stressed out infrastructure globally, so expect some shipping delays that are out of our control. Over 2020, shipping companies have increased their pricing by roughly 20%, as devastated as we are with this, we must adjust to keep the business alive. We try to maintain our shipping costs as best as possible to give you the best shipping rates to get our art and products to you. Thank you for your patience and support.
Upon packaging up and shipping out your order there may be delays in the following countries.
USA & EU regions - expect up to 1 month delay (Most orders are currently arriving within 6-8 weeks)
Asia regions - expect up to 1 month delay (Most orders are currently arriving within 6-8 weeks)
AU & NZ regions - expect up to 2 weeks delay (Most orders are currently arriving within 2-4 weeks)
We are doing our best to make sure you get your orders as fast as possible and exploring multiple shipping options to get our products into your house.
You are always welcome to message us on instagram or email us to check up on your order details by simply quoting your order number.
We apologise for the delays and we hope you stay safe during these times.
Thank you for your love and trust in us,
Team Cowfee


Pyra Mythra Chibis Kiss-Cut (Limited Edition)
Regular price $8.80 USD
Tax included.
Shipping calculated at checkout.
Artwork By Cowfee//カウフィー
Sticker measures approximately:
6" Standard
Printed on high-quality outdoor use UV-resistant and weatherproof vinyl, satin laminate.
All characters aged 18+
To view the secret version, find the code on instagram and add it on the end. Like a certain 6 digit code.
https://mega.nz/folder/lFNDwS6Y#Jv3fbpwMcjJj4tOGKu
General Sticker application rules apply but here’s how you apply them properly!
Large Decal Application Instructions
Wet Application
(Messy but the safest method of application)
- Ensure surface is appropriately cleaned beforehand and weather is calm. Little wind if applying outdoors.
Use isopropyl alcohol, alcohol wipes, or a detergent to remove any dirt and oils. - Spray down surface with as much water as possible.
- Remove decal backing paper and apply as gently as possible from center outwards.
Make sure to position it how you want at this stage. - “Tack” centre of decal down firmly and hold with one hand, press down firmly using a card or Squeegee at an angle and work from center out in an arc. Work slowly and remove as much water as possible taking care not to trap any bubbles.
Work in halves and in arcs outwards - Recommended to leave on application tape as the decal adheres for a few hours before removal. Remove from largest decal area to thinnest, avoid removing directly towards thin areas.
Dry Application
(Clean but hardest method of application)
- Same as Wet Application
- Remove and trim half of backing paper
- Take your time and line it up, tack from trimmed half of backing paper.
- Same as Wet Application
- Application tape can be removed instantly
Banner Instructions
- Measure out how you want it to fit, we recommend keeping the logo under the top of the windshield at minimum and above the arrows marked on the windscreen (whatever is legal for your country for sunstrips)
Use masking tape to keep the banner centred (Align the banner vertically and horizontally, use a ruler for precise measurements) - Lift up half the banner on the long side and peel off the backing paper and trim halfway.
- Spray down the windscreen and vinyl with water thoroughly (More cant hurt)
- Place the banner down gently. Make sure all your adjustments are made at this stage before progressing.
- Tack down the centre by pressing down with your finger before firmly pushing out the water with the Seconds Please! Squeegee in the same area.
- You can continue to push out the water firmly to apply the rest of the area with the backing paper removed
- Repeat for the other side.
- Trim the banner on the top and sides leaving 5mm where the windscreen seals are.
- Press down firmly with the squeegee to get it up to the seal. Do the side sections separate from the top and trim using a razor blade sitting in the corner the seal makes with the windshield. Drag the knife towards you gently holding the same angle around 30 degrees.
Other things to consider
Use common sense! Whilst they are rated for outdoor use, don’t place them anywhere there will be extreme temperatures, take care of your girls.
Don’t put them anywhere normal stickers won't go, that is on surfaces which aren’t flat and smooth.
Take care when cleaning the surface afterwards, sharp points and corners could get lifted accidentally.
UPDATED 25th Jan, 2021
We ship out of Australia.
Due to Covid-19, logistics companies are facing stressed out infrastructure globally, so expect some shipping delays that are out of our control. Over 2020, shipping companies have increased their pricing by roughly 20%, as devastated as we are with this, we must adjust to keep the business alive. We try to maintain our shipping costs as best as possible to give you the best shipping rates to get our art and products to you. Thank you for your patience and support.
Upon packaging up and shipping out your order there may be delays in the following countries.
USA & EU regions - expect up to 1 month delay (Most orders are currently arriving within 6-8 weeks)
Asia regions - expect up to 1 month delay (Most orders are currently arriving within 6-8 weeks)
AU & NZ regions - expect up to 2 weeks delay (Most orders are currently arriving within 2-4 weeks)
We are doing our best to make sure you get your orders as fast as possible and exploring multiple shipping options to get our products into your house.
You are always welcome to message us on instagram or email us to check up on your order details by simply quoting your order number.
We apologise for the delays and we hope you stay safe during these times.
Thank you for your love and trust in us,
Team Cowfee

Mayu Mechanic Kiss-Cut (Limited Edition)
Regular price $8.80 USD
Tax included.
Shipping calculated at checkout.
Artwork By Cowfee//カウフィー
Sticker measures approximately:
5.5" Standard
Printed on high-quality outdoor use UV-resistant and weatherproof vinyl, satin laminate.
All characters aged 18+
To view the secret version, find the code on instagram and add it on the end. Like a certain 6 digit code.
https://mega.nz/folder/lFNDwS6Y#Jv3fbpwMcjJj4tOGKu
General Sticker application rules apply but here’s how you apply them properly!
Large Decal Application Instructions
Wet Application
(Messy but the safest method of application)
- Ensure surface is appropriately cleaned beforehand and weather is calm. Little wind if applying outdoors.
Use isopropyl alcohol, alcohol wipes, or a detergent to remove any dirt and oils. - Spray down surface with as much water as possible.
- Remove decal backing paper and apply as gently as possible from center outwards.
Make sure to position it how you want at this stage. - “Tack” centre of decal down firmly and hold with one hand, press down firmly using a card or Squeegee at an angle and work from center out in an arc. Work slowly and remove as much water as possible taking care not to trap any bubbles.
Work in halves and in arcs outwards - Recommended to leave on application tape as the decal adheres for a few hours before removal. Remove from largest decal area to thinnest, avoid removing directly towards thin areas.
Dry Application
(Clean but hardest method of application)
- Same as Wet Application
- Remove and trim half of backing paper
- Take your time and line it up, tack from trimmed half of backing paper.
- Same as Wet Application
- Application tape can be removed instantly
Banner Instructions
- Measure out how you want it to fit, we recommend keeping the logo under the top of the windshield at minimum and above the arrows marked on the windscreen (whatever is legal for your country for sunstrips)
Use masking tape to keep the banner centred (Align the banner vertically and horizontally, use a ruler for precise measurements) - Lift up half the banner on the long side and peel off the backing paper and trim halfway.
- Spray down the windscreen and vinyl with water thoroughly (More cant hurt)
- Place the banner down gently. Make sure all your adjustments are made at this stage before progressing.
- Tack down the centre by pressing down with your finger before firmly pushing out the water with the Seconds Please! Squeegee in the same area.
- You can continue to push out the water firmly to apply the rest of the area with the backing paper removed
- Repeat for the other side.
- Trim the banner on the top and sides leaving 5mm where the windscreen seals are.
- Press down firmly with the squeegee to get it up to the seal. Do the side sections separate from the top and trim using a razor blade sitting in the corner the seal makes with the windshield. Drag the knife towards you gently holding the same angle around 30 degrees.
Other things to consider
Use common sense! Whilst they are rated for outdoor use, don’t place them anywhere there will be extreme temperatures, take care of your girls.
Don’t put them anywhere normal stickers won't go, that is on surfaces which aren’t flat and smooth.
Take care when cleaning the surface afterwards, sharp points and corners could get lifted accidentally.
UPDATED 25th Jan, 2021
We ship out of Australia.
Due to Covid-19, logistics companies are facing stressed out infrastructure globally, so expect some shipping delays that are out of our control. Over 2020, shipping companies have increased their pricing by roughly 20%, as devastated as we are with this, we must adjust to keep the business alive. We try to maintain our shipping costs as best as possible to give you the best shipping rates to get our art and products to you. Thank you for your patience and support.
Upon packaging up and shipping out your order there may be delays in the following countries.
USA & EU regions - expect up to 1 month delay (Most orders are currently arriving within 6-8 weeks)
Asia regions - expect up to 1 month delay (Most orders are currently arriving within 6-8 weeks)
AU & NZ regions - expect up to 2 weeks delay (Most orders are currently arriving within 2-4 weeks)
We are doing our best to make sure you get your orders as fast as possible and exploring multiple shipping options to get our products into your house.
You are always welcome to message us on instagram or email us to check up on your order details by simply quoting your order number.
We apologise for the delays and we hope you stay safe during these times.
Thank you for your love and trust in us,
Team Cowfee


Were Raph Kiss-Cut
Regular price $8.80 USD
Tax included.
Shipping calculated at checkout.
Artwork By Cowfee//カウフィー
Sticker measures approximately:
5.5" Standard
Printed on high-quality outdoor use UV-resistant and weatherproof vinyl, satin laminate.
All characters aged 18+
To view the secret version and install instructions, head to our FAQ page
General Sticker application rules apply but here’s how you apply them properly!
Large Decal Application Instructions
Wet Application
(Messy but the safest method of application)
- Ensure surface is appropriately cleaned beforehand and weather is calm. Little wind if applying outdoors.
Use isopropyl alcohol, alcohol wipes, or a detergent to remove any dirt and oils. - Spray down surface with as much water as possible.
- Remove decal backing paper and apply as gently as possible from center outwards.
Make sure to position it how you want at this stage. - “Tack” centre of decal down firmly and hold with one hand, press down firmly using a card or Squeegee at an angle and work from center out in an arc. Work slowly and remove as much water as possible taking care not to trap any bubbles.
Work in halves and in arcs outwards - Recommended to leave on application tape as the decal adheres for a few hours before removal. Remove from largest decal area to thinnest, avoid removing directly towards thin areas.
Dry Application
(Clean but hardest method of application)
- Same as Wet Application
- Remove and trim half of backing paper
- Take your time and line it up, tack from trimmed half of backing paper.
- Same as Wet Application
- Application tape can be removed instantly
Banner Instructions
- Measure out how you want it to fit, we recommend keeping the logo under the top of the windshield at minimum and above the arrows marked on the windscreen (whatever is legal for your country for sunstrips)
Use masking tape to keep the banner centred (Align the banner vertically and horizontally, use a ruler for precise measurements) - Lift up half the banner on the long side and peel off the backing paper and trim halfway.
- Spray down the windscreen and vinyl with water thoroughly (More cant hurt)
- Place the banner down gently. Make sure all your adjustments are made at this stage before progressing.
- Tack down the centre by pressing down with your finger before firmly pushing out the water with the Seconds Please! Squeegee in the same area.
- You can continue to push out the water firmly to apply the rest of the area with the backing paper removed
- Repeat for the other side.
- Trim the banner on the top and sides leaving 5mm where the windscreen seals are.
- Press down firmly with the squeegee to get it up to the seal. Do the side sections separate from the top and trim using a razor blade sitting in the corner the seal makes with the windshield. Drag the knife towards you gently holding the same angle around 30 degrees.
Other things to consider
Use common sense! Whilst they are rated for outdoor use, don’t place them anywhere there will be extreme temperatures, take care of your girls.
Don’t put them anywhere normal stickers won't go, that is on surfaces which aren’t flat and smooth.
Take care when cleaning the surface afterwards, sharp points and corners could get lifted accidentally.
UPDATED 25th Jan, 2021
We ship out of Australia.
Due to Covid-19, logistics companies are facing stressed out infrastructure globally, so expect some shipping delays that are out of our control. Over 2020, shipping companies have increased their pricing by roughly 20%, as devastated as we are with this, we must adjust to keep the business alive. We try to maintain our shipping costs as best as possible to give you the best shipping rates to get our art and products to you. Thank you for your patience and support.
Upon packaging up and shipping out your order there may be delays in the following countries.
USA & EU regions - expect up to 1 month delay (Most orders are currently arriving within 6-8 weeks)
Asia regions - expect up to 1 month delay (Most orders are currently arriving within 6-8 weeks)
AU & NZ regions - expect up to 2 weeks delay (Most orders are currently arriving within 2-4 weeks)
We are doing our best to make sure you get your orders as fast as possible and exploring multiple shipping options to get our products into your house.
You are always welcome to message us on instagram or email us to check up on your order details by simply quoting your order number.
We apologise for the delays and we hope you stay safe during these times.
Thank you for your love and trust in us,
Team Cowfee


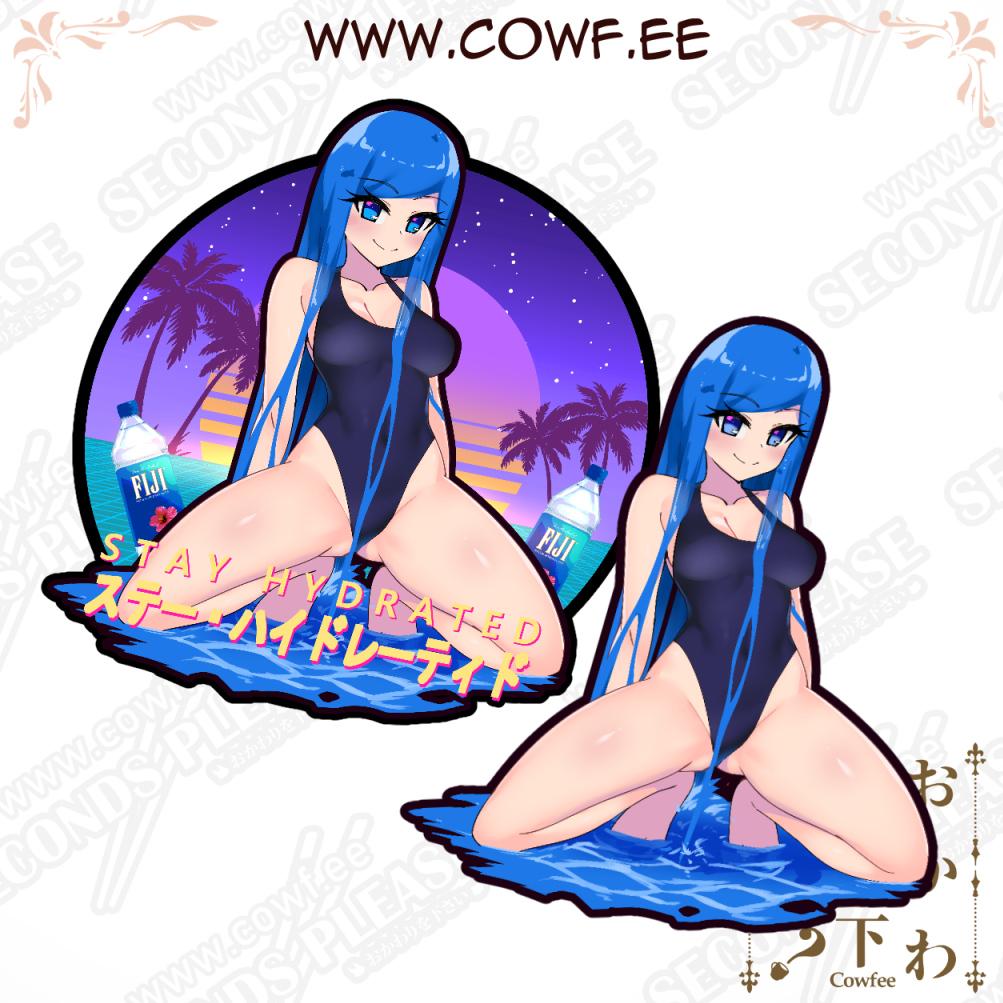

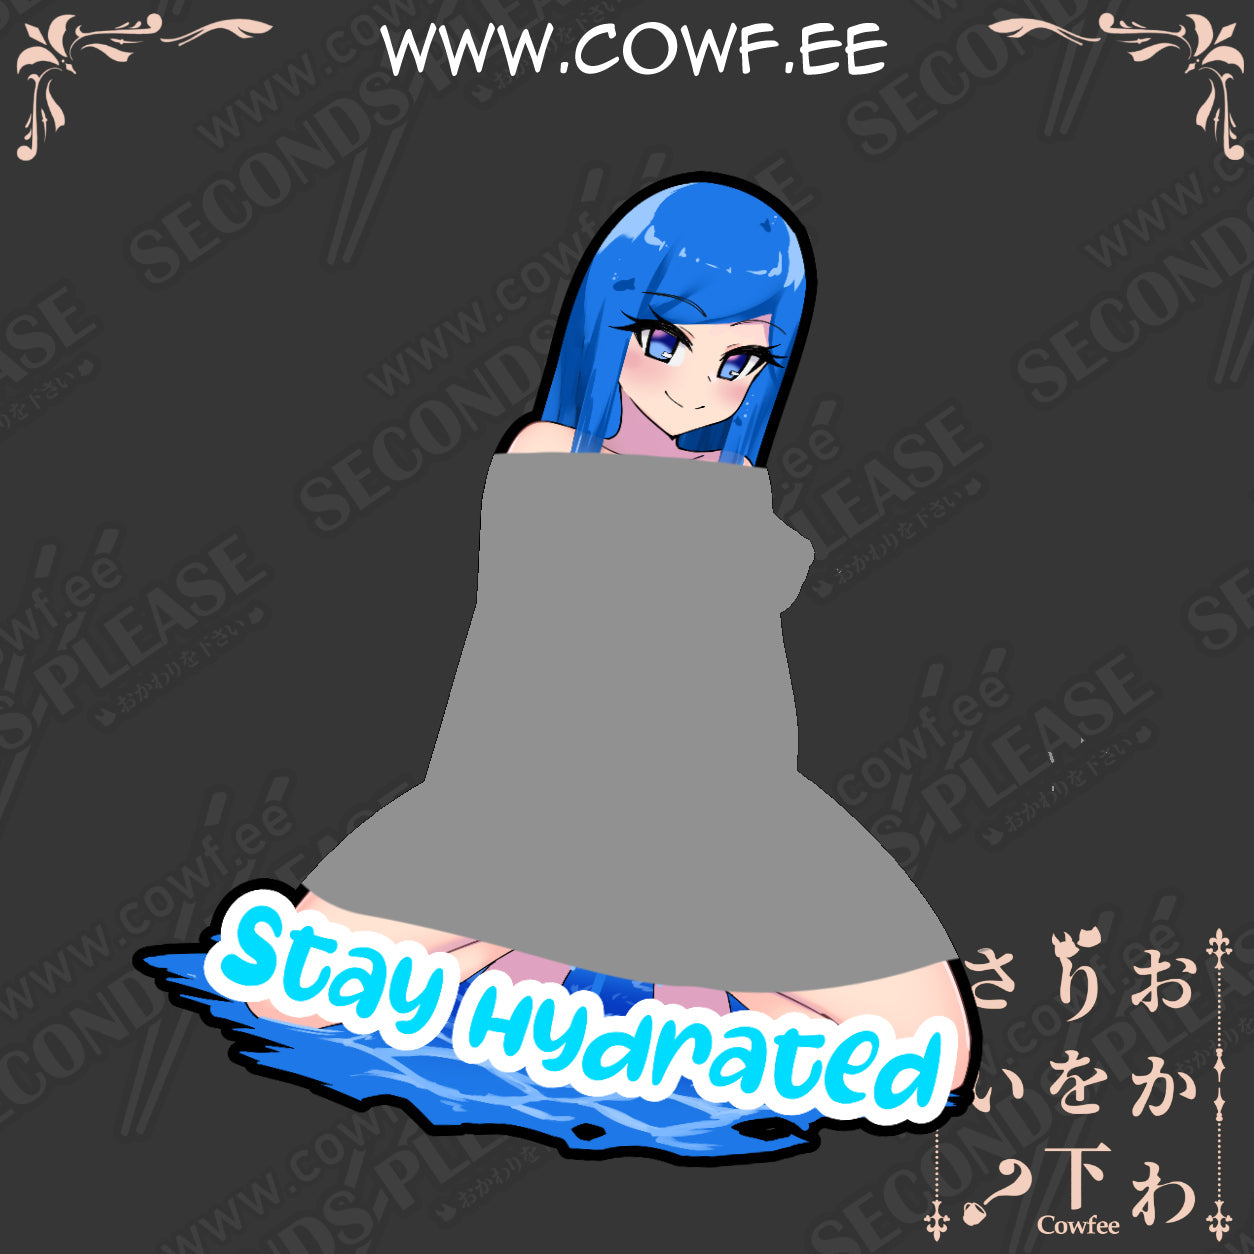
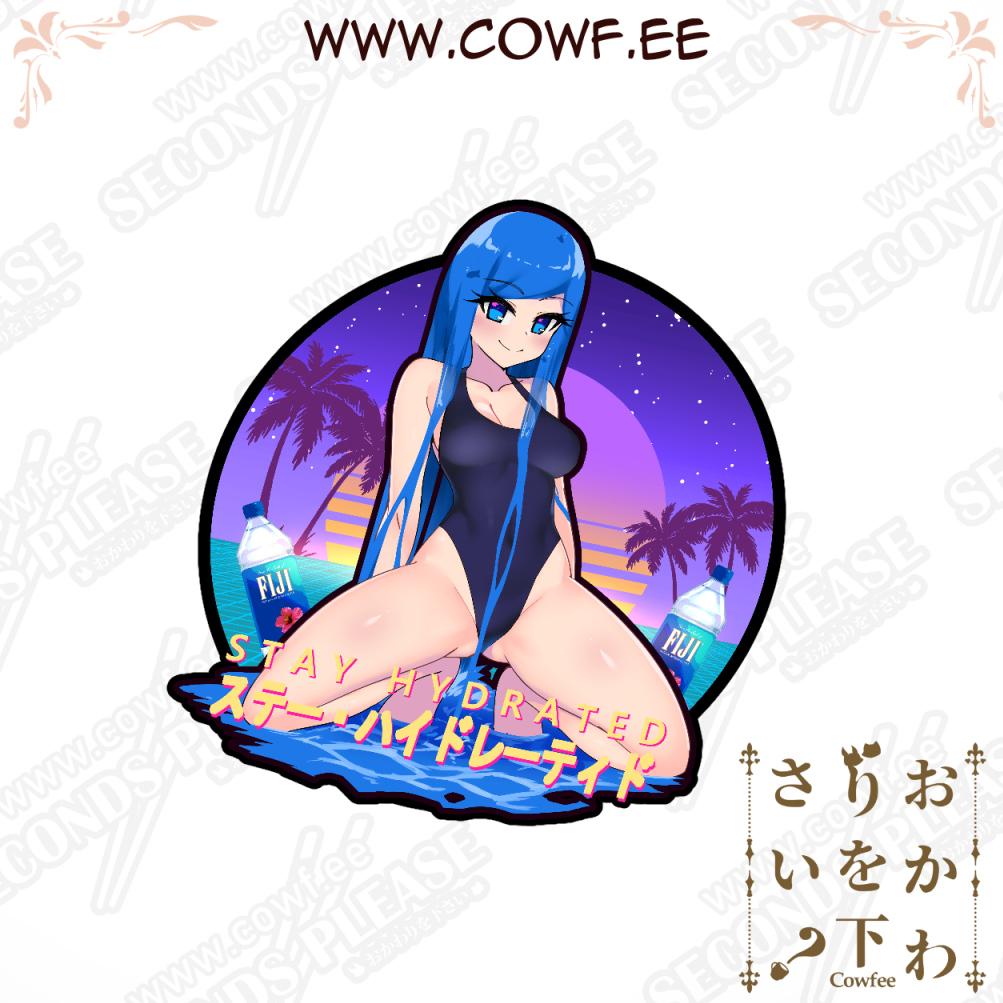
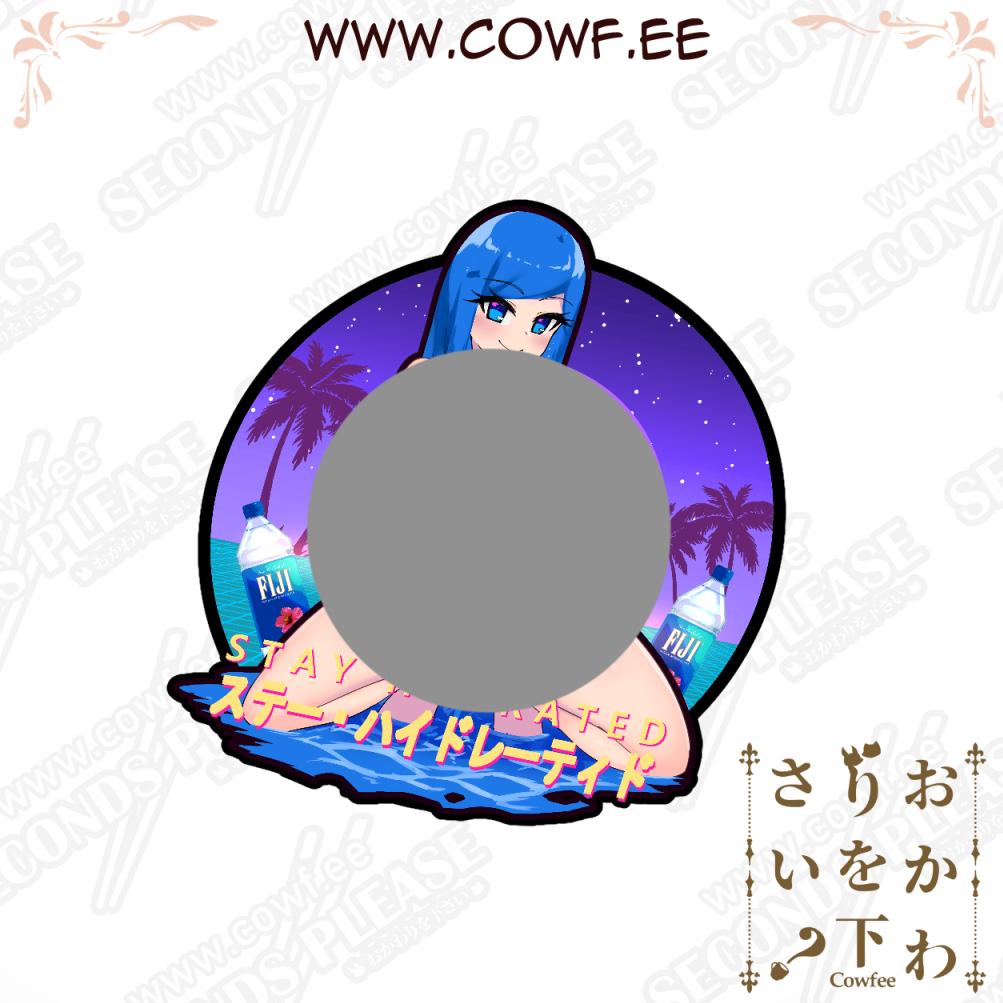
Water Chan Kiss-Cut
Regular price $8.80 USD
Tax included.
Shipping calculated at checkout.
Artwork By Cowfee//カウフィー
Original Artwork by Cowfee
Sticker measures approximately 5.5" tall , Vaporwave 5" x 4"
Printed on high-quality outdoor use UV-resistant and weatherproof vinyl, satin laminate.
All characters aged 18+
To view the secret version and install instructions, head to our FAQ page
General Sticker application rules apply but here’s how you apply them properly!
Large Decal Application Instructions
Wet Application
(Messy but the safest method of application)
- Ensure surface is appropriately cleaned beforehand and weather is calm. Little wind if applying outdoors.
Use isopropyl alcohol, alcohol wipes, or a detergent to remove any dirt and oils. - Spray down surface with as much water as possible.
- Remove decal backing paper and apply as gently as possible from center outwards.
Make sure to position it how you want at this stage. - “Tack” centre of decal down firmly and hold with one hand, press down firmly using a card or Squeegee at an angle and work from center out in an arc. Work slowly and remove as much water as possible taking care not to trap any bubbles.
Work in halves and in arcs outwards - Recommended to leave on application tape as the decal adheres for a few hours before removal. Remove from largest decal area to thinnest, avoid removing directly towards thin areas.
Dry Application
(Clean but hardest method of application)
- Same as Wet Application
- Remove and trim half of backing paper
- Take your time and line it up, tack from trimmed half of backing paper.
- Same as Wet Application
- Application tape can be removed instantly
Banner Instructions
- Measure out how you want it to fit, we recommend keeping the logo under the top of the windshield at minimum and above the arrows marked on the windscreen (whatever is legal for your country for sunstrips)
Use masking tape to keep the banner centred (Align the banner vertically and horizontally, use a ruler for precise measurements) - Lift up half the banner on the long side and peel off the backing paper and trim halfway.
- Spray down the windscreen and vinyl with water thoroughly (More cant hurt)
- Place the banner down gently. Make sure all your adjustments are made at this stage before progressing.
- Tack down the centre by pressing down with your finger before firmly pushing out the water with the Seconds Please! Squeegee in the same area.
- You can continue to push out the water firmly to apply the rest of the area with the backing paper removed
- Repeat for the other side.
- Trim the banner on the top and sides leaving 5mm where the windscreen seals are.
- Press down firmly with the squeegee to get it up to the seal. Do the side sections separate from the top and trim using a razor blade sitting in the corner the seal makes with the windshield. Drag the knife towards you gently holding the same angle around 30 degrees.
Other things to consider
Use common sense! Whilst they are rated for outdoor use, don’t place them anywhere there will be extreme temperatures, take care of your girls.
Don’t put them anywhere normal stickers won't go, that is on surfaces which aren’t flat and smooth.
Take care when cleaning the surface afterwards, sharp points and corners could get lifted accidentally.
UPDATED 25th Jan, 2021
We ship out of Australia.
Due to Covid-19, logistics companies are facing stressed out infrastructure globally, so expect some shipping delays that are out of our control. Over 2020, shipping companies have increased their pricing by roughly 20%, as devastated as we are with this, we must adjust to keep the business alive. We try to maintain our shipping costs as best as possible to give you the best shipping rates to get our art and products to you. Thank you for your patience and support.
Upon packaging up and shipping out your order there may be delays in the following countries.
USA & EU regions - expect up to 1 month delay (Most orders are currently arriving within 6-8 weeks)
Asia regions - expect up to 1 month delay (Most orders are currently arriving within 6-8 weeks)
AU & NZ regions - expect up to 2 weeks delay (Most orders are currently arriving within 2-4 weeks)
We are doing our best to make sure you get your orders as fast as possible and exploring multiple shipping options to get our products into your house.
You are always welcome to message us on instagram or email us to check up on your order details by simply quoting your order number.
We apologise for the delays and we hope you stay safe during these times.
Thank you for your love and trust in us,
Team Cowfee


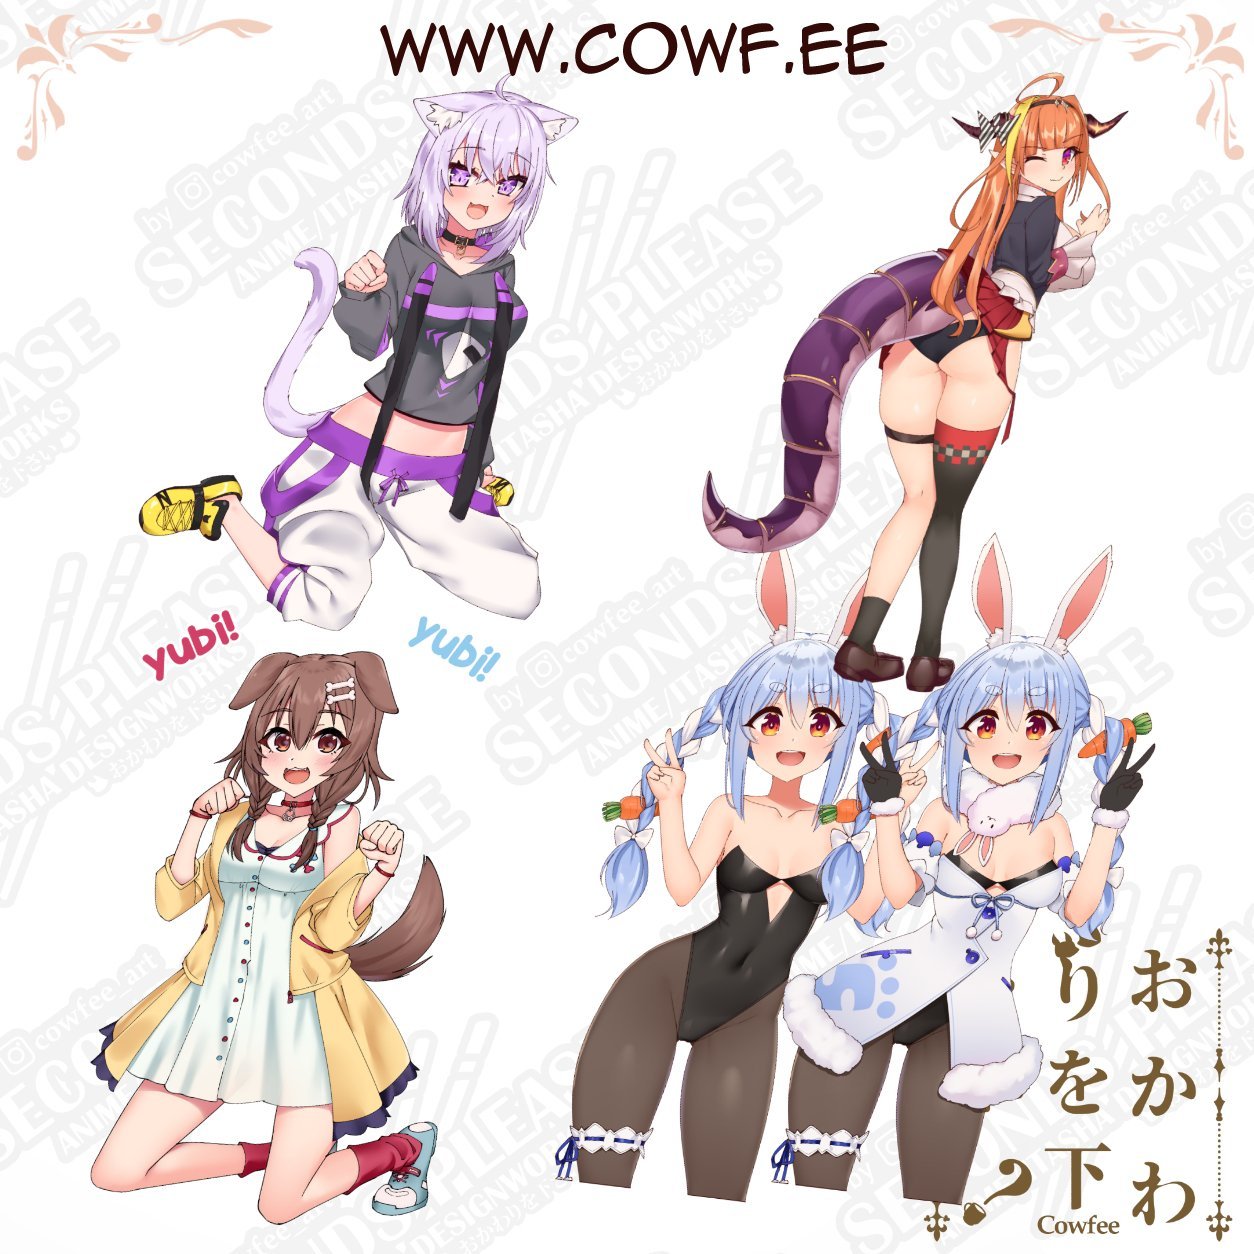
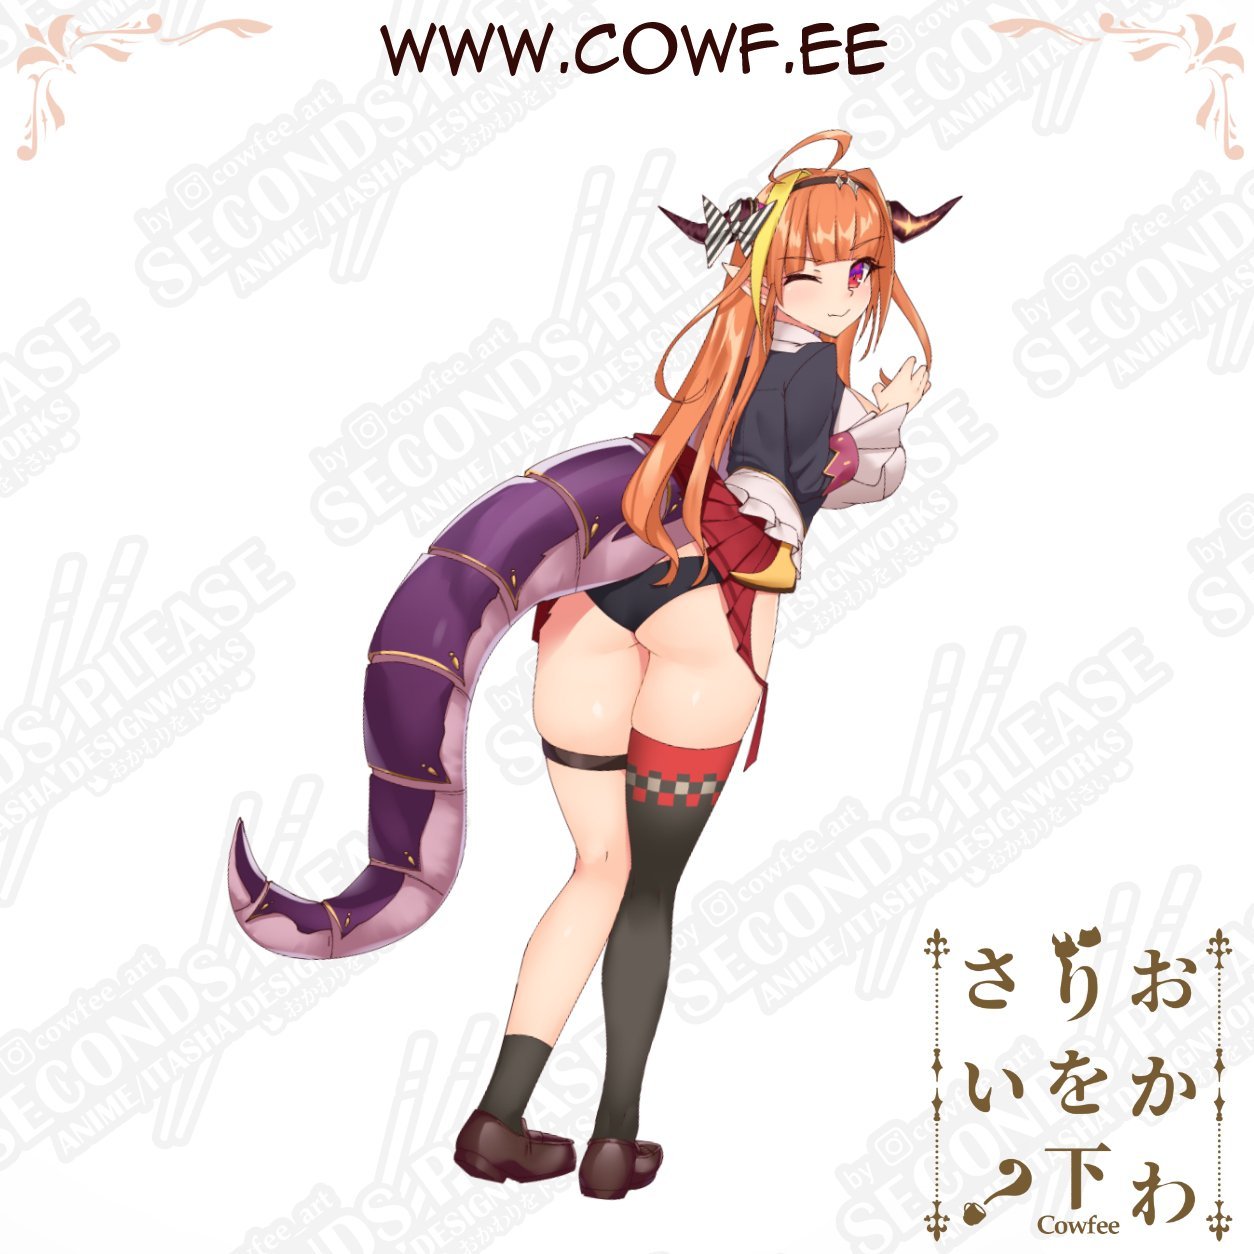
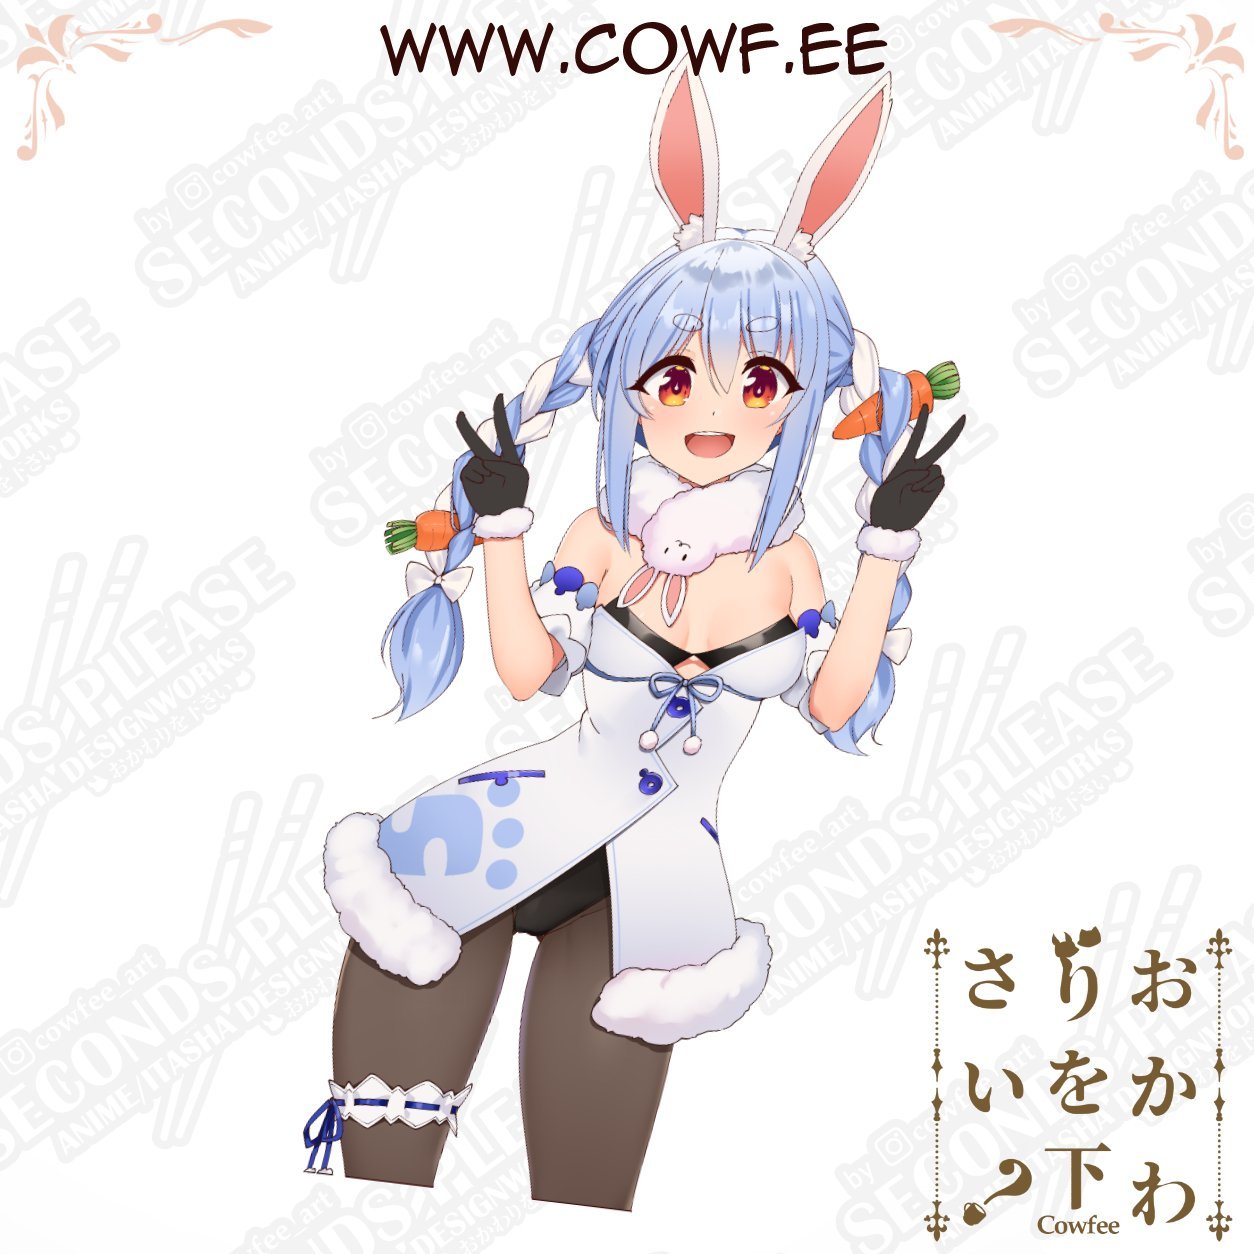


Idol SFW Kiss-Cut
Regular price $8.80 USD
Tax included.
Shipping calculated at checkout.
Artwork By Cowfee//カウフィー
Sticker measures approximately 5.5" tall
5.5" K
6" P
5.5" O
6" C
Printed on high-quality outdoor use UV-resistant and weatherproof vinyl, satin laminate.
All characters aged 18+
General Sticker application rules apply but here’s how you apply them properly!
Large Decal Application Instructions
Wet Application
(Messy but the safest method of application)
- Ensure surface is appropriately cleaned beforehand and weather is calm. Little wind if applying outdoors.
Use isopropyl alcohol, alcohol wipes, or a detergent to remove any dirt and oils. - Spray down surface with as much water as possible.
- Remove decal backing paper and apply as gently as possible from center outwards.
Make sure to position it how you want at this stage. - “Tack” centre of decal down firmly and hold with one hand, press down firmly using a card or Squeegee at an angle and work from center out in an arc. Work slowly and remove as much water as possible taking care not to trap any bubbles.
Work in halves and in arcs outwards - Recommended to leave on application tape as the decal adheres for a few hours before removal. Remove from largest decal area to thinnest, avoid removing directly towards thin areas.
Dry Application
(Clean but hardest method of application)
- Same as Wet Application
- Remove and trim half of backing paper
- Take your time and line it up, tack from trimmed half of backing paper.
- Same as Wet Application
- Application tape can be removed instantly
Banner Instructions
- Measure out how you want it to fit, we recommend keeping the logo under the top of the windshield at minimum and above the arrows marked on the windscreen (whatever is legal for your country for sunstrips)
Use masking tape to keep the banner centred (Align the banner vertically and horizontally, use a ruler for precise measurements) - Lift up half the banner on the long side and peel off the backing paper and trim halfway.
- Spray down the windscreen and vinyl with water thoroughly (More cant hurt)
- Place the banner down gently. Make sure all your adjustments are made at this stage before progressing.
- Tack down the centre by pressing down with your finger before firmly pushing out the water with the Seconds Please! Squeegee in the same area.
- You can continue to push out the water firmly to apply the rest of the area with the backing paper removed
- Repeat for the other side.
- Trim the banner on the top and sides leaving 5mm where the windscreen seals are.
- Press down firmly with the squeegee to get it up to the seal. Do the side sections separate from the top and trim using a razor blade sitting in the corner the seal makes with the windshield. Drag the knife towards you gently holding the same angle around 30 degrees.
Other things to consider
Use common sense! Whilst they are rated for outdoor use, don’t place them anywhere there will be extreme temperatures, take care of your girls.
Don’t put them anywhere normal stickers won't go, that is on surfaces which aren’t flat and smooth.
Take care when cleaning the surface afterwards, sharp points and corners could get lifted accidentally.
UPDATED 25th Jan, 2021
We ship out of Australia.
Due to Covid-19, logistics companies are facing stressed out infrastructure globally, so expect some shipping delays that are out of our control. Over 2020, shipping companies have increased their pricing by roughly 20%, as devastated as we are with this, we must adjust to keep the business alive. We try to maintain our shipping costs as best as possible to give you the best shipping rates to get our art and products to you. Thank you for your patience and support.
Upon packaging up and shipping out your order there may be delays in the following countries.
USA & EU regions - expect up to 1 month delay (Most orders are currently arriving within 6-8 weeks)
Asia regions - expect up to 1 month delay (Most orders are currently arriving within 6-8 weeks)
AU & NZ regions - expect up to 2 weeks delay (Most orders are currently arriving within 2-4 weeks)
We are doing our best to make sure you get your orders as fast as possible and exploring multiple shipping options to get our products into your house.
You are always welcome to message us on instagram or email us to check up on your order details by simply quoting your order number.
We apologise for the delays and we hope you stay safe during these times.
Thank you for your love and trust in us,
Team Cowfee


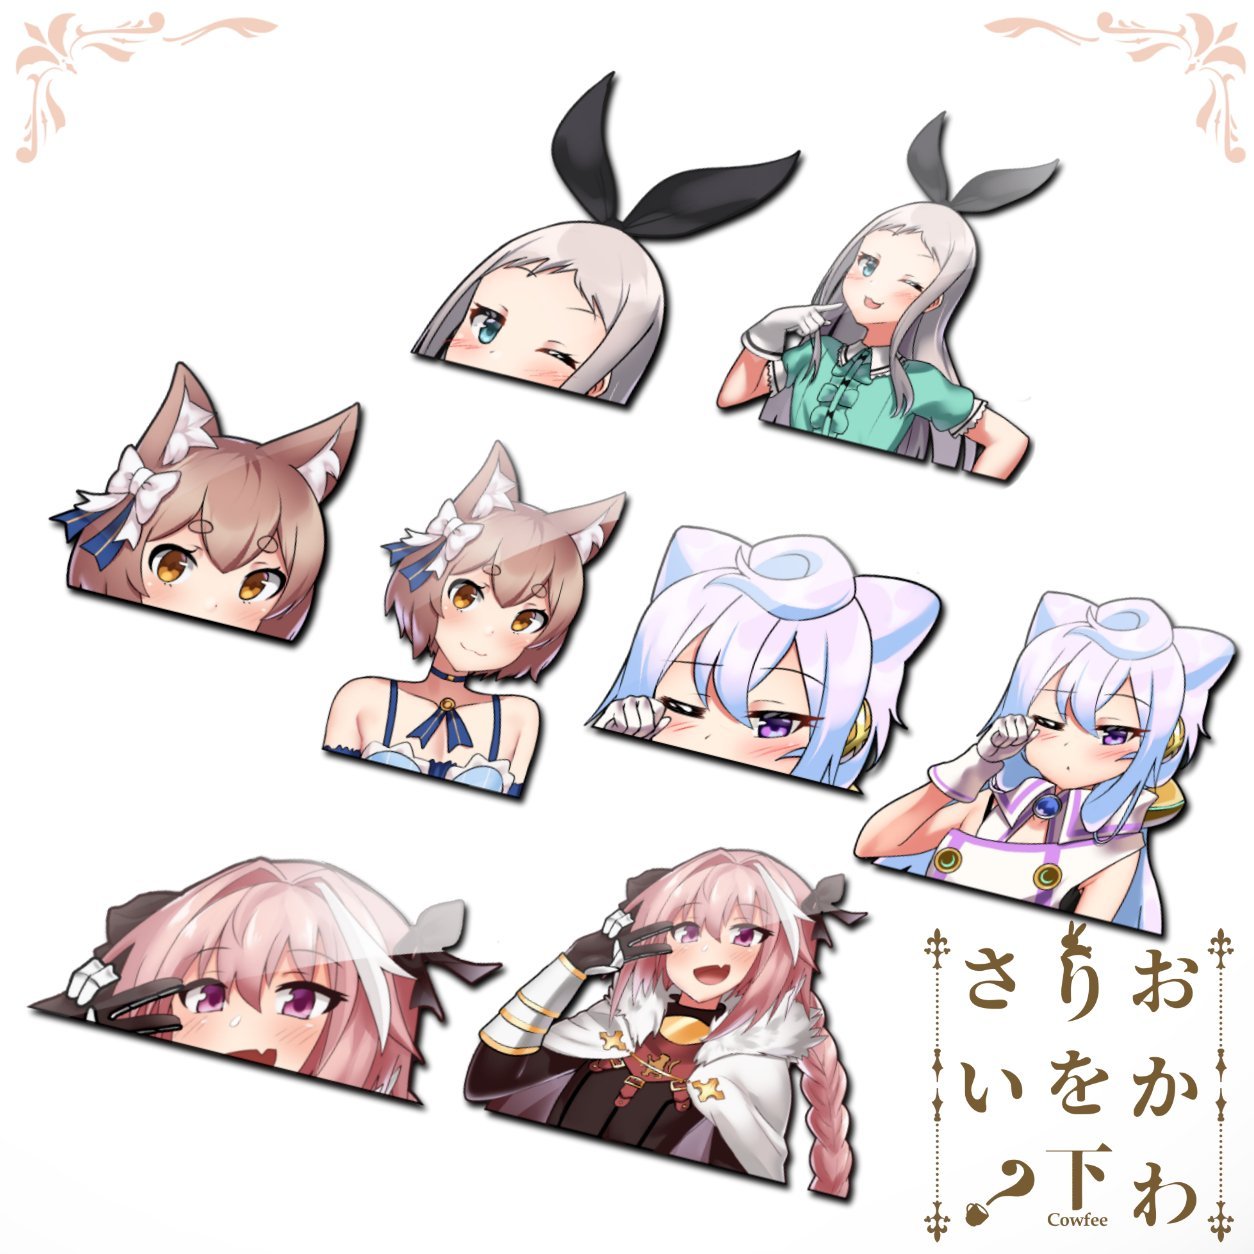
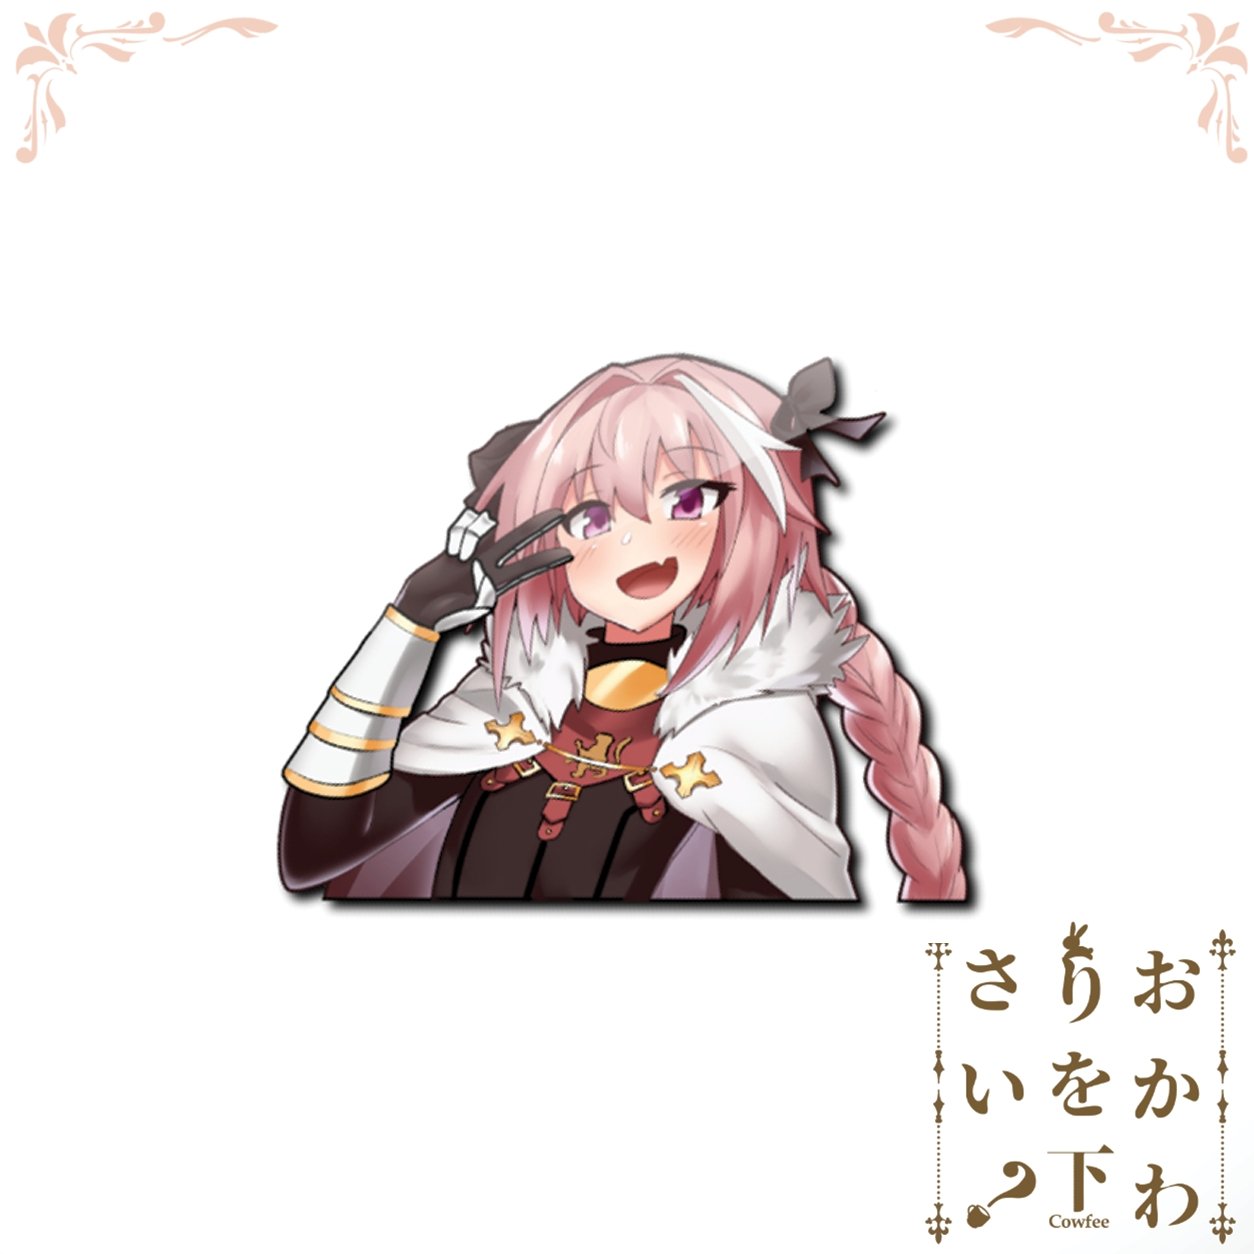

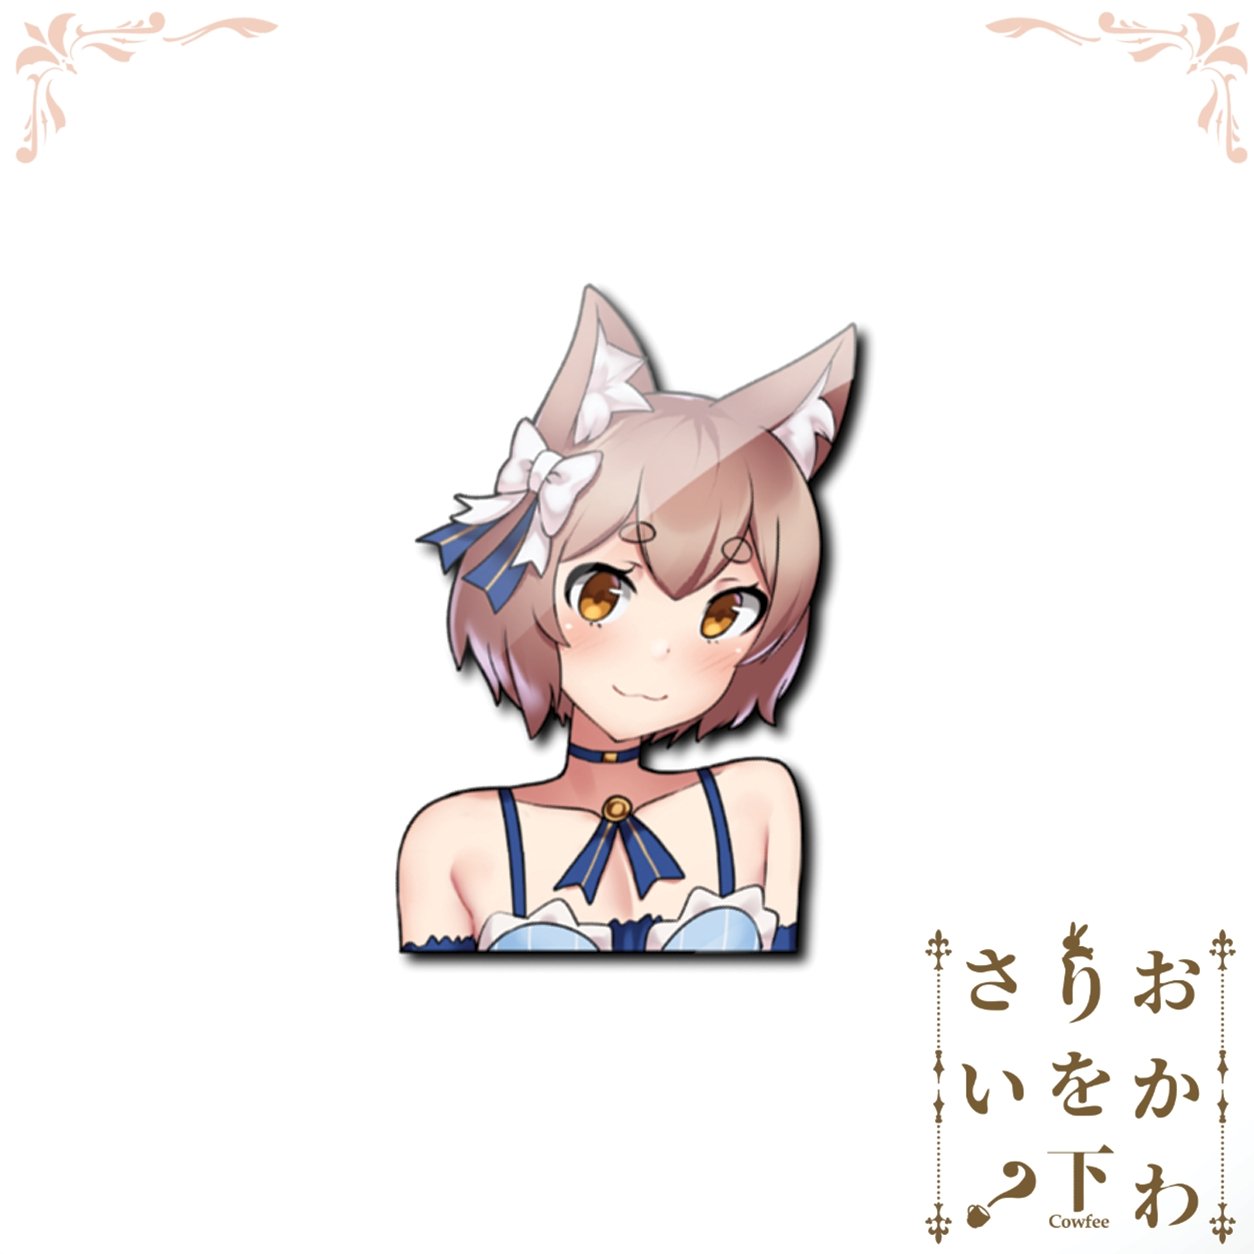
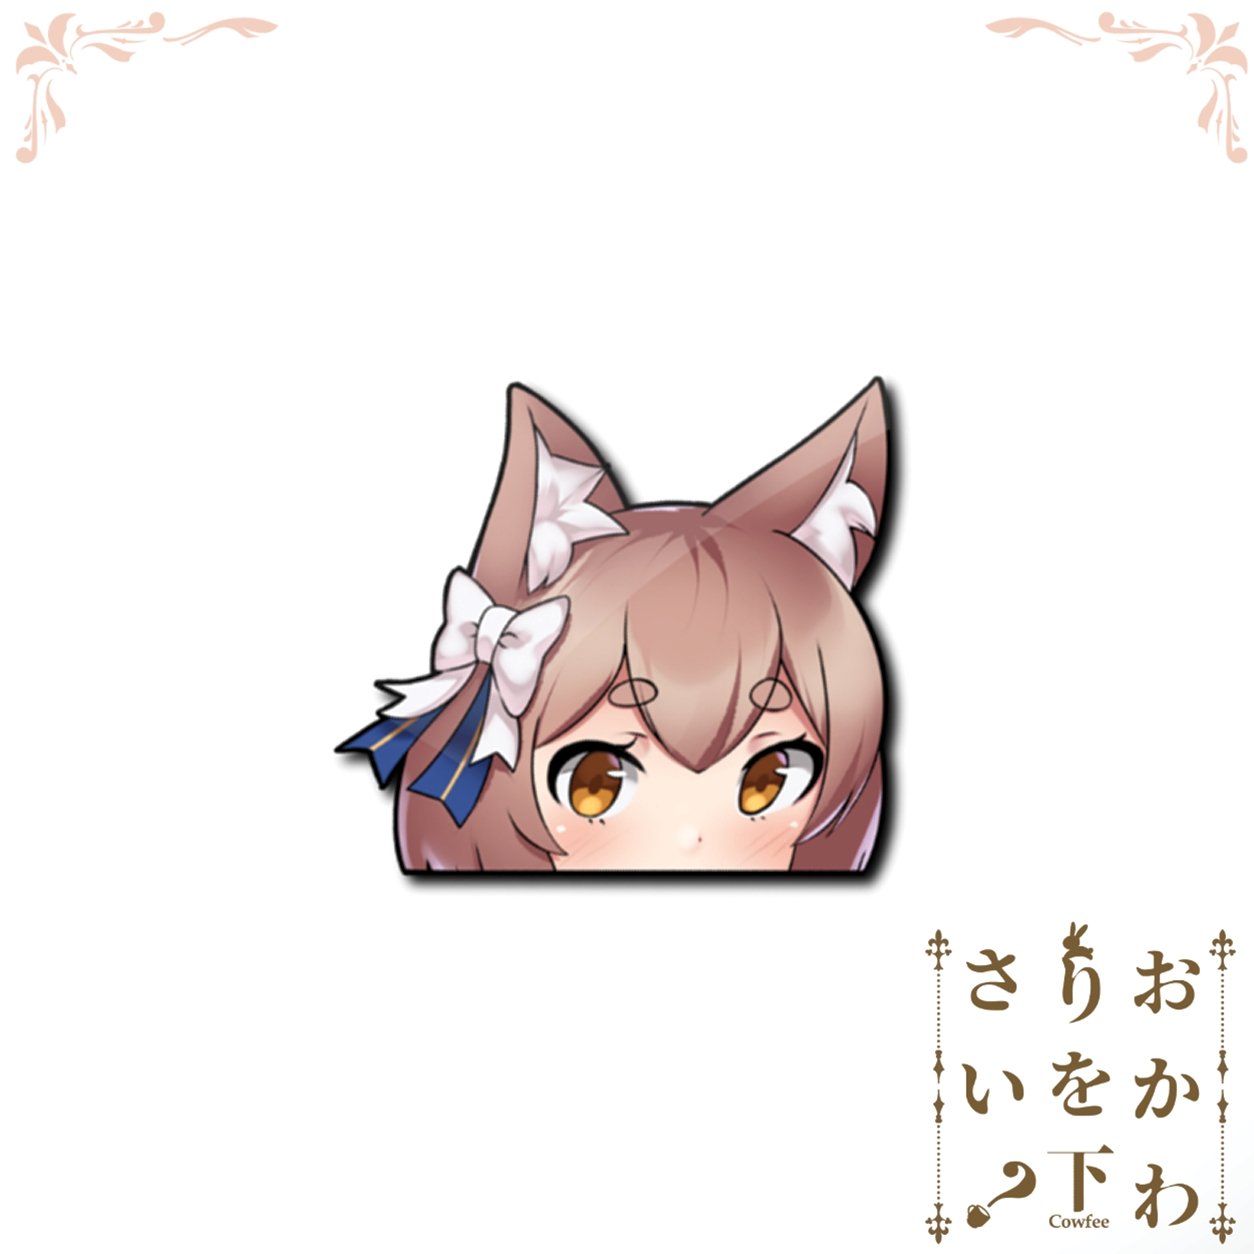
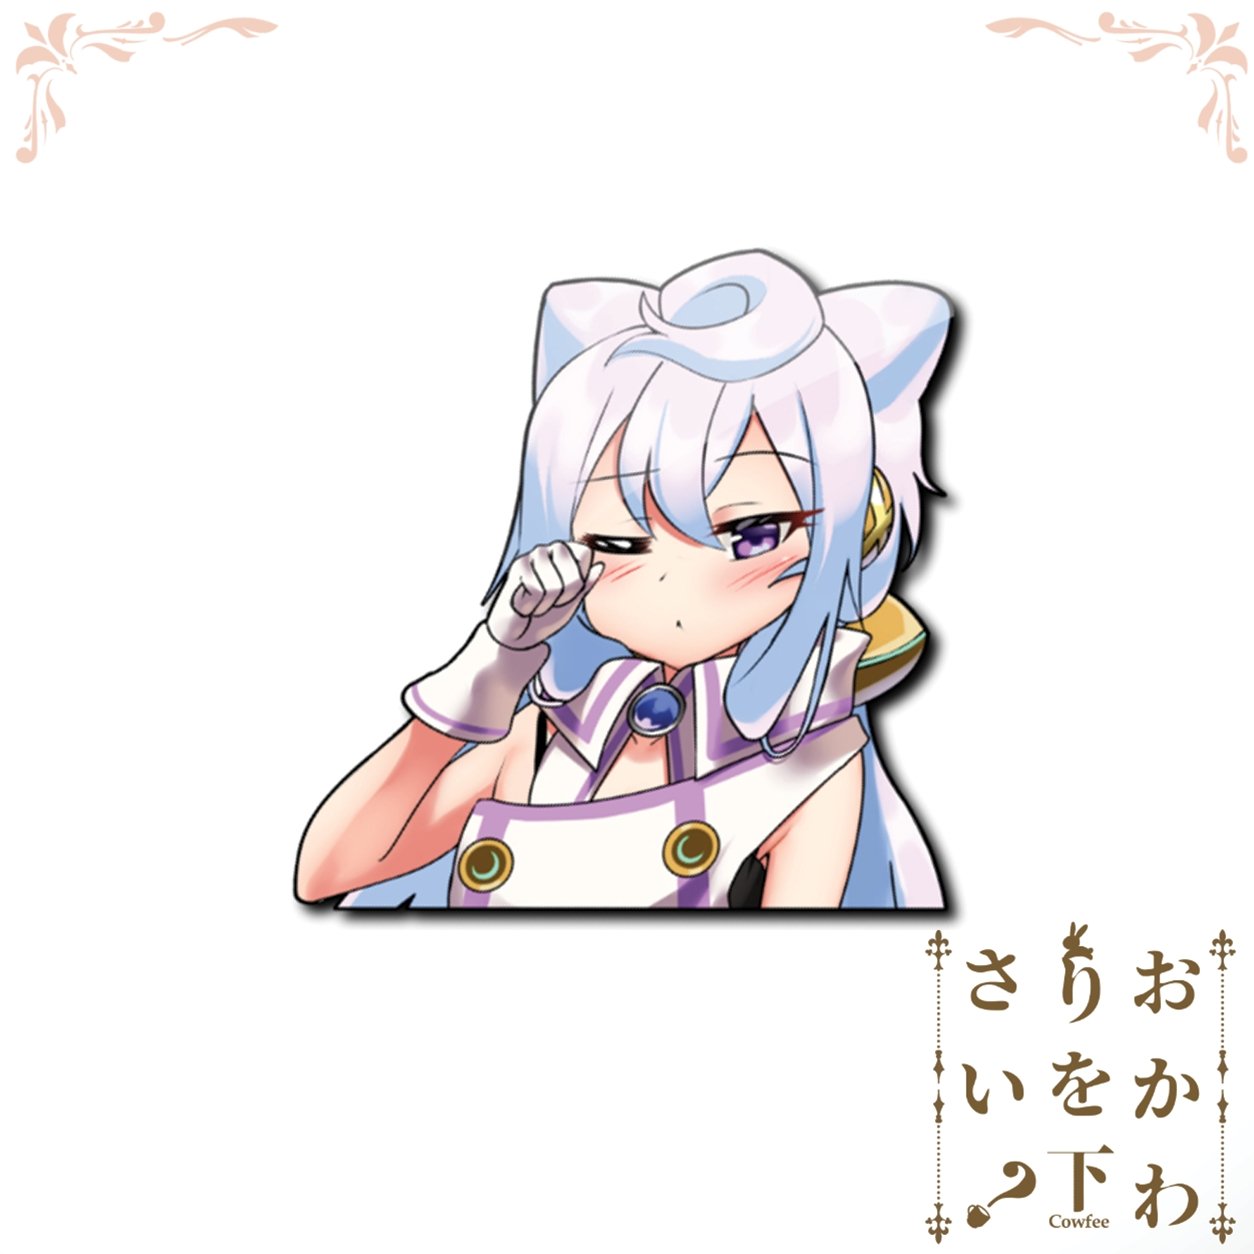
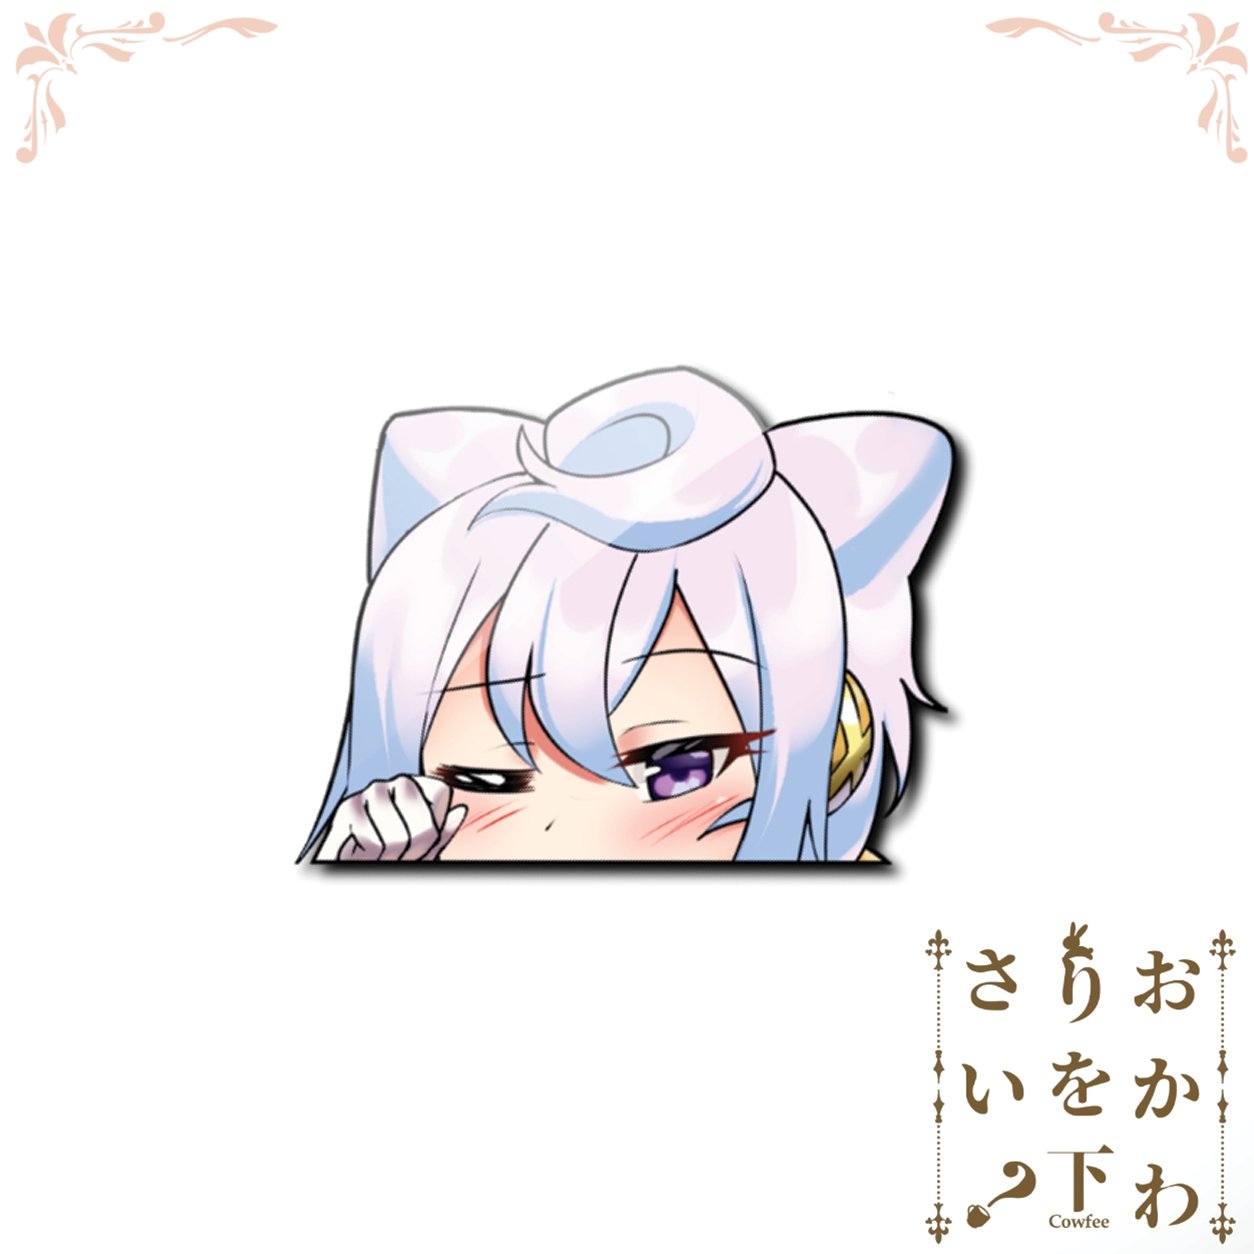

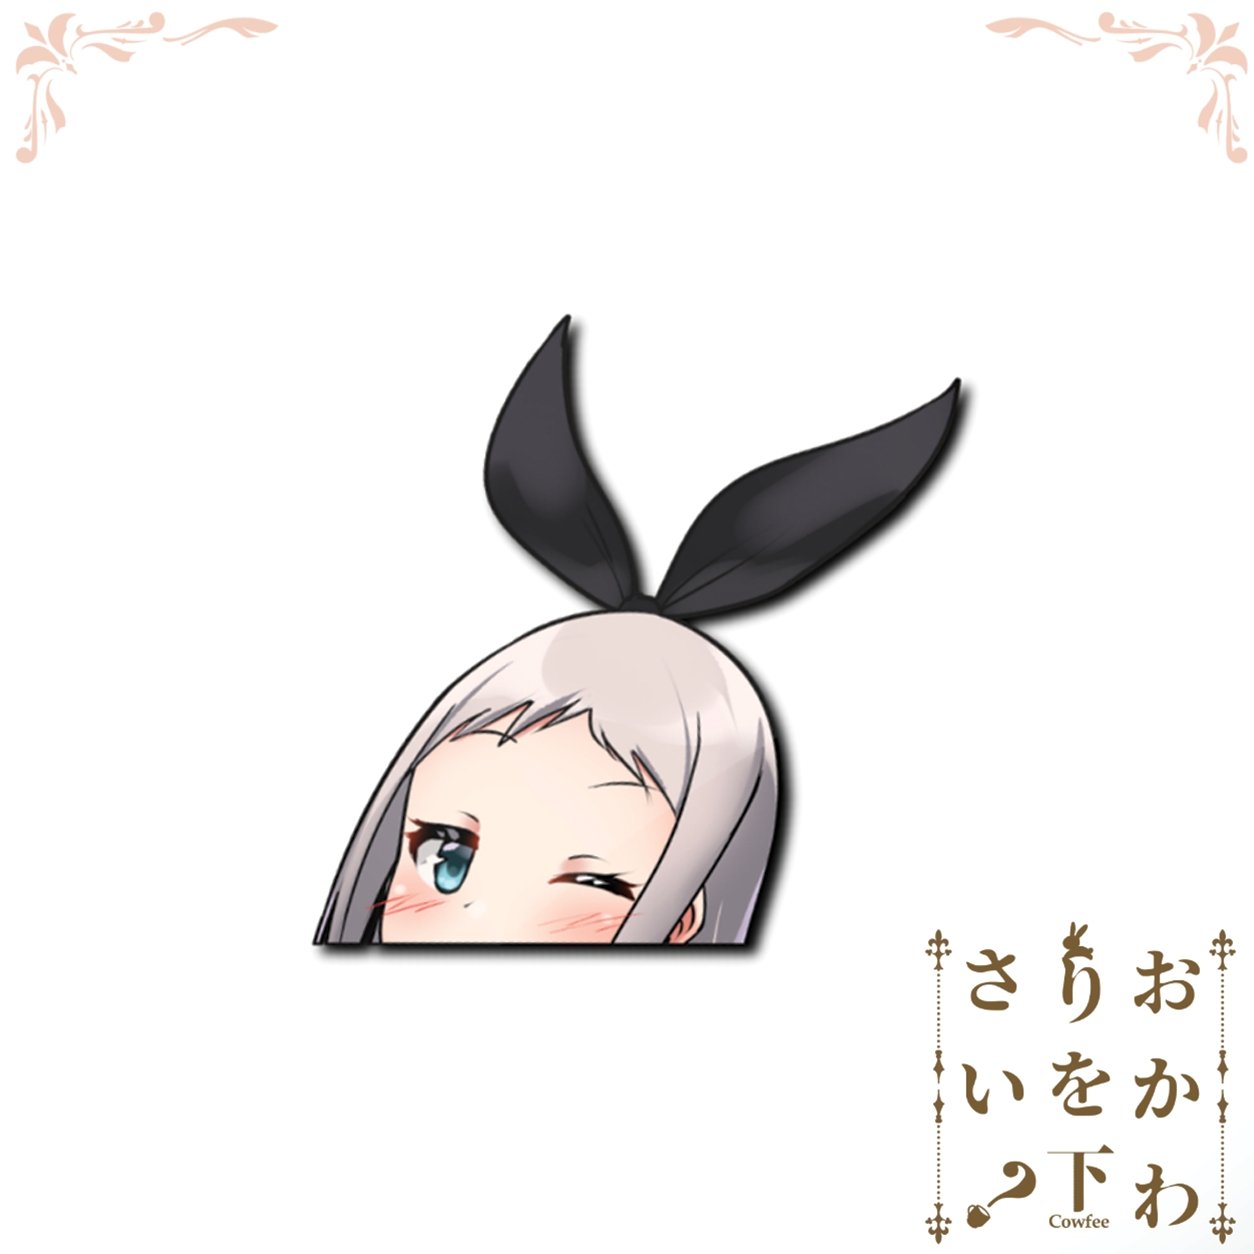
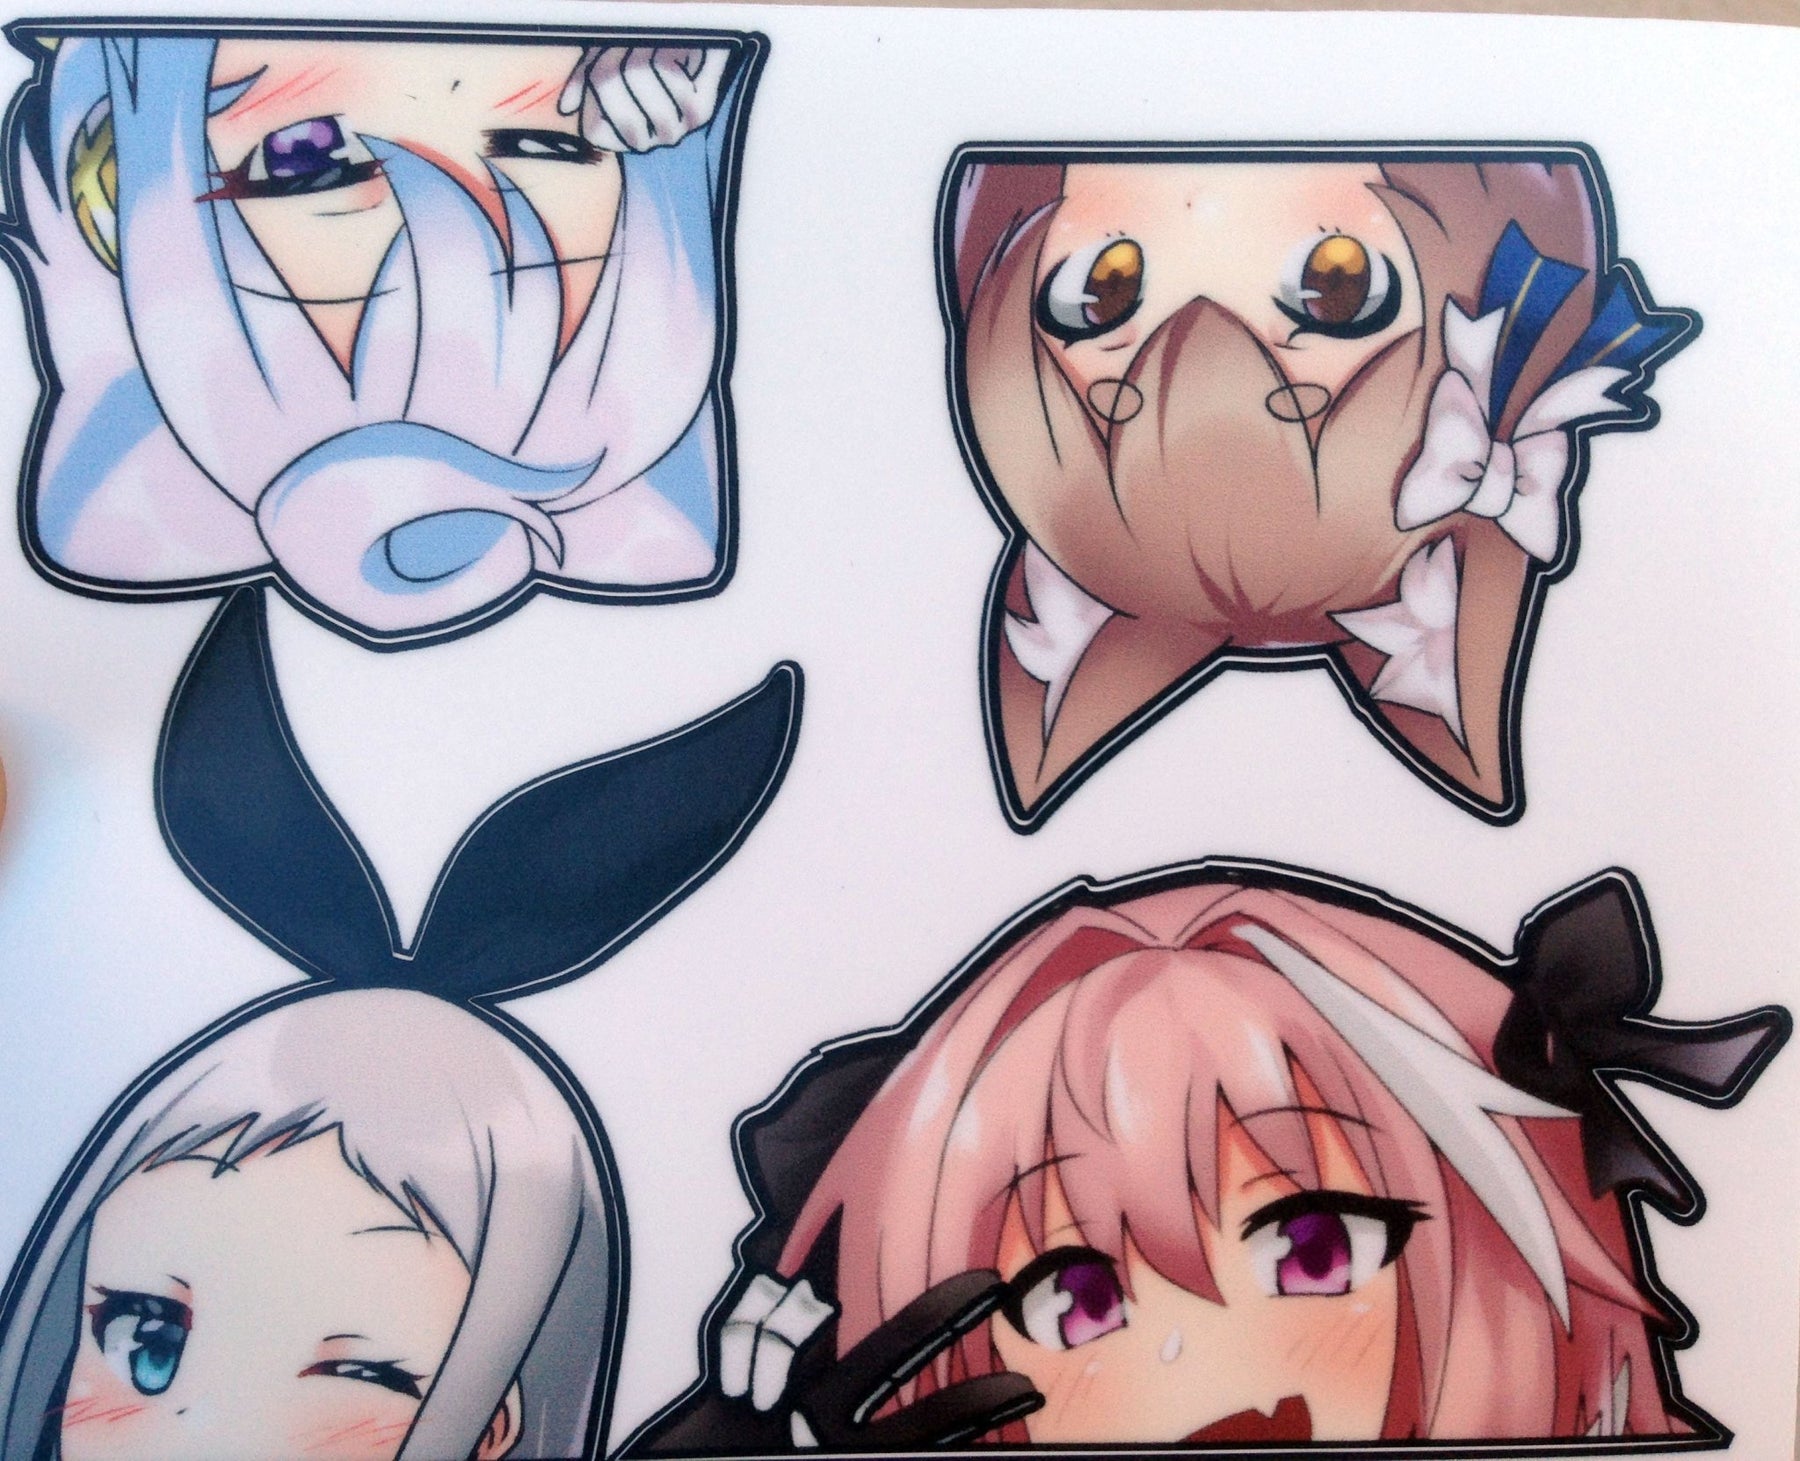
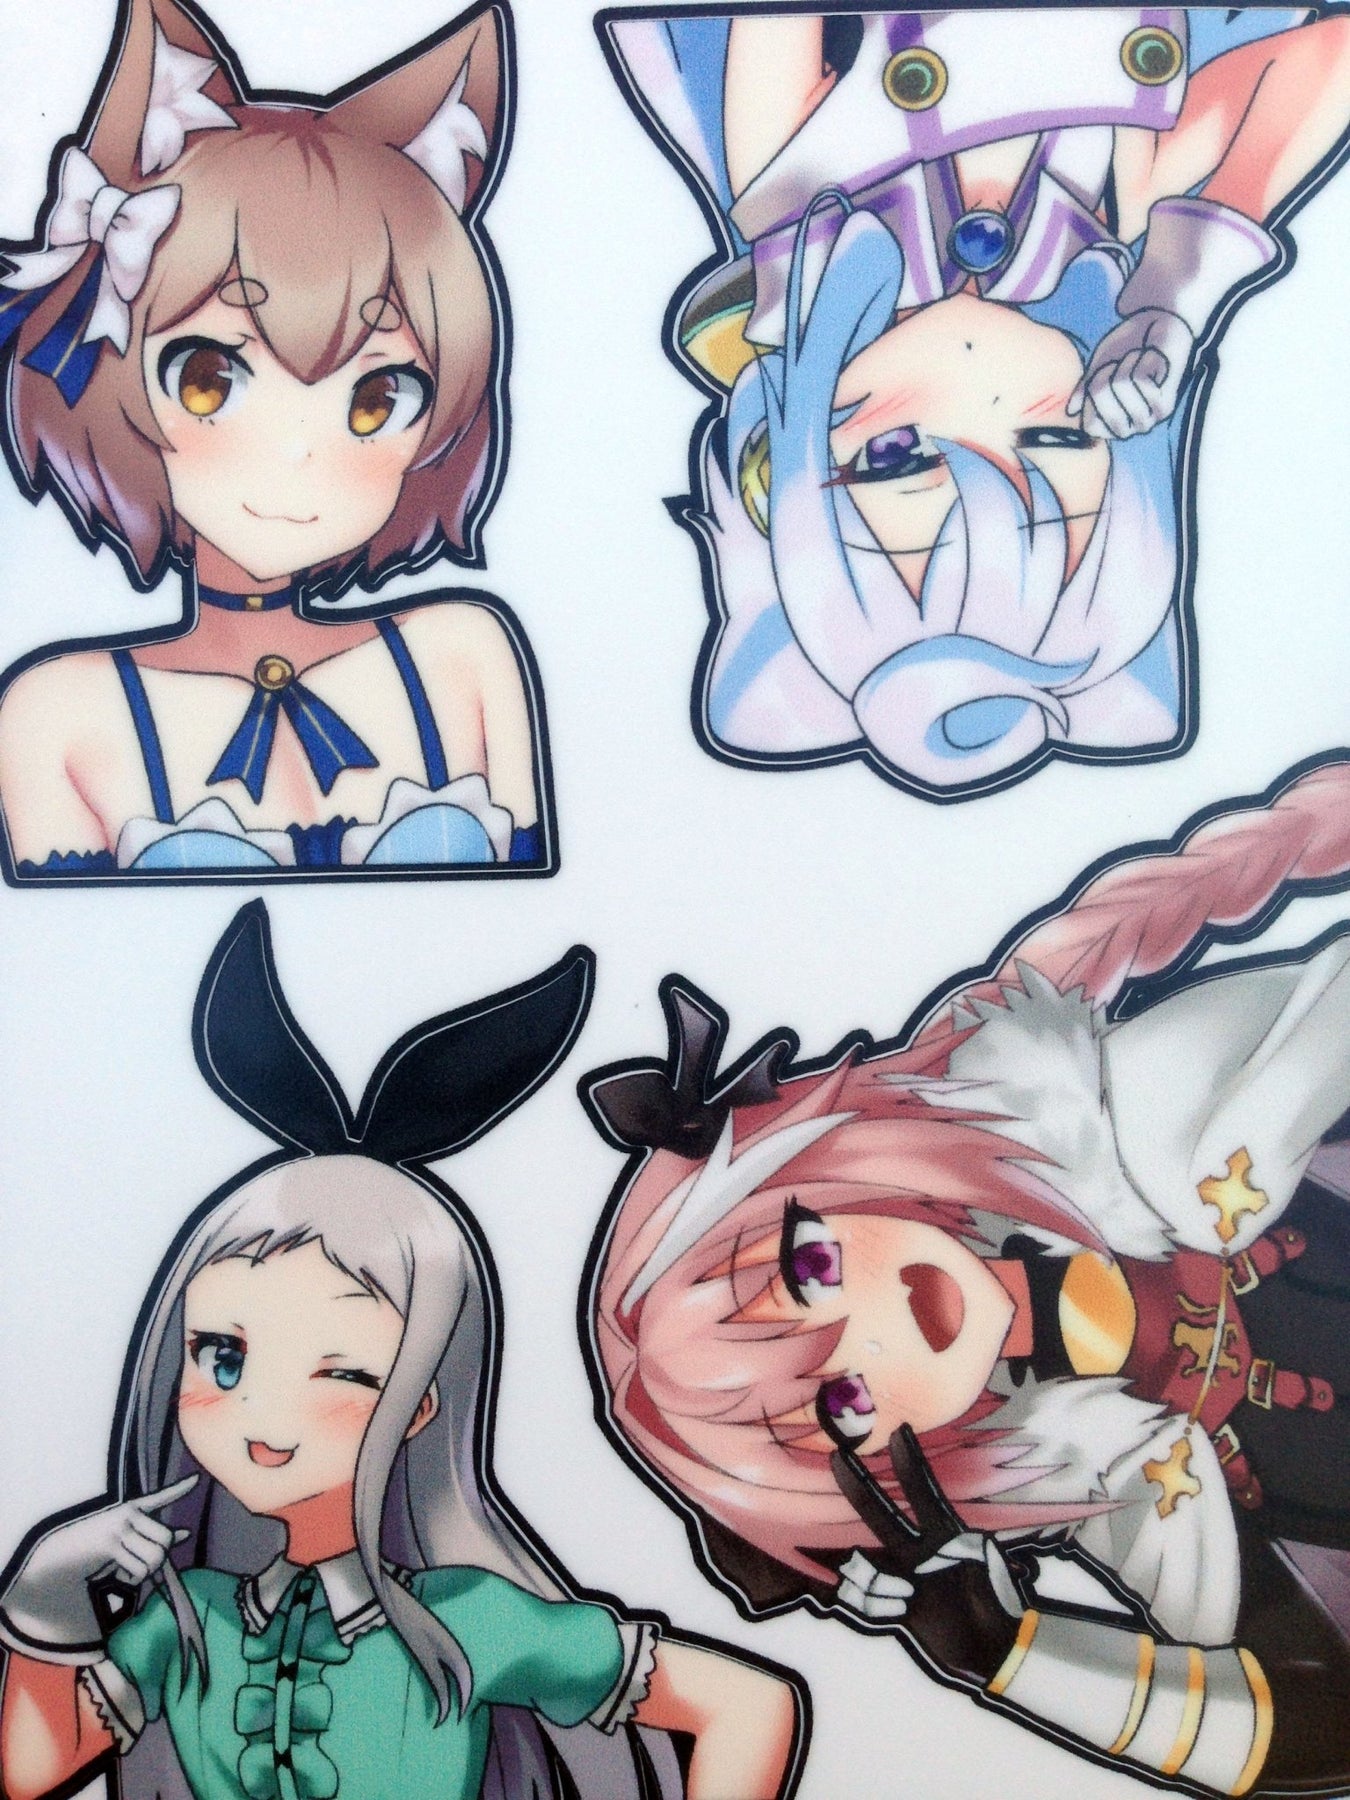
Femboy Set Kiss-Cut
Sale price $8.80 USD
Tax included.
Shipping calculated at checkout.
Artwork By Cowfee//カウフィー
Various commissioned trap designs
Sticker measures approximately 5" tall
Printed on high-quality outdoor use UV-resistant and weatherproof vinyl, satin laminate.
General Sticker application rules apply but here’s how you apply them properly!
Large Decal Application Instructions
Wet Application
(Messy but the safest method of application)
- Ensure surface is appropriately cleaned beforehand and weather is calm. Little wind if applying outdoors.
Use isopropyl alcohol, alcohol wipes, or a detergent to remove any dirt and oils. - Spray down surface with as much water as possible.
- Remove decal backing paper and apply as gently as possible from center outwards.
Make sure to position it how you want at this stage. - “Tack” centre of decal down firmly and hold with one hand, press down firmly using a card or Squeegee at an angle and work from center out in an arc. Work slowly and remove as much water as possible taking care not to trap any bubbles.
Work in halves and in arcs outwards - Recommended to leave on application tape as the decal adheres for a few hours before removal. Remove from largest decal area to thinnest, avoid removing directly towards thin areas.
Dry Application
(Clean but hardest method of application)
- Same as Wet Application
- Remove and trim half of backing paper
- Take your time and line it up, tack from trimmed half of backing paper.
- Same as Wet Application
- Application tape can be removed instantly
Banner Instructions
- Measure out how you want it to fit, we recommend keeping the logo under the top of the windshield at minimum and above the arrows marked on the windscreen (whatever is legal for your country for sunstrips)
Use masking tape to keep the banner centred (Align the banner vertically and horizontally, use a ruler for precise measurements) - Lift up half the banner on the long side and peel off the backing paper and trim halfway.
- Spray down the windscreen and vinyl with water thoroughly (More cant hurt)
- Place the banner down gently. Make sure all your adjustments are made at this stage before progressing.
- Tack down the centre by pressing down with your finger before firmly pushing out the water with the Seconds Please! Squeegee in the same area.
- You can continue to push out the water firmly to apply the rest of the area with the backing paper removed
- Repeat for the other side.
- Trim the banner on the top and sides leaving 5mm where the windscreen seals are.
- Press down firmly with the squeegee to get it up to the seal. Do the side sections separate from the top and trim using a razor blade sitting in the corner the seal makes with the windshield. Drag the knife towards you gently holding the same angle around 30 degrees.
Other things to consider
Use common sense! Whilst they are rated for outdoor use, don’t place them anywhere there will be extreme temperatures, take care of your girls.
Don’t put them anywhere normal stickers won't go, that is on surfaces which aren’t flat and smooth.
Take care when cleaning the surface afterwards, sharp points and corners could get lifted accidentally.
UPDATED 25th Jan, 2021
We ship out of Australia.
Due to Covid-19, logistics companies are facing stressed out infrastructure globally, so expect some shipping delays that are out of our control. Over 2020, shipping companies have increased their pricing by roughly 20%, as devastated as we are with this, we must adjust to keep the business alive. We try to maintain our shipping costs as best as possible to give you the best shipping rates to get our art and products to you. Thank you for your patience and support.
Upon packaging up and shipping out your order there may be delays in the following countries.
USA & EU regions - expect up to 1 month delay (Most orders are currently arriving within 6-8 weeks)
Asia regions - expect up to 1 month delay (Most orders are currently arriving within 6-8 weeks)
AU & NZ regions - expect up to 2 weeks delay (Most orders are currently arriving within 2-4 weeks)
We are doing our best to make sure you get your orders as fast as possible and exploring multiple shipping options to get our products into your house.
You are always welcome to message us on instagram or email us to check up on your order details by simply quoting your order number.
We apologise for the delays and we hope you stay safe during these times.
Thank you for your love and trust in us,
Team Cowfee


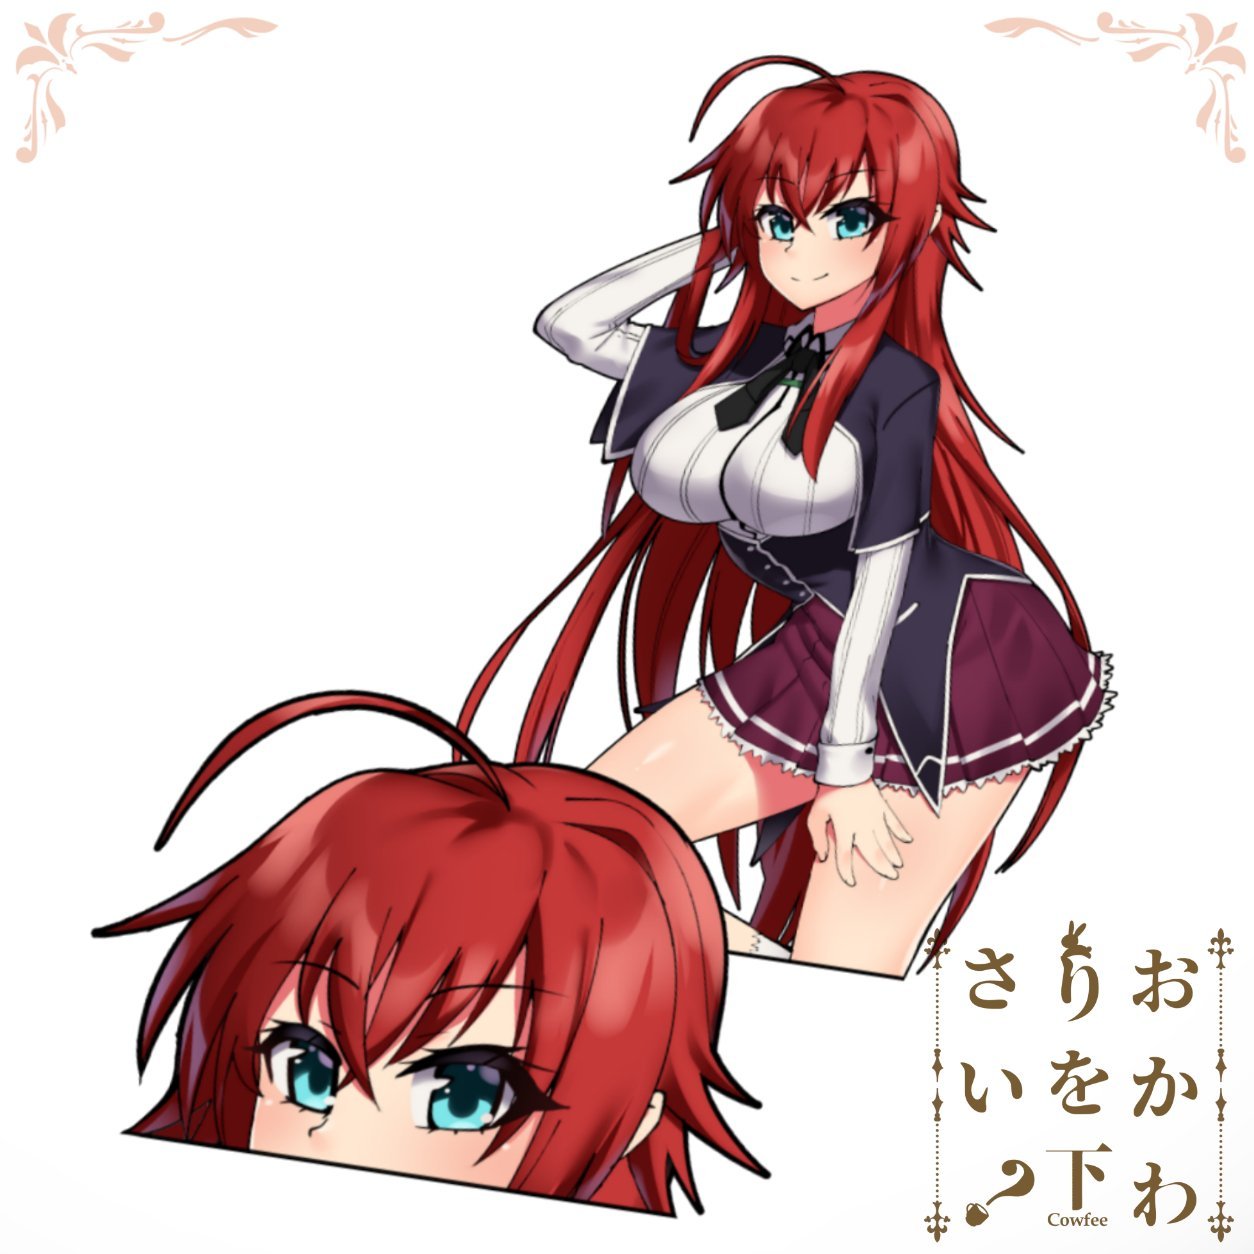

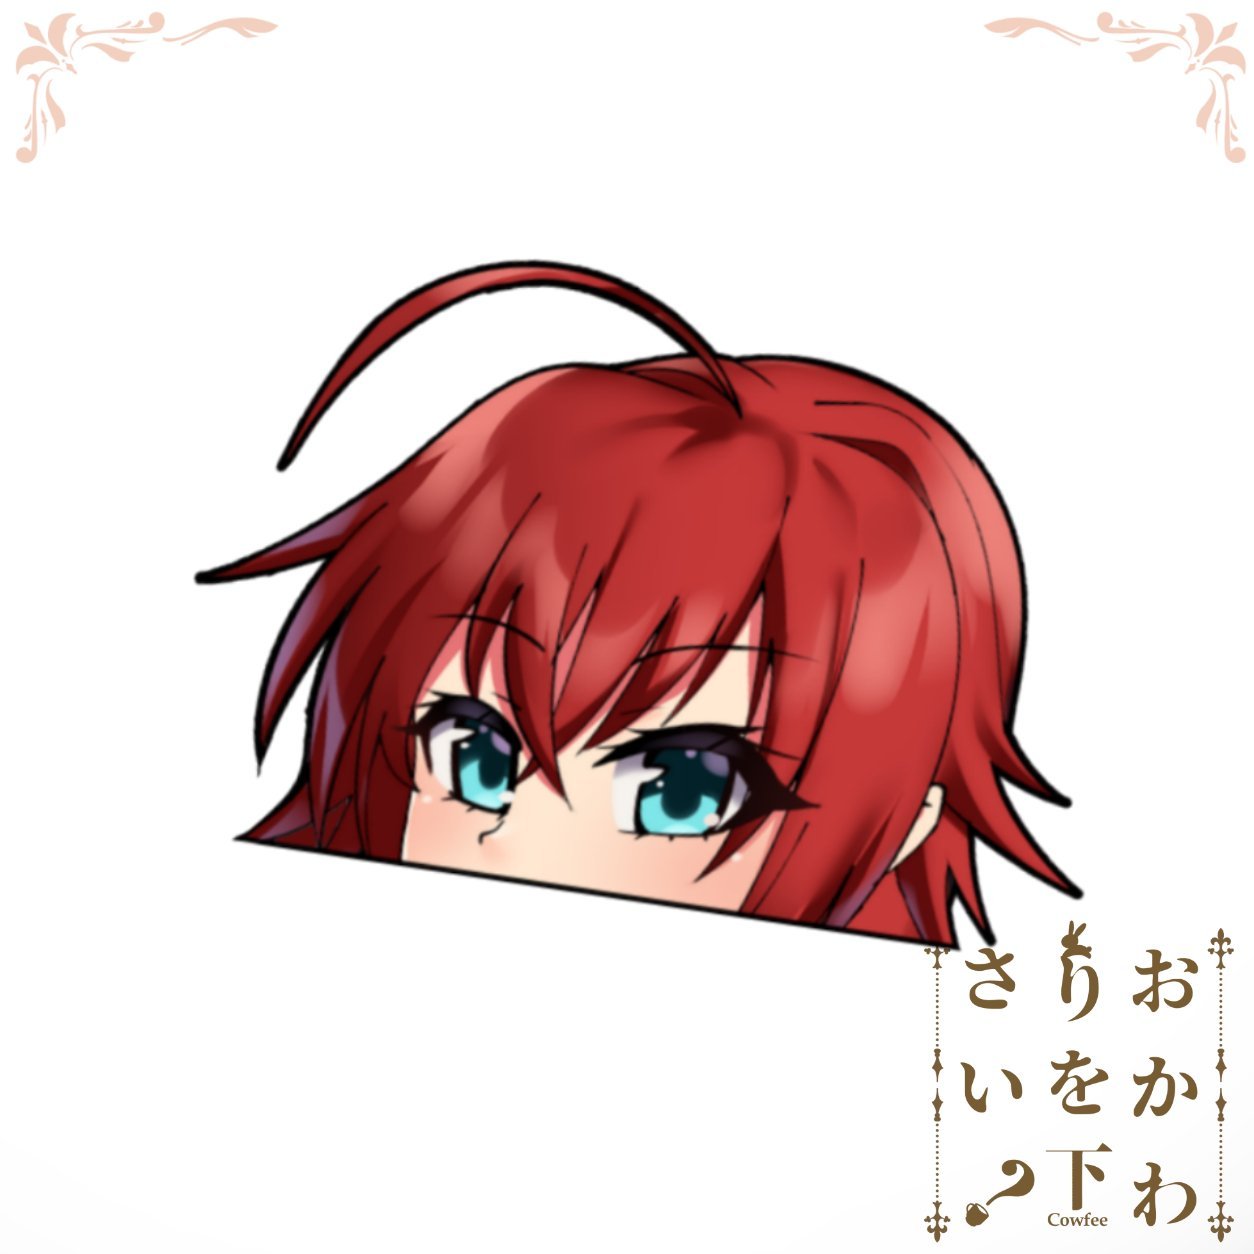
Devil Girl Kiss-Cut
Regular price $8.80 USD
Tax included.
Shipping calculated at checkout.
Artwork By Cowfee//カウフィー
Sticker measures approximately 4 x 5.5" tall & 3 x 4.5" peekers
Printed on high-quality outdoor use UV-resistant and weatherproof vinyl, satin laminate.
General Sticker application rules apply but here’s how you apply them properly!
Large Decal Application Instructions
Wet Application
(Messy but the safest method of application)
- Ensure surface is appropriately cleaned beforehand and weather is calm. Little wind if applying outdoors.
Use isopropyl alcohol, alcohol wipes, or a detergent to remove any dirt and oils. - Spray down surface with as much water as possible.
- Remove decal backing paper and apply as gently as possible from center outwards.
Make sure to position it how you want at this stage. - “Tack” centre of decal down firmly and hold with one hand, press down firmly using a card or Squeegee at an angle and work from center out in an arc. Work slowly and remove as much water as possible taking care not to trap any bubbles.
Work in halves and in arcs outwards - Recommended to leave on application tape as the decal adheres for a few hours before removal. Remove from largest decal area to thinnest, avoid removing directly towards thin areas.
Dry Application
(Clean but hardest method of application)
- Same as Wet Application
- Remove and trim half of backing paper
- Take your time and line it up, tack from trimmed half of backing paper.
- Same as Wet Application
- Application tape can be removed instantly
Banner Instructions
- Measure out how you want it to fit, we recommend keeping the logo under the top of the windshield at minimum and above the arrows marked on the windscreen (whatever is legal for your country for sunstrips)
Use masking tape to keep the banner centred (Align the banner vertically and horizontally, use a ruler for precise measurements) - Lift up half the banner on the long side and peel off the backing paper and trim halfway.
- Spray down the windscreen and vinyl with water thoroughly (More cant hurt)
- Place the banner down gently. Make sure all your adjustments are made at this stage before progressing.
- Tack down the centre by pressing down with your finger before firmly pushing out the water with the Seconds Please! Squeegee in the same area.
- You can continue to push out the water firmly to apply the rest of the area with the backing paper removed
- Repeat for the other side.
- Trim the banner on the top and sides leaving 5mm where the windscreen seals are.
- Press down firmly with the squeegee to get it up to the seal. Do the side sections separate from the top and trim using a razor blade sitting in the corner the seal makes with the windshield. Drag the knife towards you gently holding the same angle around 30 degrees.
Other things to consider
Use common sense! Whilst they are rated for outdoor use, don’t place them anywhere there will be extreme temperatures, take care of your girls.
Don’t put them anywhere normal stickers won't go, that is on surfaces which aren’t flat and smooth.
Take care when cleaning the surface afterwards, sharp points and corners could get lifted accidentally.
UPDATED 25th Jan, 2021
We ship out of Australia.
Due to Covid-19, logistics companies are facing stressed out infrastructure globally, so expect some shipping delays that are out of our control. Over 2020, shipping companies have increased their pricing by roughly 20%, as devastated as we are with this, we must adjust to keep the business alive. We try to maintain our shipping costs as best as possible to give you the best shipping rates to get our art and products to you. Thank you for your patience and support.
Upon packaging up and shipping out your order there may be delays in the following countries.
USA & EU regions - expect up to 1 month delay (Most orders are currently arriving within 6-8 weeks)
Asia regions - expect up to 1 month delay (Most orders are currently arriving within 6-8 weeks)
AU & NZ regions - expect up to 2 weeks delay (Most orders are currently arriving within 2-4 weeks)
We are doing our best to make sure you get your orders as fast as possible and exploring multiple shipping options to get our products into your house.
You are always welcome to message us on instagram or email us to check up on your order details by simply quoting your order number.
We apologise for the delays and we hope you stay safe during these times.
Thank you for your love and trust in us,
Team Cowfee


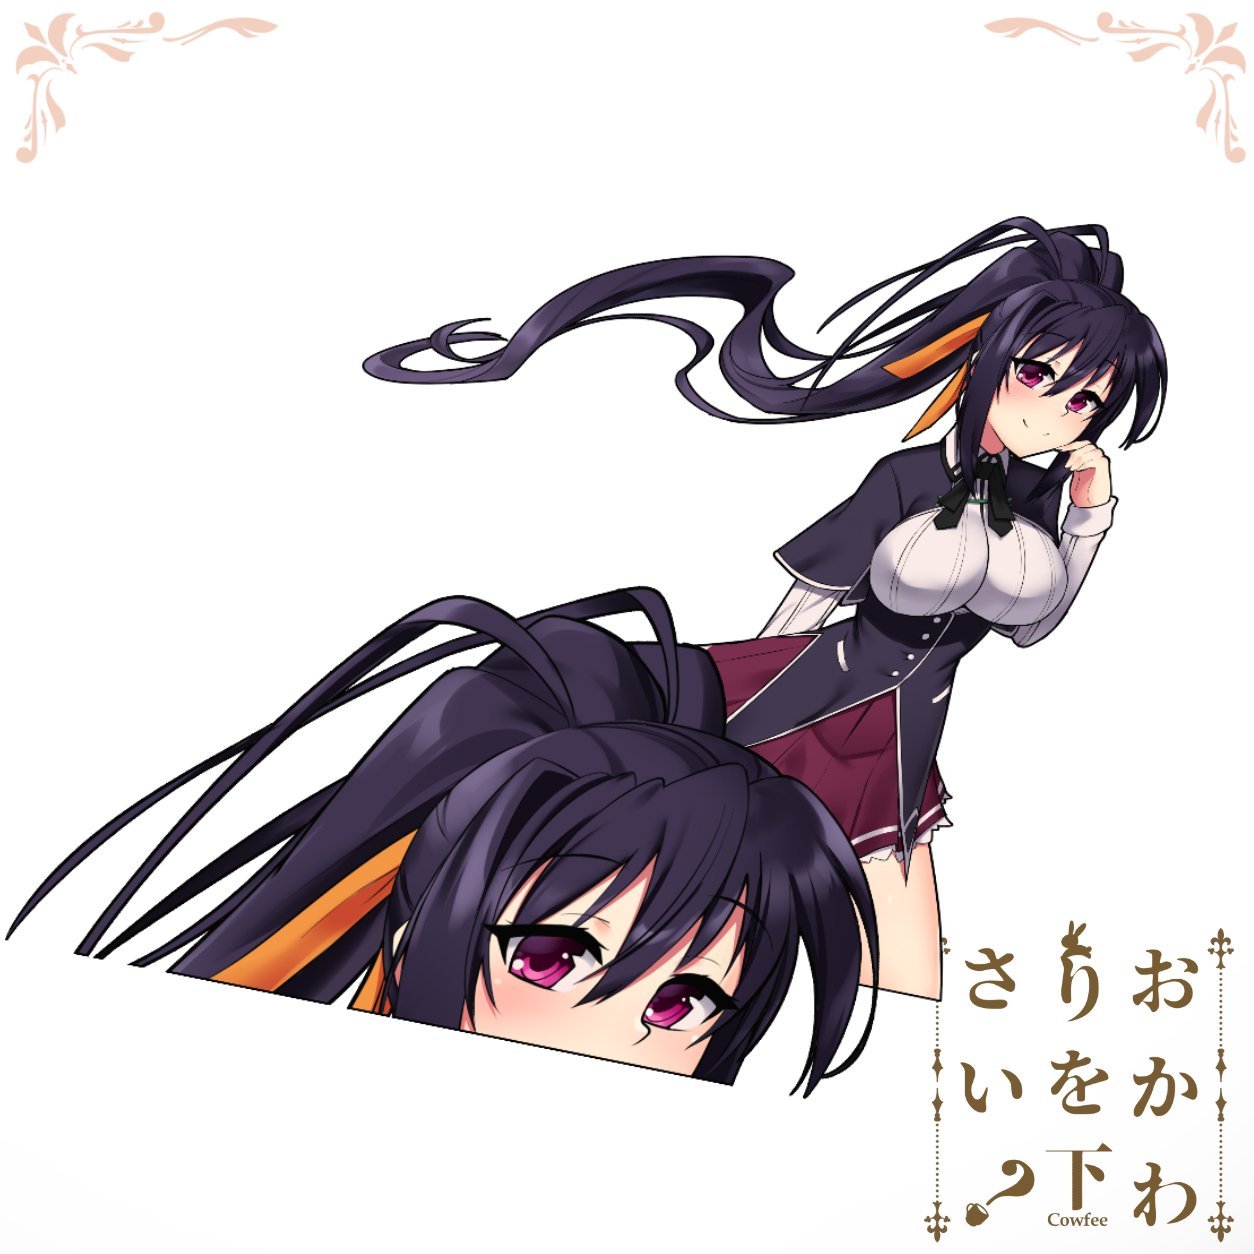

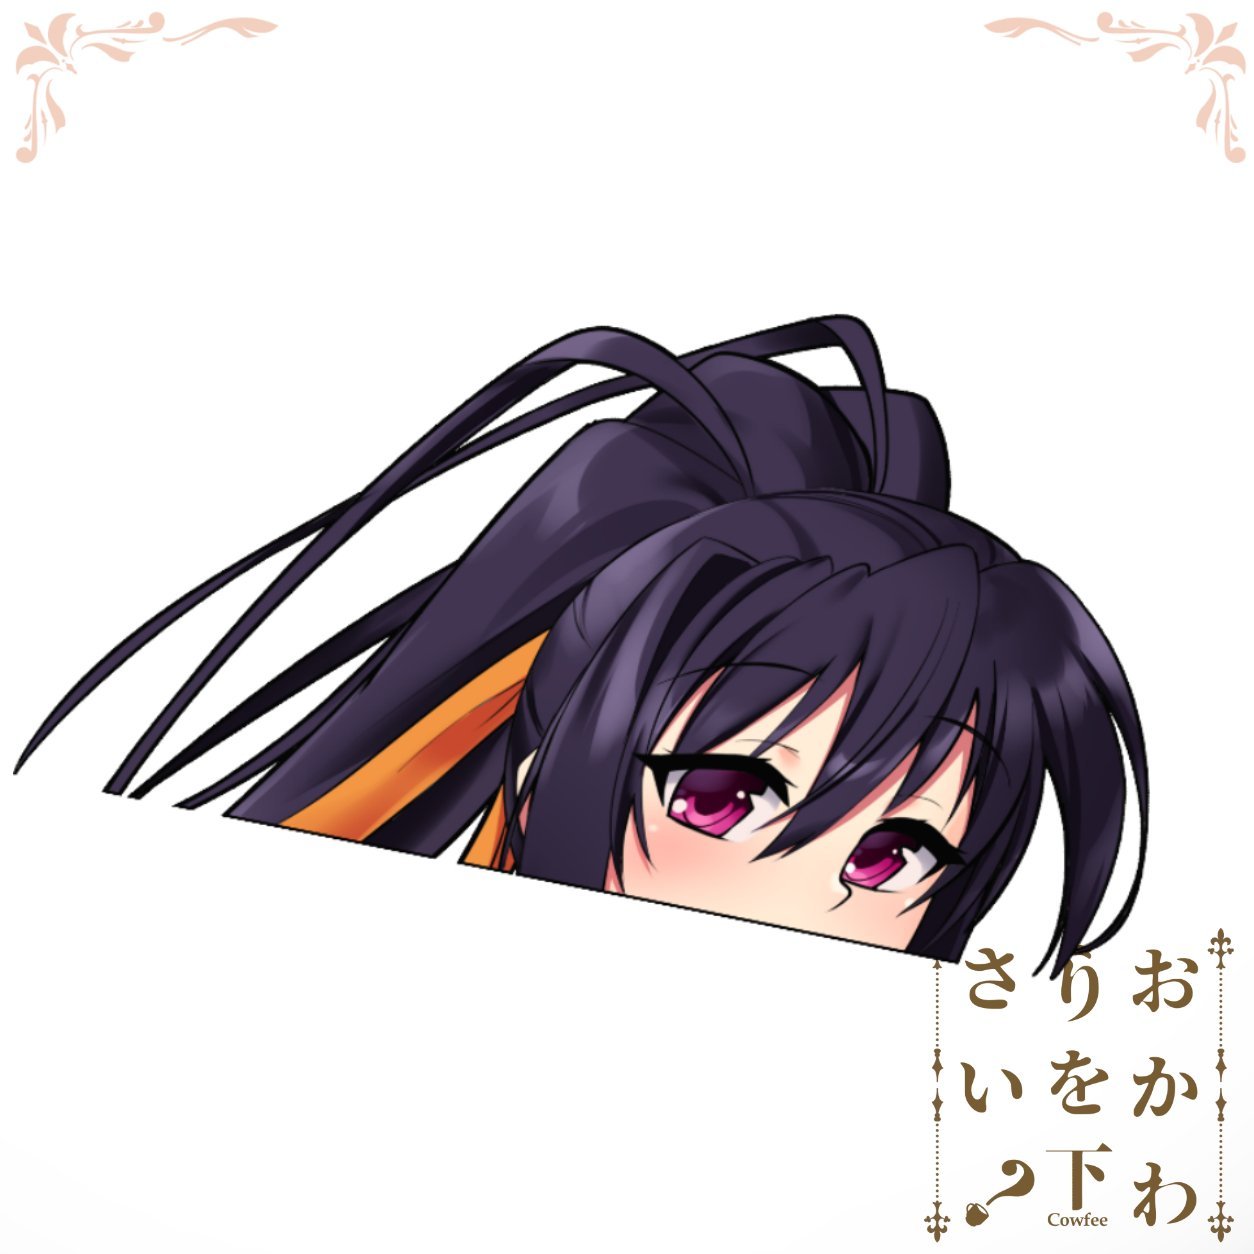
Devil Girl 2 Kiss-Cut
Regular price $8.80 USD
Tax included.
Shipping calculated at checkout.
Artwork By Cowfee//カウフィー
Sticker measures approximately 5.5" tall & 6 x 3.5" peekers
Printed on high-quality outdoor use UV-resistant and weatherproof vinyl, satin laminate.
General Sticker application rules apply but here’s how you apply them properly!
Large Decal Application Instructions
Wet Application
(Messy but the safest method of application)
- Ensure surface is appropriately cleaned beforehand and weather is calm. Little wind if applying outdoors.
Use isopropyl alcohol, alcohol wipes, or a detergent to remove any dirt and oils. - Spray down surface with as much water as possible.
- Remove decal backing paper and apply as gently as possible from center outwards.
Make sure to position it how you want at this stage. - “Tack” centre of decal down firmly and hold with one hand, press down firmly using a card or Squeegee at an angle and work from center out in an arc. Work slowly and remove as much water as possible taking care not to trap any bubbles.
Work in halves and in arcs outwards - Recommended to leave on application tape as the decal adheres for a few hours before removal. Remove from largest decal area to thinnest, avoid removing directly towards thin areas.
Dry Application
(Clean but hardest method of application)
- Same as Wet Application
- Remove and trim half of backing paper
- Take your time and line it up, tack from trimmed half of backing paper.
- Same as Wet Application
- Application tape can be removed instantly
Banner Instructions
- Measure out how you want it to fit, we recommend keeping the logo under the top of the windshield at minimum and above the arrows marked on the windscreen (whatever is legal for your country for sunstrips)
Use masking tape to keep the banner centred (Align the banner vertically and horizontally, use a ruler for precise measurements) - Lift up half the banner on the long side and peel off the backing paper and trim halfway.
- Spray down the windscreen and vinyl with water thoroughly (More cant hurt)
- Place the banner down gently. Make sure all your adjustments are made at this stage before progressing.
- Tack down the centre by pressing down with your finger before firmly pushing out the water with the Seconds Please! Squeegee in the same area.
- You can continue to push out the water firmly to apply the rest of the area with the backing paper removed
- Repeat for the other side.
- Trim the banner on the top and sides leaving 5mm where the windscreen seals are.
- Press down firmly with the squeegee to get it up to the seal. Do the side sections separate from the top and trim using a razor blade sitting in the corner the seal makes with the windshield. Drag the knife towards you gently holding the same angle around 30 degrees.
Other things to consider
Use common sense! Whilst they are rated for outdoor use, don’t place them anywhere there will be extreme temperatures, take care of your girls.
Don’t put them anywhere normal stickers won't go, that is on surfaces which aren’t flat and smooth.
Take care when cleaning the surface afterwards, sharp points and corners could get lifted accidentally.
UPDATED 25th Jan, 2021
We ship out of Australia.
Due to Covid-19, logistics companies are facing stressed out infrastructure globally, so expect some shipping delays that are out of our control. Over 2020, shipping companies have increased their pricing by roughly 20%, as devastated as we are with this, we must adjust to keep the business alive. We try to maintain our shipping costs as best as possible to give you the best shipping rates to get our art and products to you. Thank you for your patience and support.
Upon packaging up and shipping out your order there may be delays in the following countries.
USA & EU regions - expect up to 1 month delay (Most orders are currently arriving within 6-8 weeks)
Asia regions - expect up to 1 month delay (Most orders are currently arriving within 6-8 weeks)
AU & NZ regions - expect up to 2 weeks delay (Most orders are currently arriving within 2-4 weeks)
We are doing our best to make sure you get your orders as fast as possible and exploring multiple shipping options to get our products into your house.
You are always welcome to message us on instagram or email us to check up on your order details by simply quoting your order number.
We apologise for the delays and we hope you stay safe during these times.
Thank you for your love and trust in us,
Team Cowfee


Mystery Value Gacha Sticker Pack
Regular price $15.40 USD Sale price $13.90 USD Save $1.50 USD
Tax included.
Shipping calculated at checkout.
Artwork By Cowfee//カウフィー
Can't decide? Get yourself a mystery pack of random stickers at a discounted price!
GL:HF
Please note that the selection is limited and changes over time. New products do not get added in until much later.
Please add notes at the checkout if you have any preferences
General Sticker application rules apply but here’s how you apply them properly!
Large Decal Application Instructions
Wet Application
(Messy but the safest method of application)
- Ensure surface is appropriately cleaned beforehand and weather is calm. Little wind if applying outdoors.
Use isopropyl alcohol, alcohol wipes, or a detergent to remove any dirt and oils. - Spray down surface with as much water as possible.
- Remove decal backing paper and apply as gently as possible from center outwards.
Make sure to position it how you want at this stage. - “Tack” centre of decal down firmly and hold with one hand, press down firmly using a card or Squeegee at an angle and work from center out in an arc. Work slowly and remove as much water as possible taking care not to trap any bubbles.
Work in halves and in arcs outwards - Recommended to leave on application tape as the decal adheres for a few hours before removal. Remove from largest decal area to thinnest, avoid removing directly towards thin areas.
Dry Application
(Clean but hardest method of application)
- Same as Wet Application
- Remove and trim half of backing paper
- Take your time and line it up, tack from trimmed half of backing paper.
- Same as Wet Application
- Application tape can be removed instantly
Banner Instructions
- Measure out how you want it to fit, we recommend keeping the logo under the top of the windshield at minimum and above the arrows marked on the windscreen (whatever is legal for your country for sunstrips)
Use masking tape to keep the banner centred (Align the banner vertically and horizontally, use a ruler for precise measurements) - Lift up half the banner on the long side and peel off the backing paper and trim halfway.
- Spray down the windscreen and vinyl with water thoroughly (More cant hurt)
- Place the banner down gently. Make sure all your adjustments are made at this stage before progressing.
- Tack down the centre by pressing down with your finger before firmly pushing out the water with the Seconds Please! Squeegee in the same area.
- You can continue to push out the water firmly to apply the rest of the area with the backing paper removed
- Repeat for the other side.
- Trim the banner on the top and sides leaving 5mm where the windscreen seals are.
- Press down firmly with the squeegee to get it up to the seal. Do the side sections separate from the top and trim using a razor blade sitting in the corner the seal makes with the windshield. Drag the knife towards you gently holding the same angle around 30 degrees.
Other things to consider
Use common sense! Whilst they are rated for outdoor use, don’t place them anywhere there will be extreme temperatures, take care of your girls.
Don’t put them anywhere normal stickers won't go, that is on surfaces which aren’t flat and smooth.
Take care when cleaning the surface afterwards, sharp points and corners could get lifted accidentally.
UPDATED 25th Jan, 2021
We ship out of Australia.
Due to Covid-19, logistics companies are facing stressed out infrastructure globally, so expect some shipping delays that are out of our control. Over 2020, shipping companies have increased their pricing by roughly 20%, as devastated as we are with this, we must adjust to keep the business alive. We try to maintain our shipping costs as best as possible to give you the best shipping rates to get our art and products to you. Thank you for your patience and support.
Upon packaging up and shipping out your order there may be delays in the following countries.
USA & EU regions - expect up to 1 month delay (Most orders are currently arriving within 6-8 weeks)
Asia regions - expect up to 1 month delay (Most orders are currently arriving within 6-8 weeks)
AU & NZ regions - expect up to 2 weeks delay (Most orders are currently arriving within 2-4 weeks)
We are doing our best to make sure you get your orders as fast as possible and exploring multiple shipping options to get our products into your house.
You are always welcome to message us on instagram or email us to check up on your order details by simply quoting your order number.
We apologise for the delays and we hope you stay safe during these times.
Thank you for your love and trust in us,
Team Cowfee


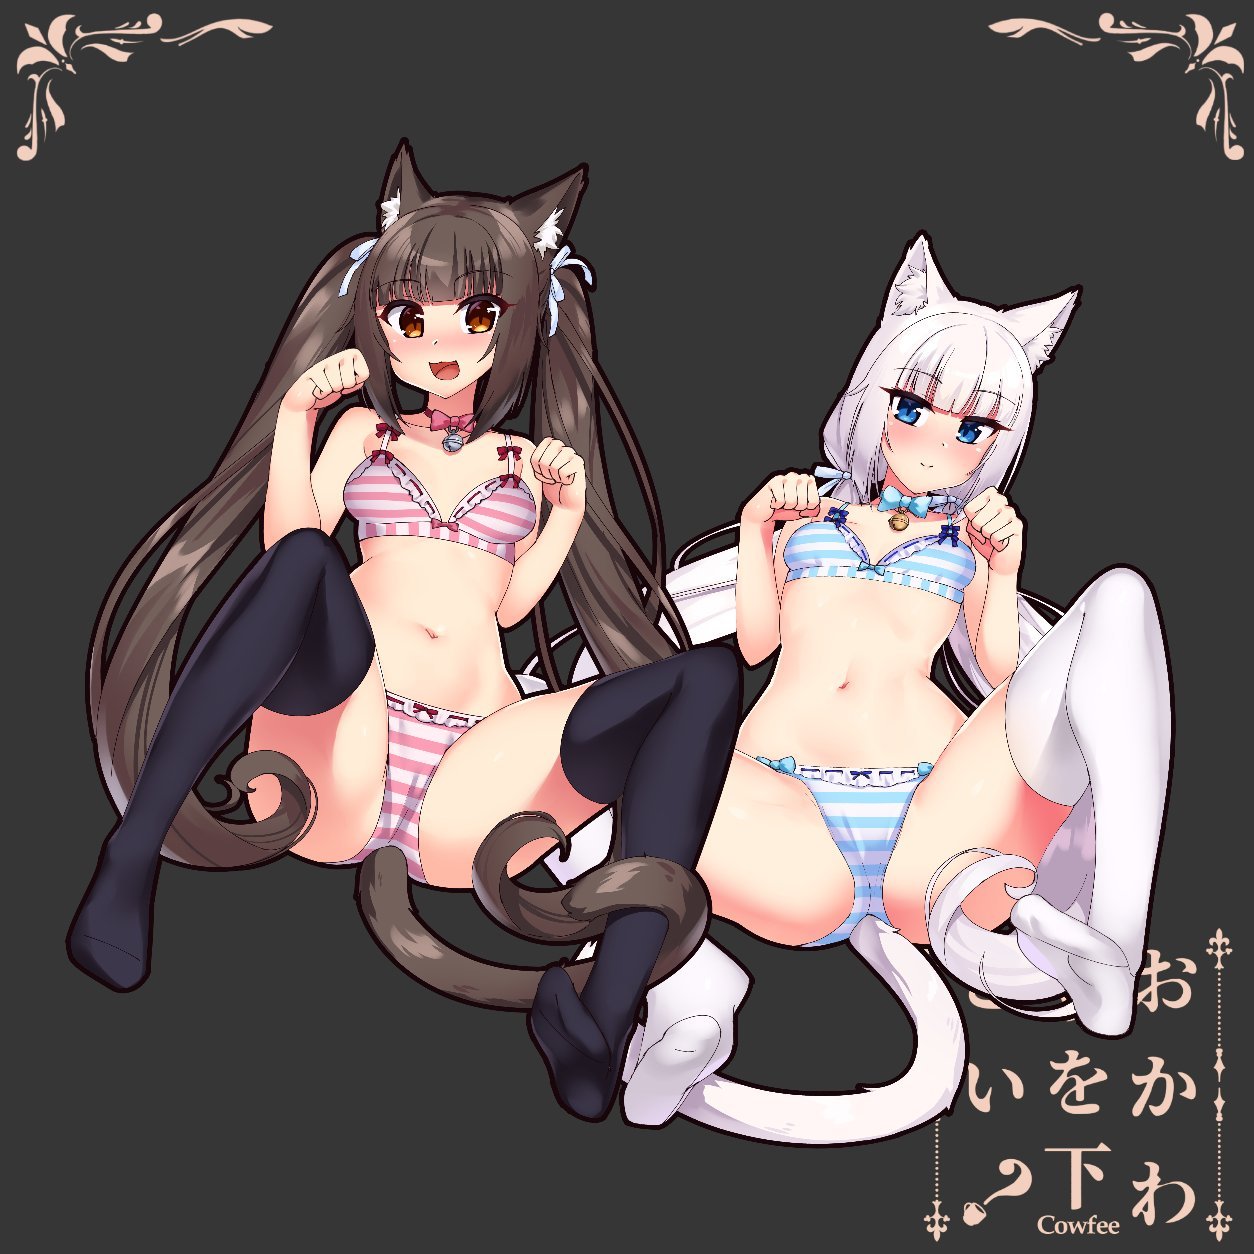
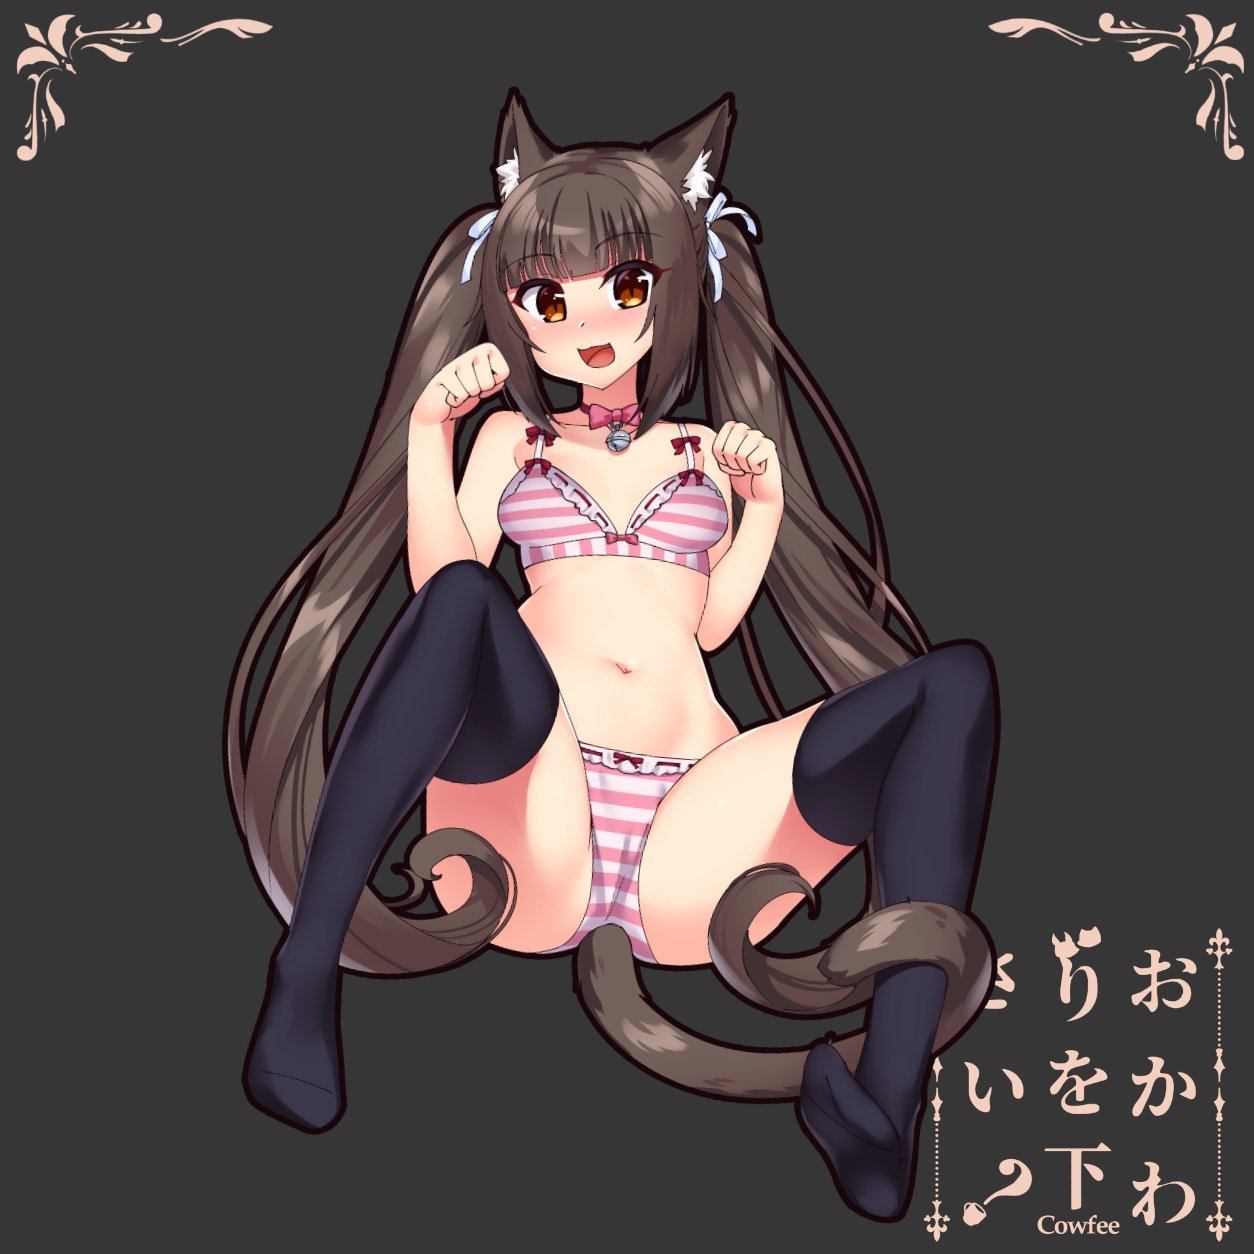
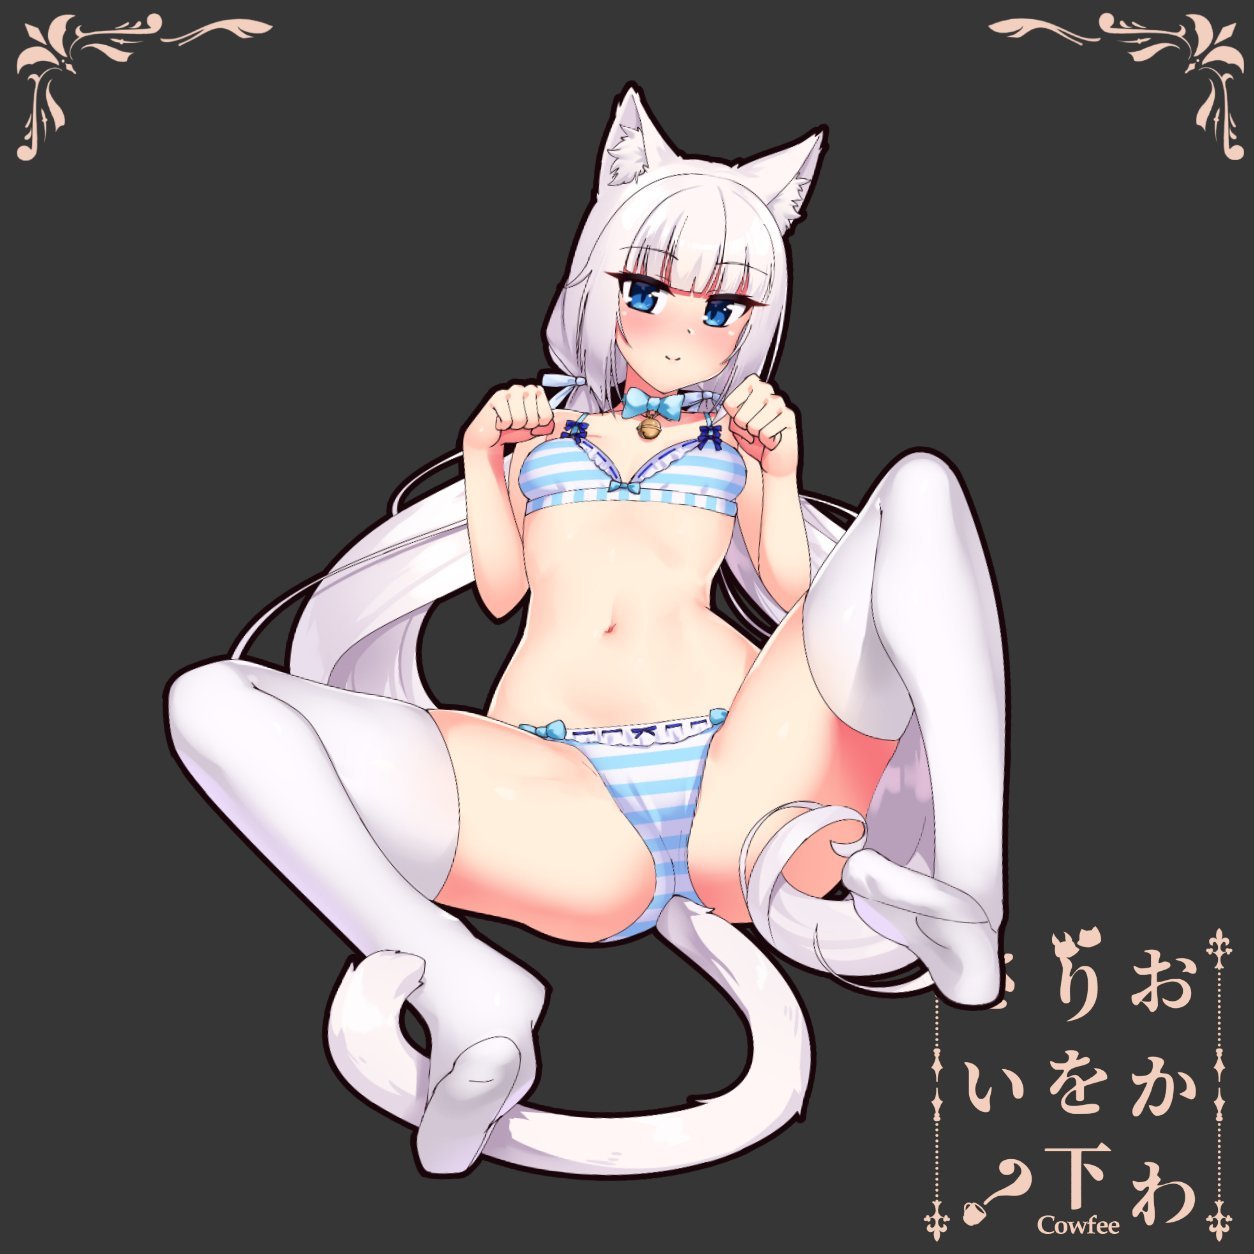
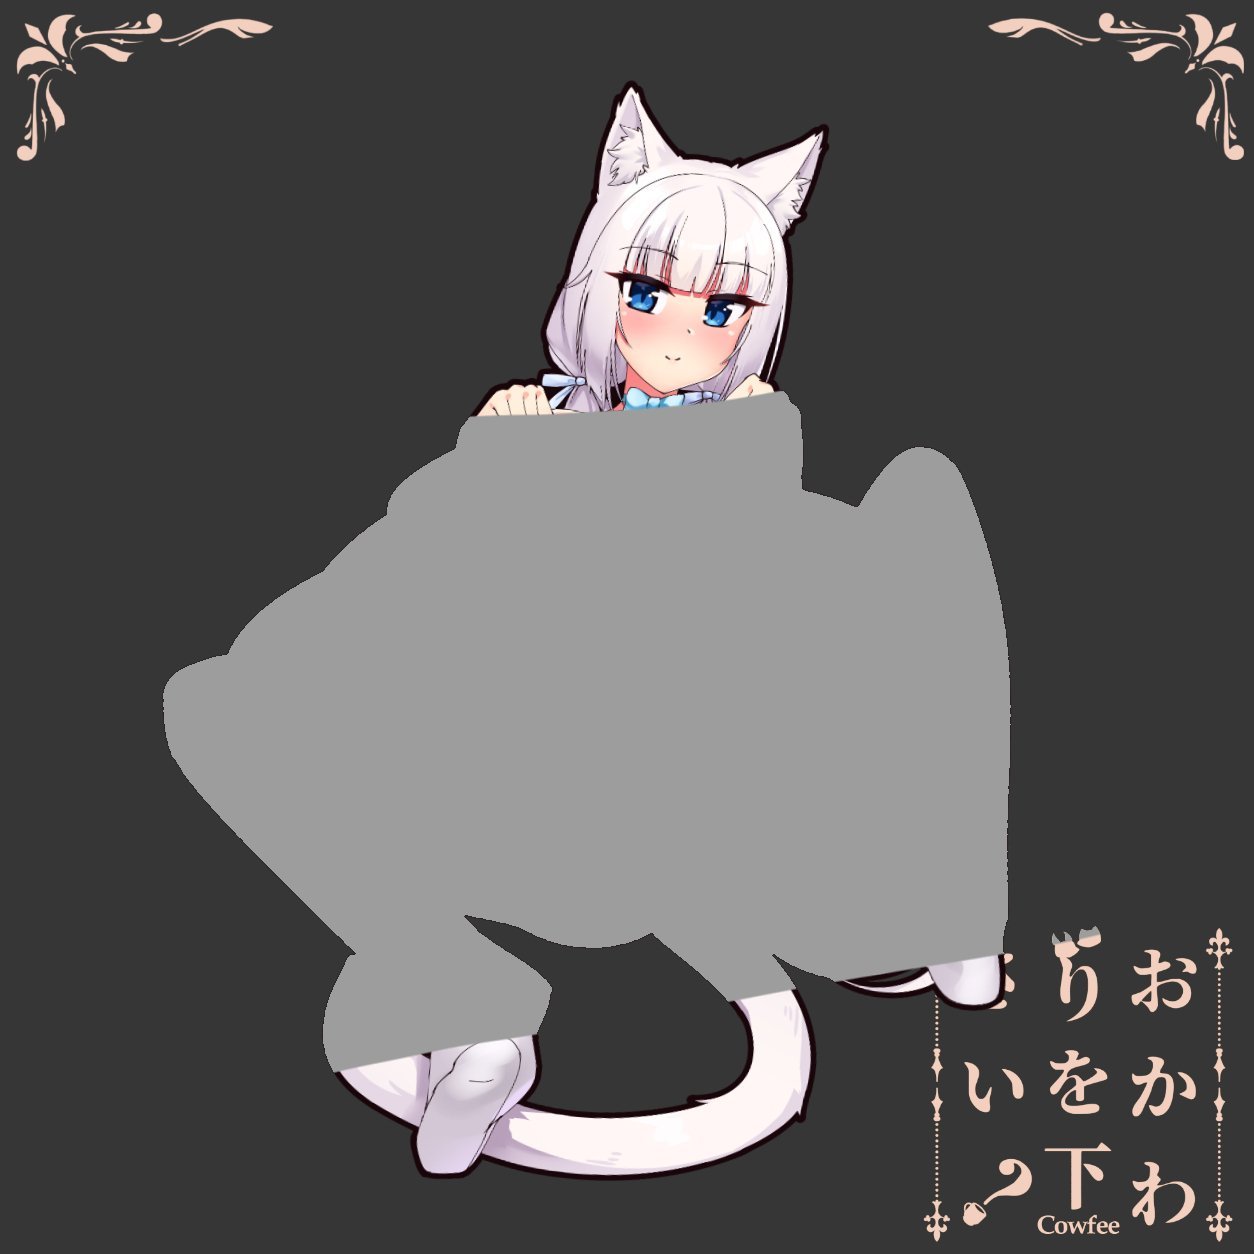
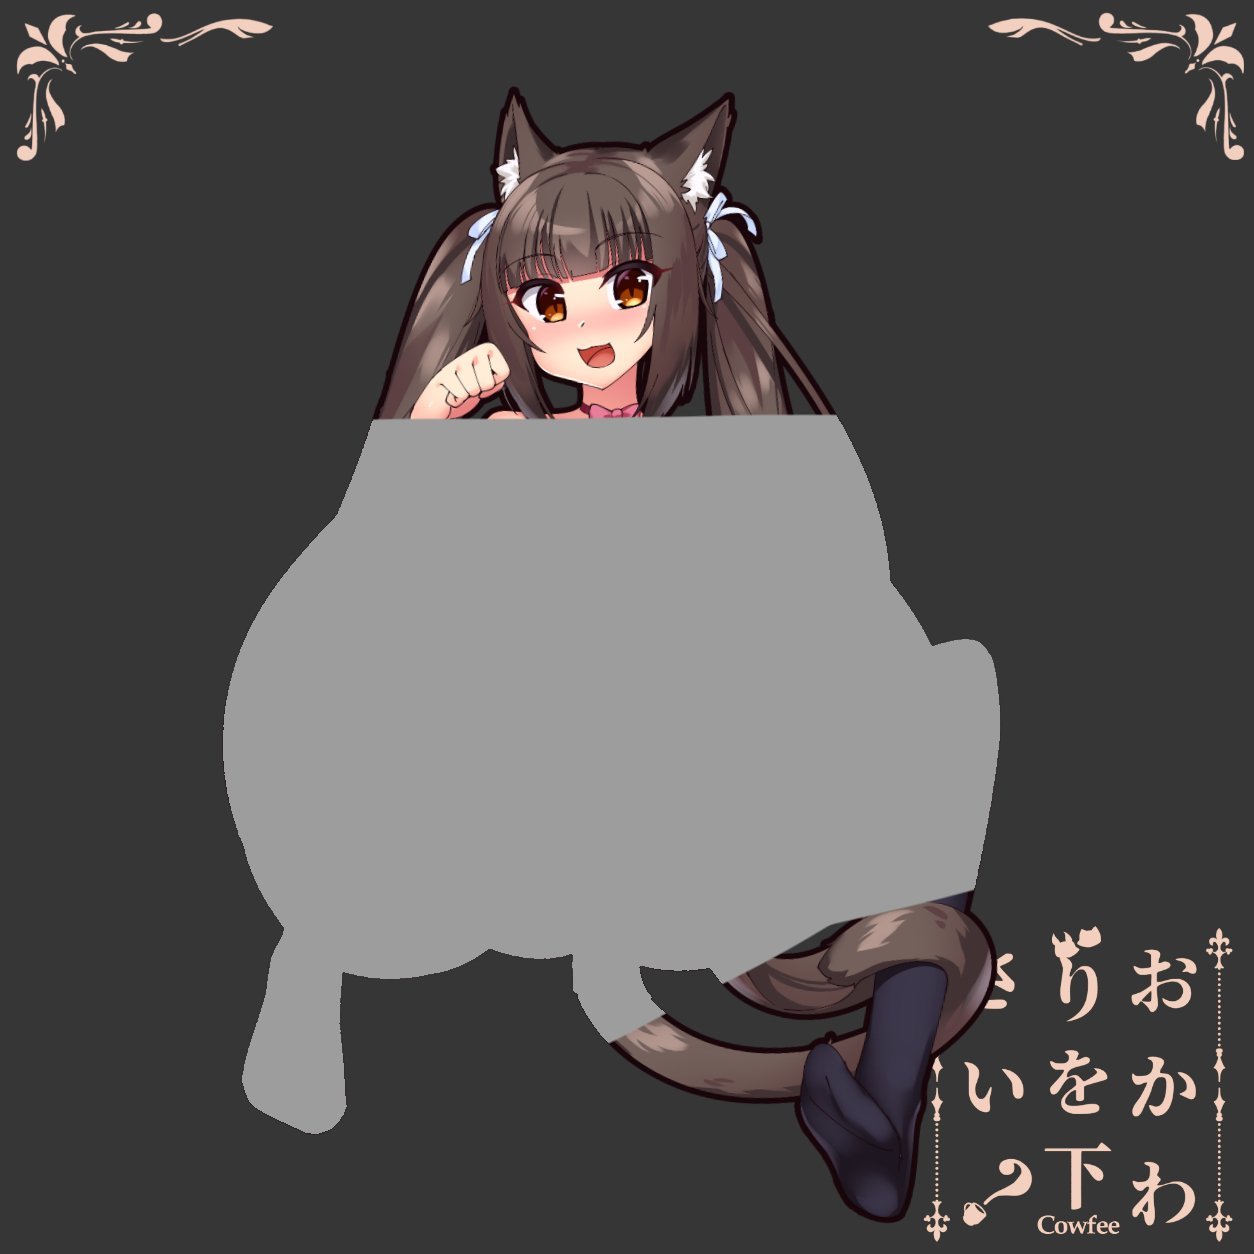
Secret Cats Kiss-Cut
Regular price $8.50 USD
Tax included.
Shipping calculated at checkout.
Artwork By Cowfee//カウフィー
Sticker measures approximately 6" tall
Printed on high-quality outdoor use UV-resistant and weatherproof vinyl, satin laminate.
All characters are original artist depictions aged 18+
To view the secret version and install instructions, head to our FAQ page
General Sticker application rules apply but here’s how you apply them properly!
Large Decal Application Instructions
Wet Application
(Messy but the safest method of application)
- Ensure surface is appropriately cleaned beforehand and weather is calm. Little wind if applying outdoors.
Use isopropyl alcohol, alcohol wipes, or a detergent to remove any dirt and oils. - Spray down surface with as much water as possible.
- Remove decal backing paper and apply as gently as possible from center outwards.
Make sure to position it how you want at this stage. - “Tack” centre of decal down firmly and hold with one hand, press down firmly using a card or Squeegee at an angle and work from center out in an arc. Work slowly and remove as much water as possible taking care not to trap any bubbles.
Work in halves and in arcs outwards - Recommended to leave on application tape as the decal adheres for a few hours before removal. Remove from largest decal area to thinnest, avoid removing directly towards thin areas.
Dry Application
(Clean but hardest method of application)
- Same as Wet Application
- Remove and trim half of backing paper
- Take your time and line it up, tack from trimmed half of backing paper.
- Same as Wet Application
- Application tape can be removed instantly
Banner Instructions
- Measure out how you want it to fit, we recommend keeping the logo under the top of the windshield at minimum and above the arrows marked on the windscreen (whatever is legal for your country for sunstrips)
Use masking tape to keep the banner centred (Align the banner vertically and horizontally, use a ruler for precise measurements) - Lift up half the banner on the long side and peel off the backing paper and trim halfway.
- Spray down the windscreen and vinyl with water thoroughly (More cant hurt)
- Place the banner down gently. Make sure all your adjustments are made at this stage before progressing.
- Tack down the centre by pressing down with your finger before firmly pushing out the water with the Seconds Please! Squeegee in the same area.
- You can continue to push out the water firmly to apply the rest of the area with the backing paper removed
- Repeat for the other side.
- Trim the banner on the top and sides leaving 5mm where the windscreen seals are.
- Press down firmly with the squeegee to get it up to the seal. Do the side sections separate from the top and trim using a razor blade sitting in the corner the seal makes with the windshield. Drag the knife towards you gently holding the same angle around 30 degrees.
Other things to consider
Use common sense! Whilst they are rated for outdoor use, don’t place them anywhere there will be extreme temperatures, take care of your girls.
Don’t put them anywhere normal stickers won't go, that is on surfaces which aren’t flat and smooth.
Take care when cleaning the surface afterwards, sharp points and corners could get lifted accidentally.
UPDATED 25th Jan, 2021
We ship out of Australia.
Due to Covid-19, logistics companies are facing stressed out infrastructure globally, so expect some shipping delays that are out of our control. Over 2020, shipping companies have increased their pricing by roughly 20%, as devastated as we are with this, we must adjust to keep the business alive. We try to maintain our shipping costs as best as possible to give you the best shipping rates to get our art and products to you. Thank you for your patience and support.
Upon packaging up and shipping out your order there may be delays in the following countries.
USA & EU regions - expect up to 1 month delay (Most orders are currently arriving within 6-8 weeks)
Asia regions - expect up to 1 month delay (Most orders are currently arriving within 6-8 weeks)
AU & NZ regions - expect up to 2 weeks delay (Most orders are currently arriving within 2-4 weeks)
We are doing our best to make sure you get your orders as fast as possible and exploring multiple shipping options to get our products into your house.
You are always welcome to message us on instagram or email us to check up on your order details by simply quoting your order number.
We apologise for the delays and we hope you stay safe during these times.
Thank you for your love and trust in us,
Team Cowfee


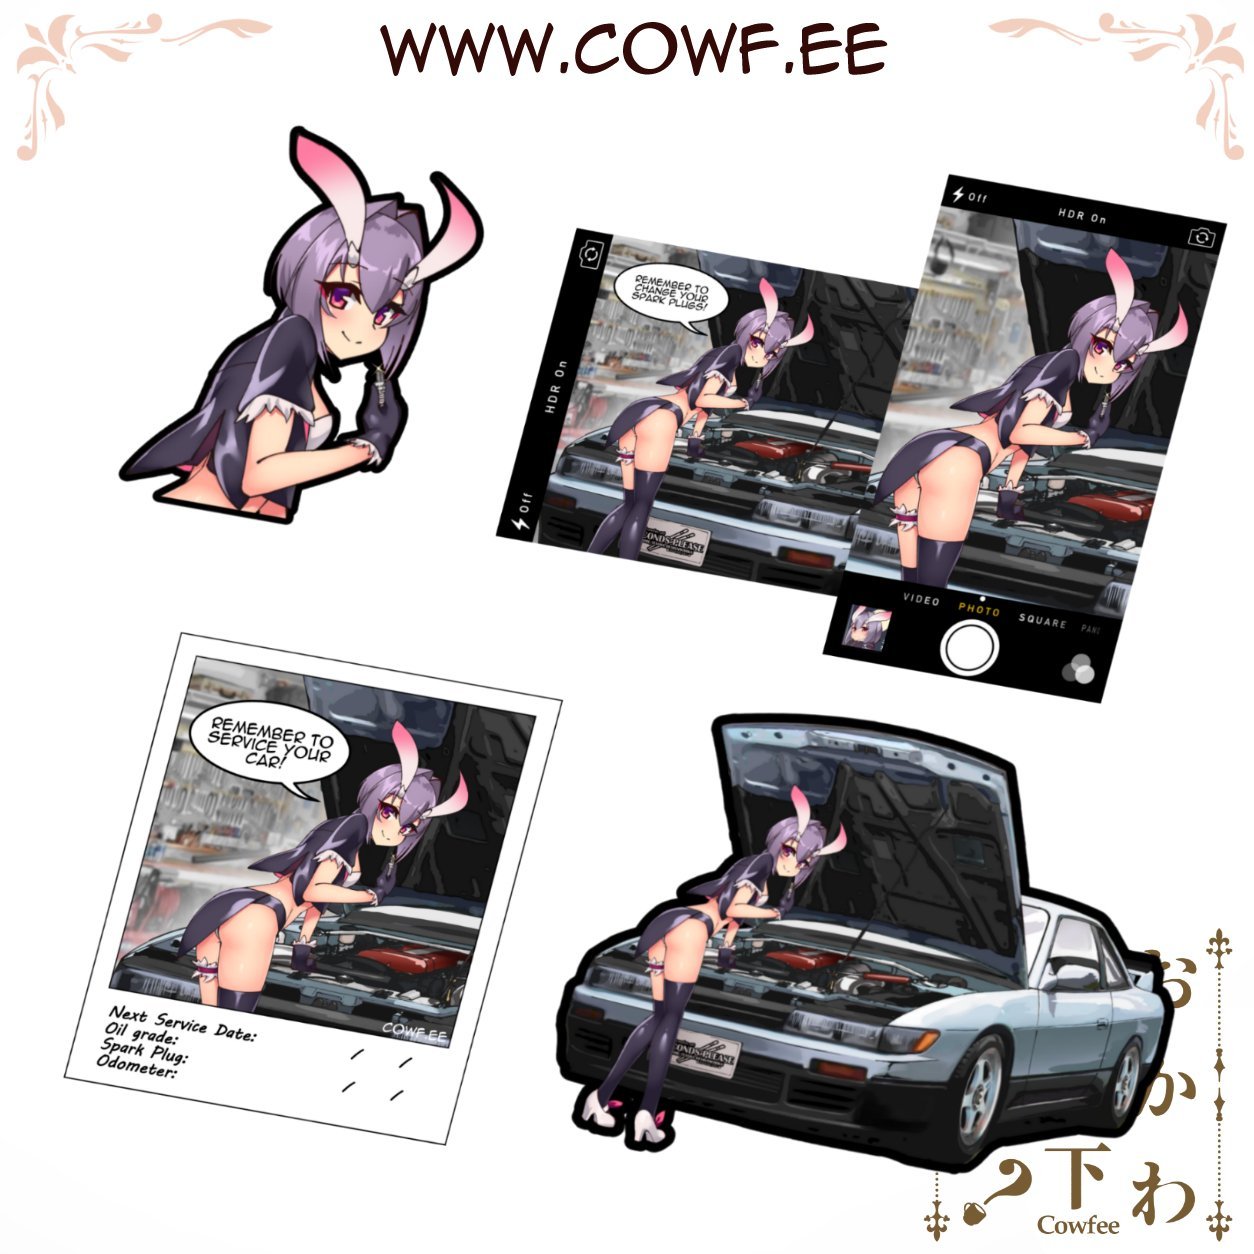
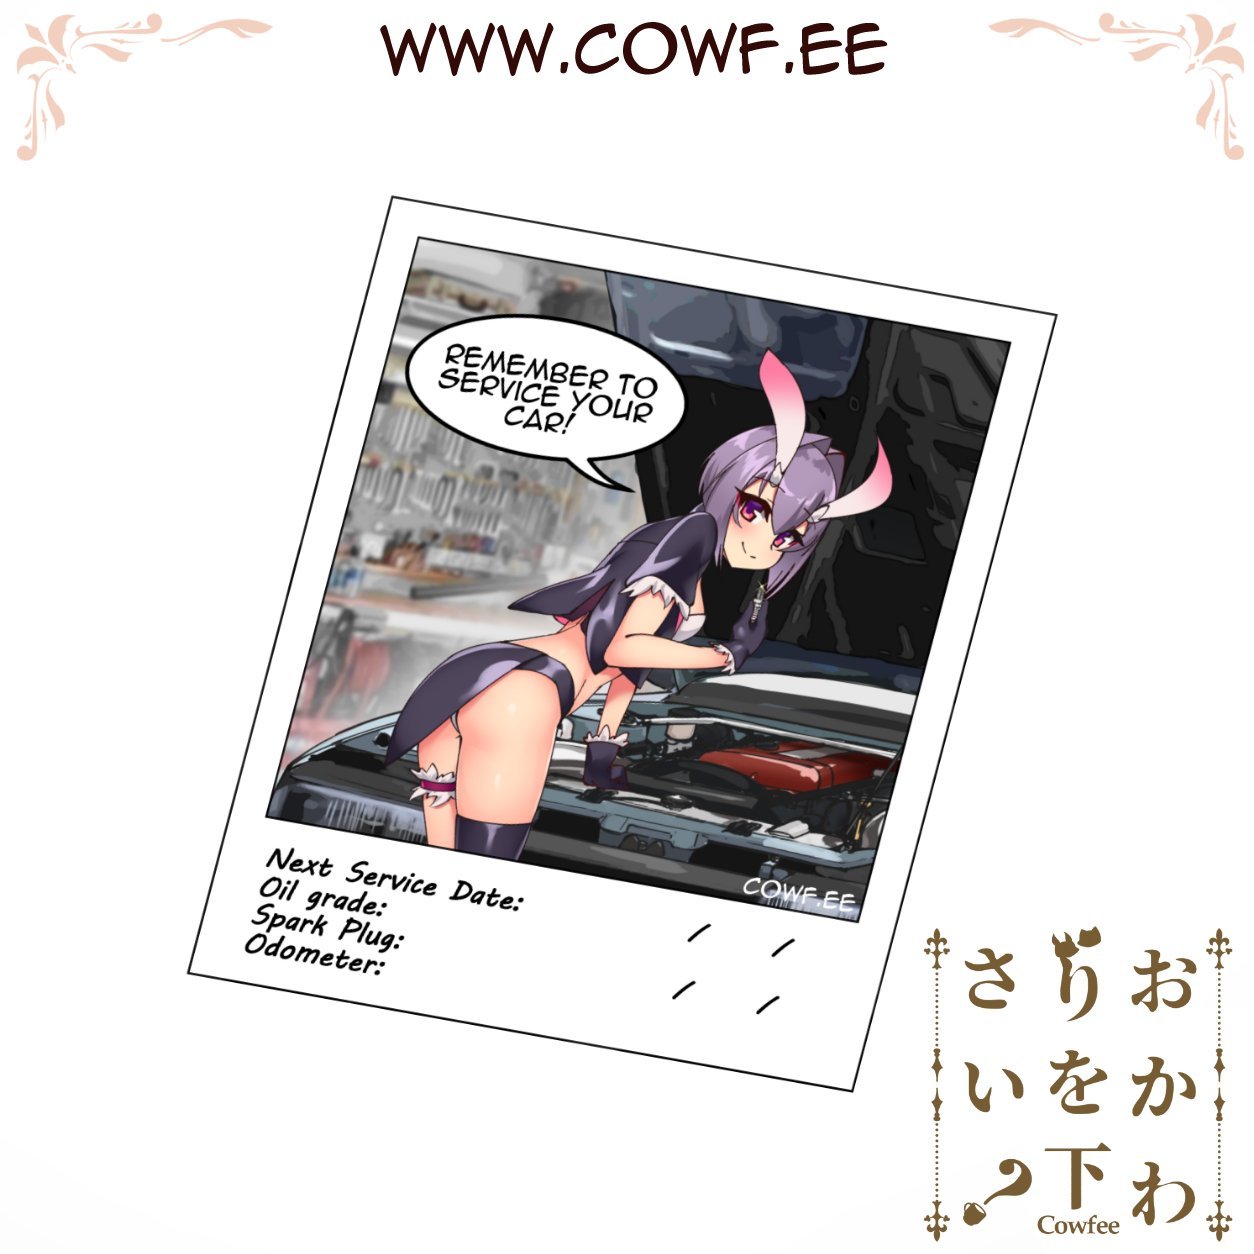
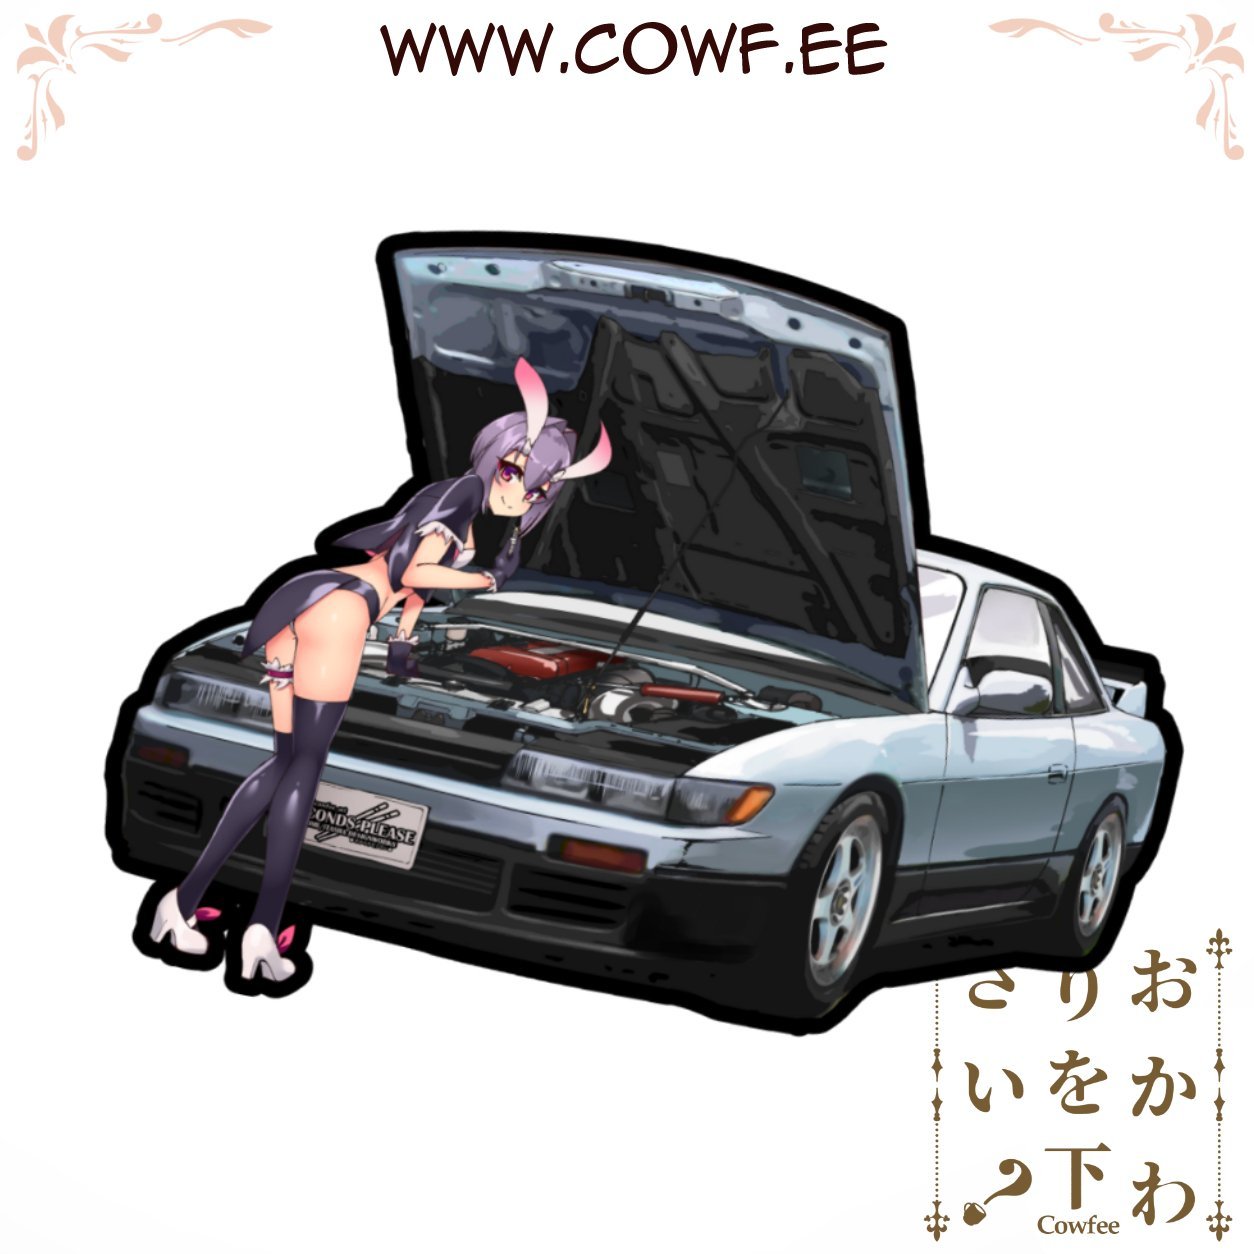
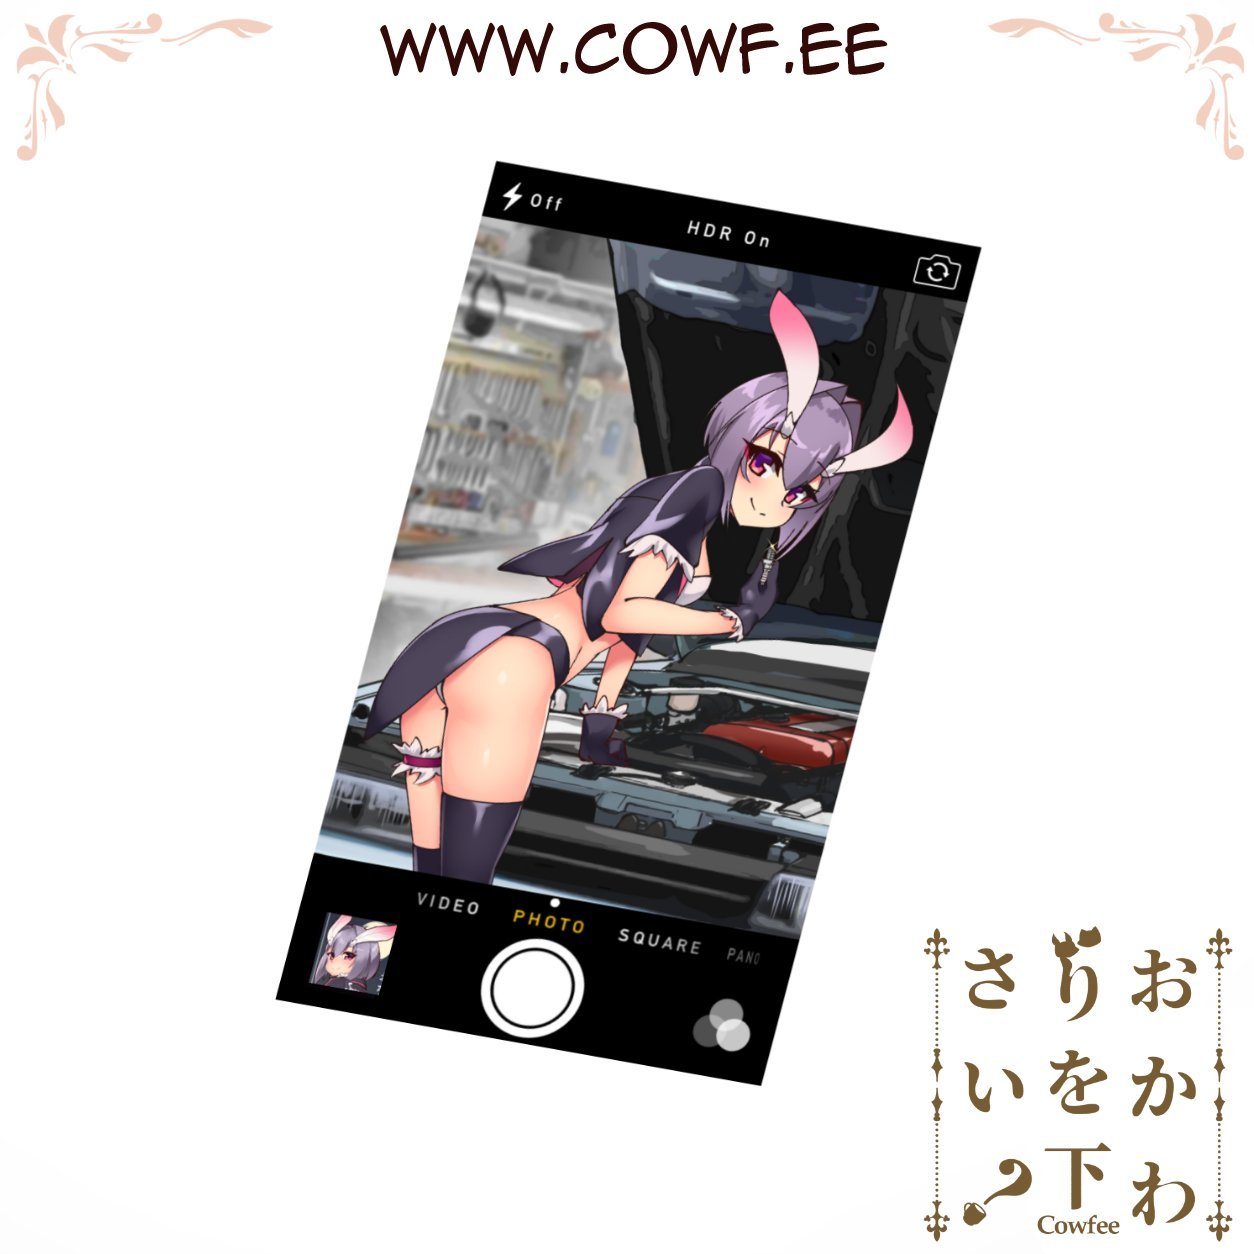
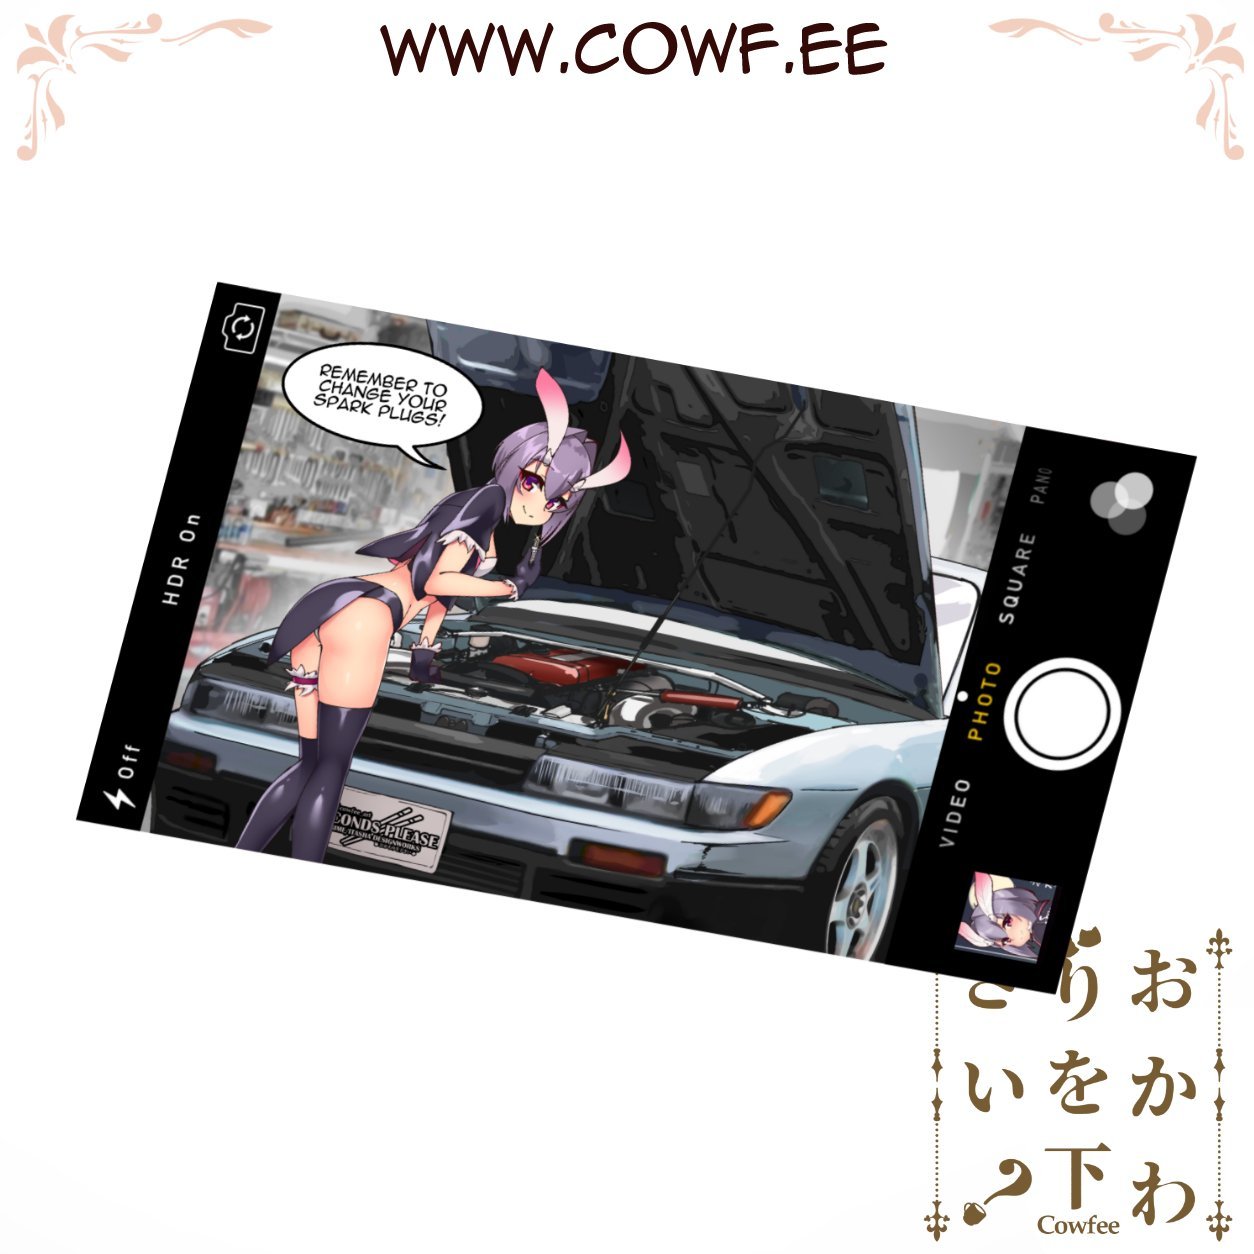
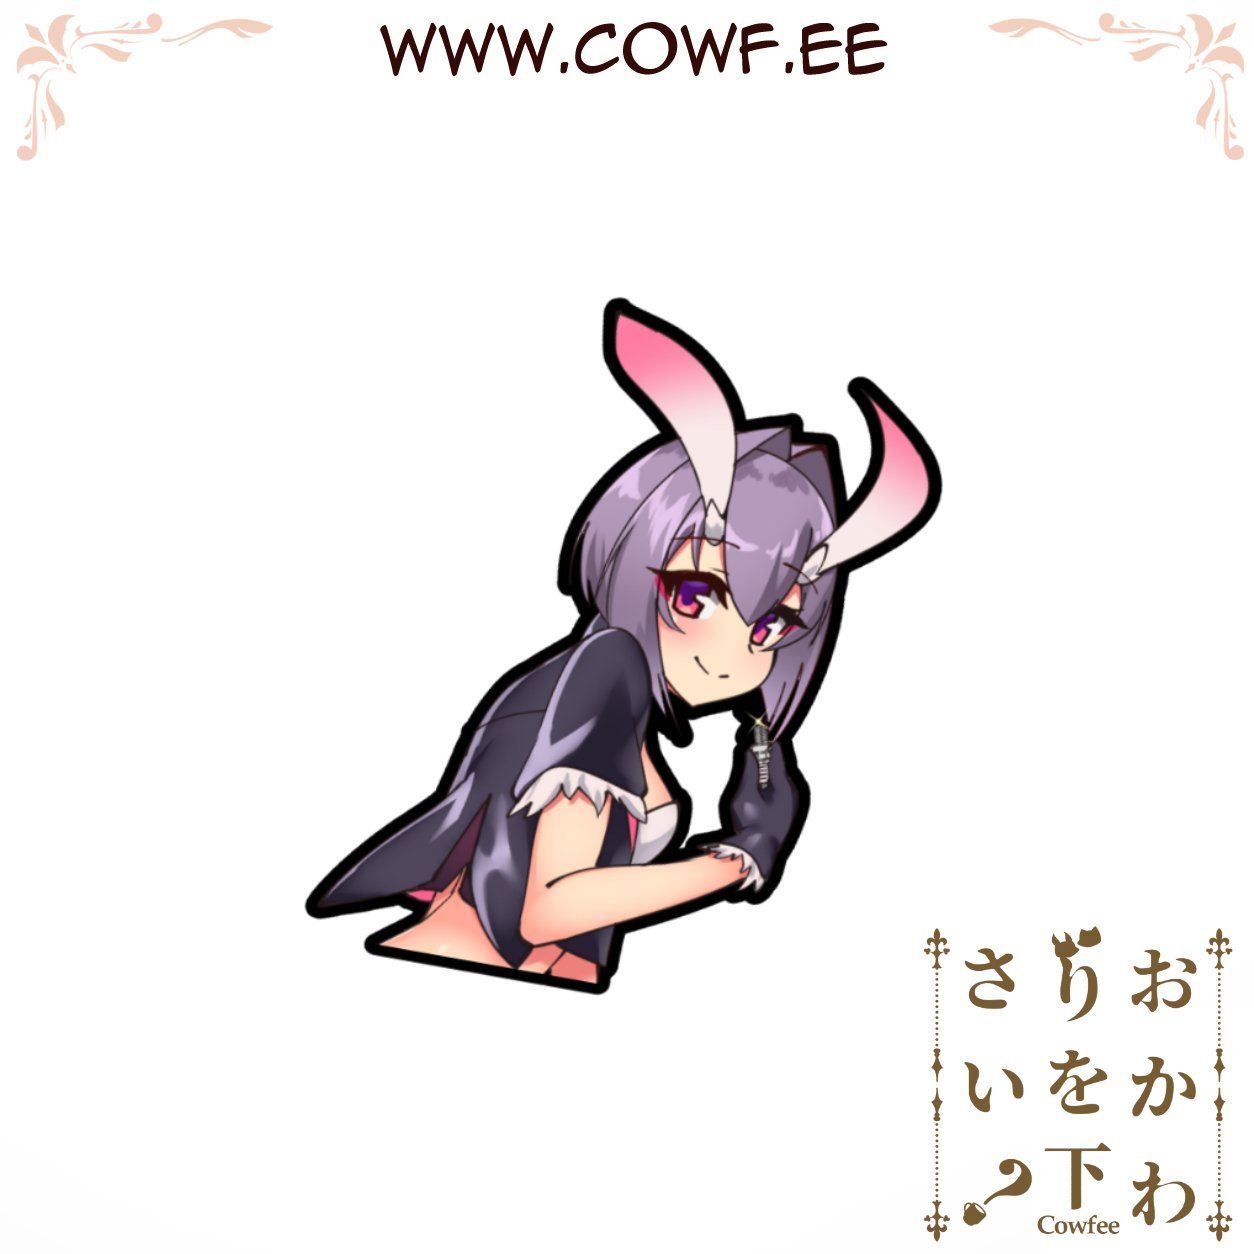
Mayu Spark Kiss-Cut
Regular price $8.50 USD
Tax included.
Shipping calculated at checkout.
Artwork By Cowfee//カウフィー
Original Artwork Mayu by Cowfee
Sticker measures approximately
4.25 x 3.5" Polaroid
5 x 3" Portrait, Landscape
7.5 x 6.5" Silvia
5 x 3.5" Bust
Printed on high-quality outdoor use UV-resistant and weatherproof vinyl, satin laminate.
General Sticker application rules apply but here’s how you apply them properly!
Large Decal Application Instructions
Wet Application
(Messy but the safest method of application)
- Ensure surface is appropriately cleaned beforehand and weather is calm. Little wind if applying outdoors.
Use isopropyl alcohol, alcohol wipes, or a detergent to remove any dirt and oils. - Spray down surface with as much water as possible.
- Remove decal backing paper and apply as gently as possible from center outwards.
Make sure to position it how you want at this stage. - “Tack” centre of decal down firmly and hold with one hand, press down firmly using a card or Squeegee at an angle and work from center out in an arc. Work slowly and remove as much water as possible taking care not to trap any bubbles.
Work in halves and in arcs outwards - Recommended to leave on application tape as the decal adheres for a few hours before removal. Remove from largest decal area to thinnest, avoid removing directly towards thin areas.
Dry Application
(Clean but hardest method of application)
- Same as Wet Application
- Remove and trim half of backing paper
- Take your time and line it up, tack from trimmed half of backing paper.
- Same as Wet Application
- Application tape can be removed instantly
Banner Instructions
- Measure out how you want it to fit, we recommend keeping the logo under the top of the windshield at minimum and above the arrows marked on the windscreen (whatever is legal for your country for sunstrips)
Use masking tape to keep the banner centred (Align the banner vertically and horizontally, use a ruler for precise measurements) - Lift up half the banner on the long side and peel off the backing paper and trim halfway.
- Spray down the windscreen and vinyl with water thoroughly (More cant hurt)
- Place the banner down gently. Make sure all your adjustments are made at this stage before progressing.
- Tack down the centre by pressing down with your finger before firmly pushing out the water with the Seconds Please! Squeegee in the same area.
- You can continue to push out the water firmly to apply the rest of the area with the backing paper removed
- Repeat for the other side.
- Trim the banner on the top and sides leaving 5mm where the windscreen seals are.
- Press down firmly with the squeegee to get it up to the seal. Do the side sections separate from the top and trim using a razor blade sitting in the corner the seal makes with the windshield. Drag the knife towards you gently holding the same angle around 30 degrees.
Other things to consider
Use common sense! Whilst they are rated for outdoor use, don’t place them anywhere there will be extreme temperatures, take care of your girls.
Don’t put them anywhere normal stickers won't go, that is on surfaces which aren’t flat and smooth.
Take care when cleaning the surface afterwards, sharp points and corners could get lifted accidentally.
UPDATED 25th Jan, 2021
We ship out of Australia.
Due to Covid-19, logistics companies are facing stressed out infrastructure globally, so expect some shipping delays that are out of our control. Over 2020, shipping companies have increased their pricing by roughly 20%, as devastated as we are with this, we must adjust to keep the business alive. We try to maintain our shipping costs as best as possible to give you the best shipping rates to get our art and products to you. Thank you for your patience and support.
Upon packaging up and shipping out your order there may be delays in the following countries.
USA & EU regions - expect up to 1 month delay (Most orders are currently arriving within 6-8 weeks)
Asia regions - expect up to 1 month delay (Most orders are currently arriving within 6-8 weeks)
AU & NZ regions - expect up to 2 weeks delay (Most orders are currently arriving within 2-4 weeks)
We are doing our best to make sure you get your orders as fast as possible and exploring multiple shipping options to get our products into your house.
You are always welcome to message us on instagram or email us to check up on your order details by simply quoting your order number.
We apologise for the delays and we hope you stay safe during these times.
Thank you for your love and trust in us,
Team Cowfee